Aimsio’s Netsuite integration currently allows accounts to:
-
Import Customer, Vendors, Employees, Projects and Items into Aimsio
-
Imports can be set to automatically run each morning or be triggered manually.
-
Data is imported but not synced. In other words, if information is changed in Aimsio after it’s imported, a re-import from Netsuite will take precedent and overwrite the information stored in Aimsio.
-
-
Push Aimsio Invoices
-
Invoices can be sent individually, or in bulk.
-
A status of Exported is given to Aimsio invoices after they’ve been successfully pushed.
-
-
The ability to send Purchase Orders and Non-Recurring Billables is in development.
Integration Overview
Below is a chart demonstrating the data flow between Aimsio & Netsuite.
Aimsio | Netsuite | Status | |
|---|---|---|---|
Employee (Direct-Hire) | ← | Employee | ACTIVE |
Company → Client | ← | Customer | ACTIVE |
Company → Vendor | ← | Vendor | ACTIVE |
Billable Item (Default Type: Service) | ← | Item | ACTIVE |
Job | ← | Project | ACTIVE |
Invoice | → | Invoice | ACTIVE |
Job | → | Project | ACTIVE |
Purchase Order | → | Purchase Order PDF cannot be received by NetSuite | TBD |
Non-Recurring Billables (NRBs) | → | Bill | TBD |
Connecting Your Netsuite Account
We use Netsuite’s “
” approach for connecting your Netsuite account with Aimsio.
We’ve focused on providing an out-of-box integration by connecting to Netsuite directly using the Aimsio API.
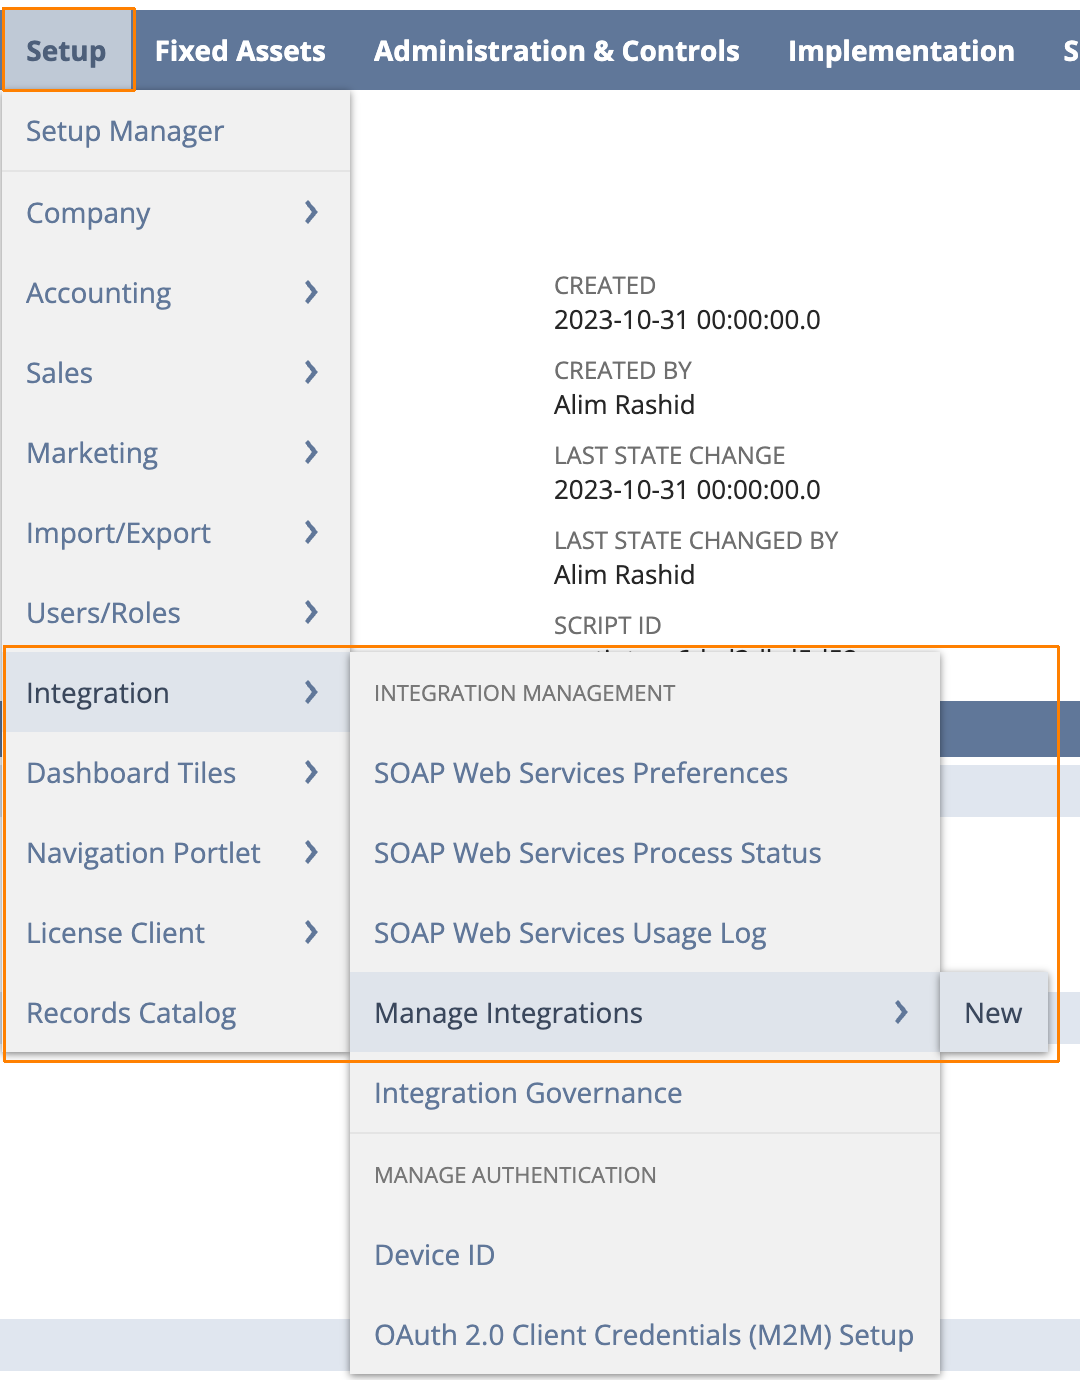
- We require that all accounts register Aimsio as an Integration record first. Navigate to Setup > Integration > Manage Integrations > New.
-
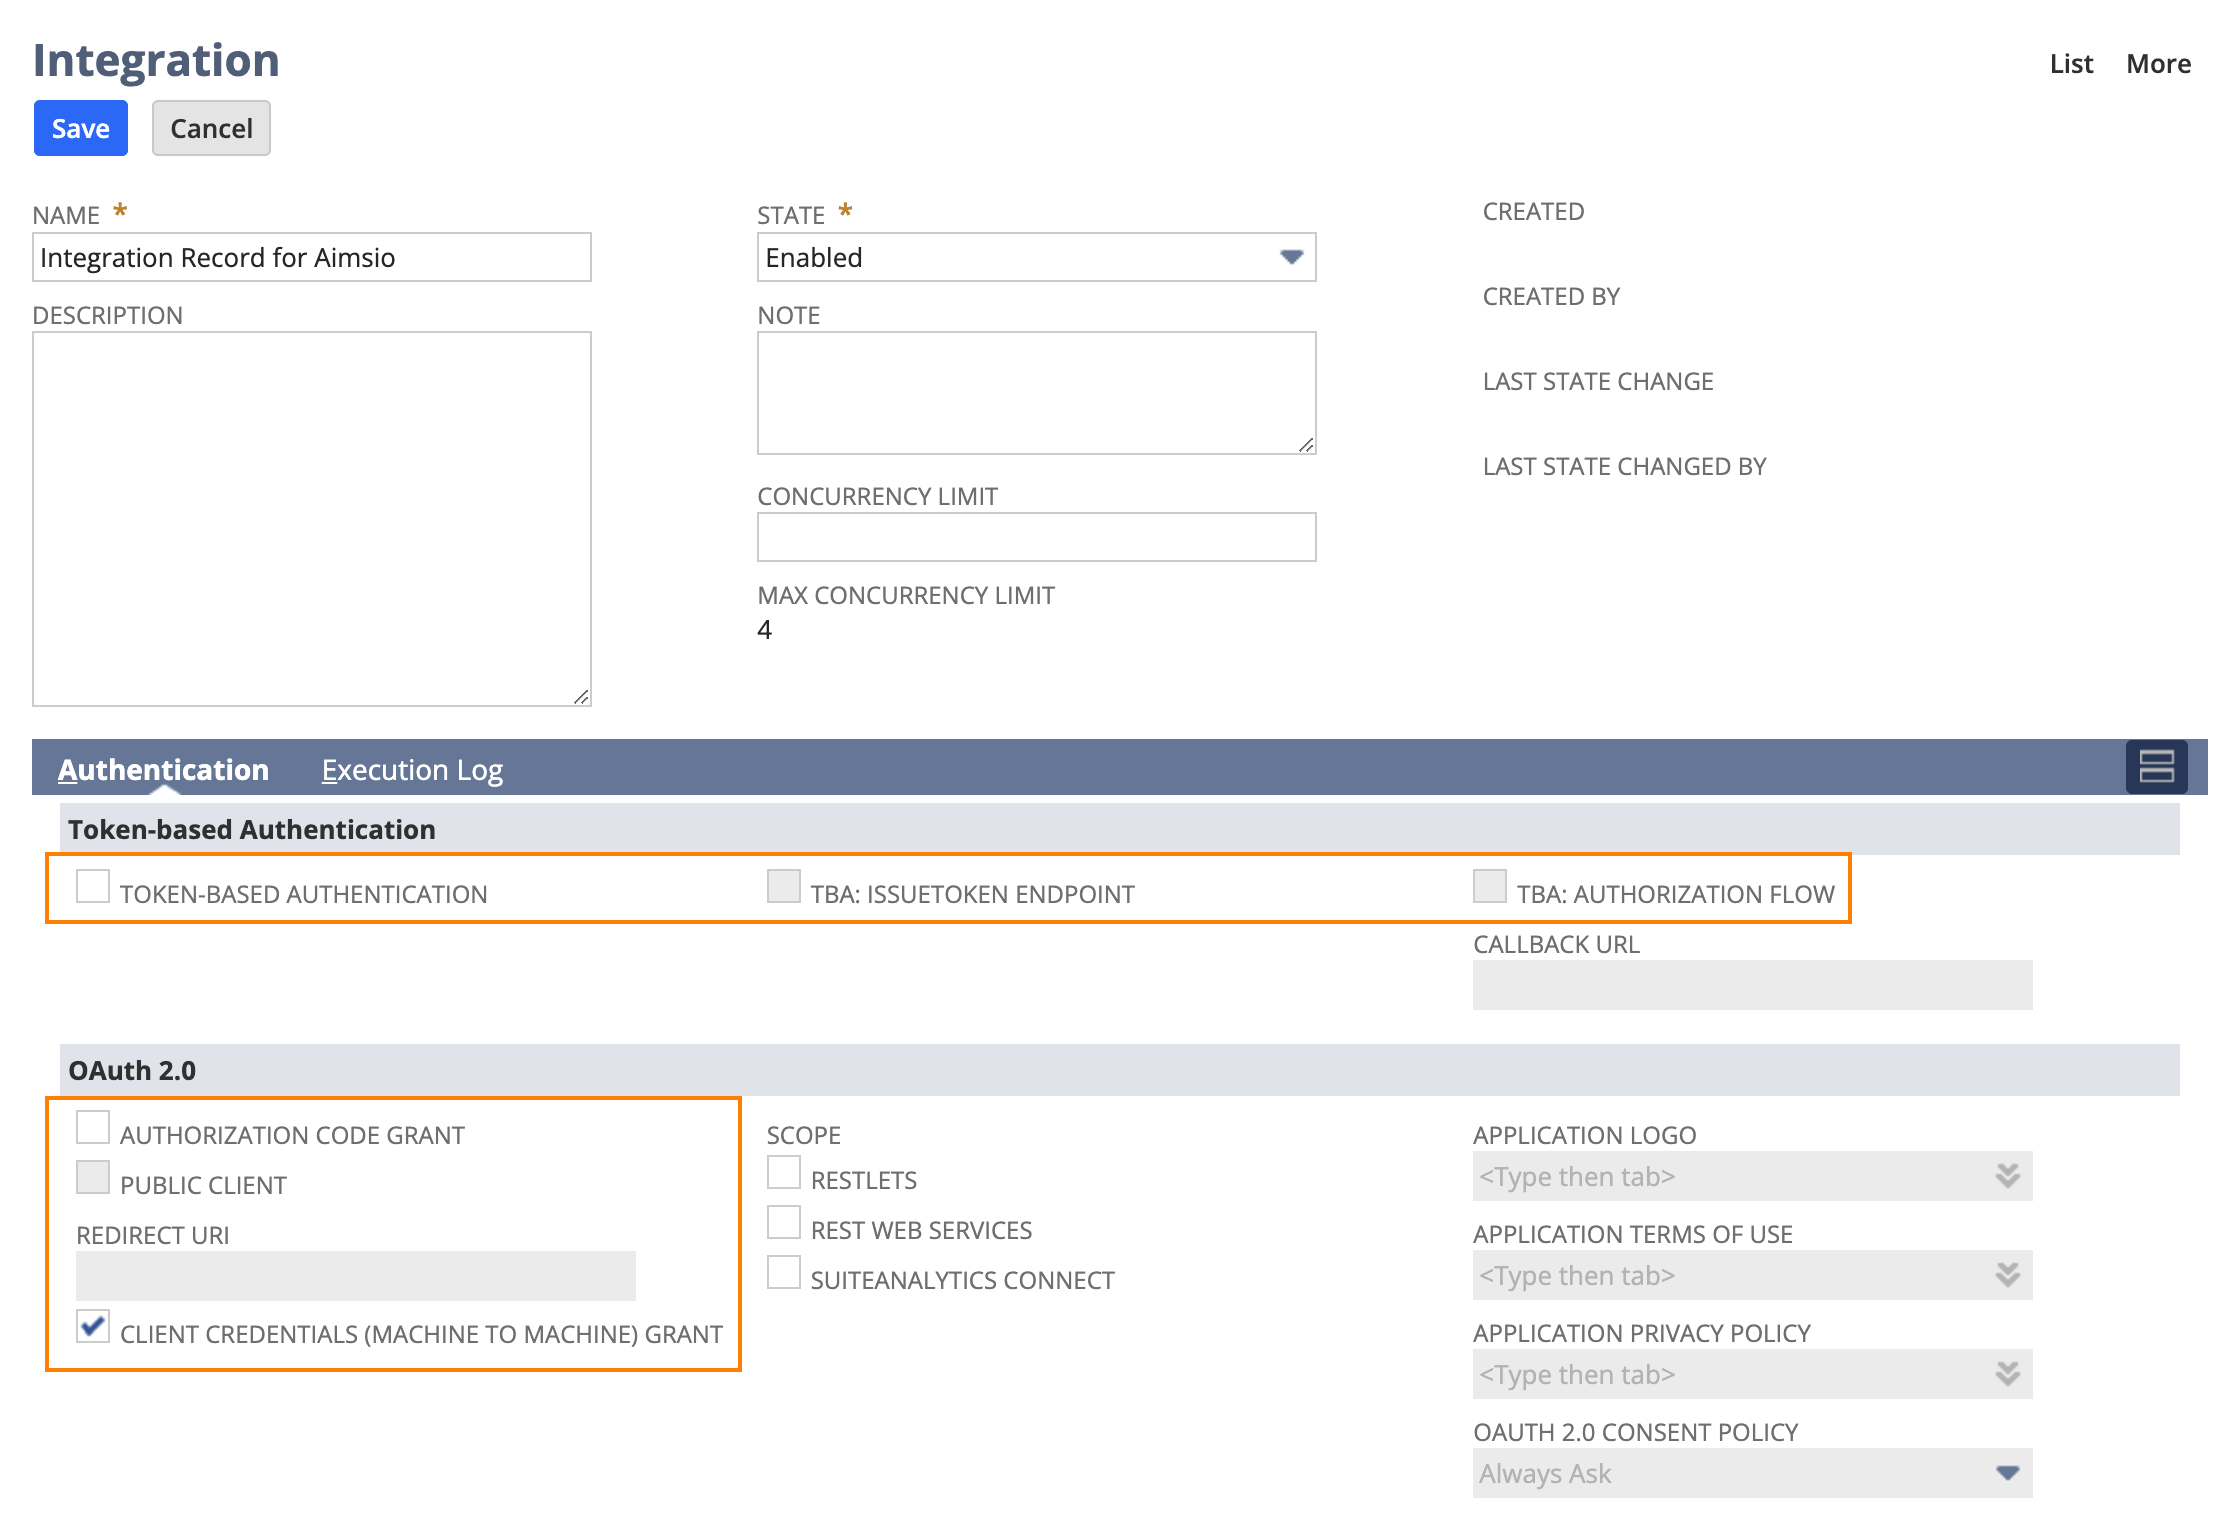
Under OAuth 2.0, make sure AUTHORIZATION CODE GRANT as well as REST WEB SERVICES options are NOT checked.
-
Make sure Client Credentials (Machine to Machine) Grant is checked
-
After this step, you are given a client id and a client secret. We need them.
-
Create a certificate in your local machine, which gives you two files: a self-signed certificate and a private key file (4:30 in the video) using the following command. Please send us both files.
-
openssl req -x509 -newkey rsa:3072 -keyout private_key.pem -out public_cert.pem -days 365 -nodes
-
If you are running on Windows, you need to install openssl first if the openssl command is not being recognized in your command line.
-
-
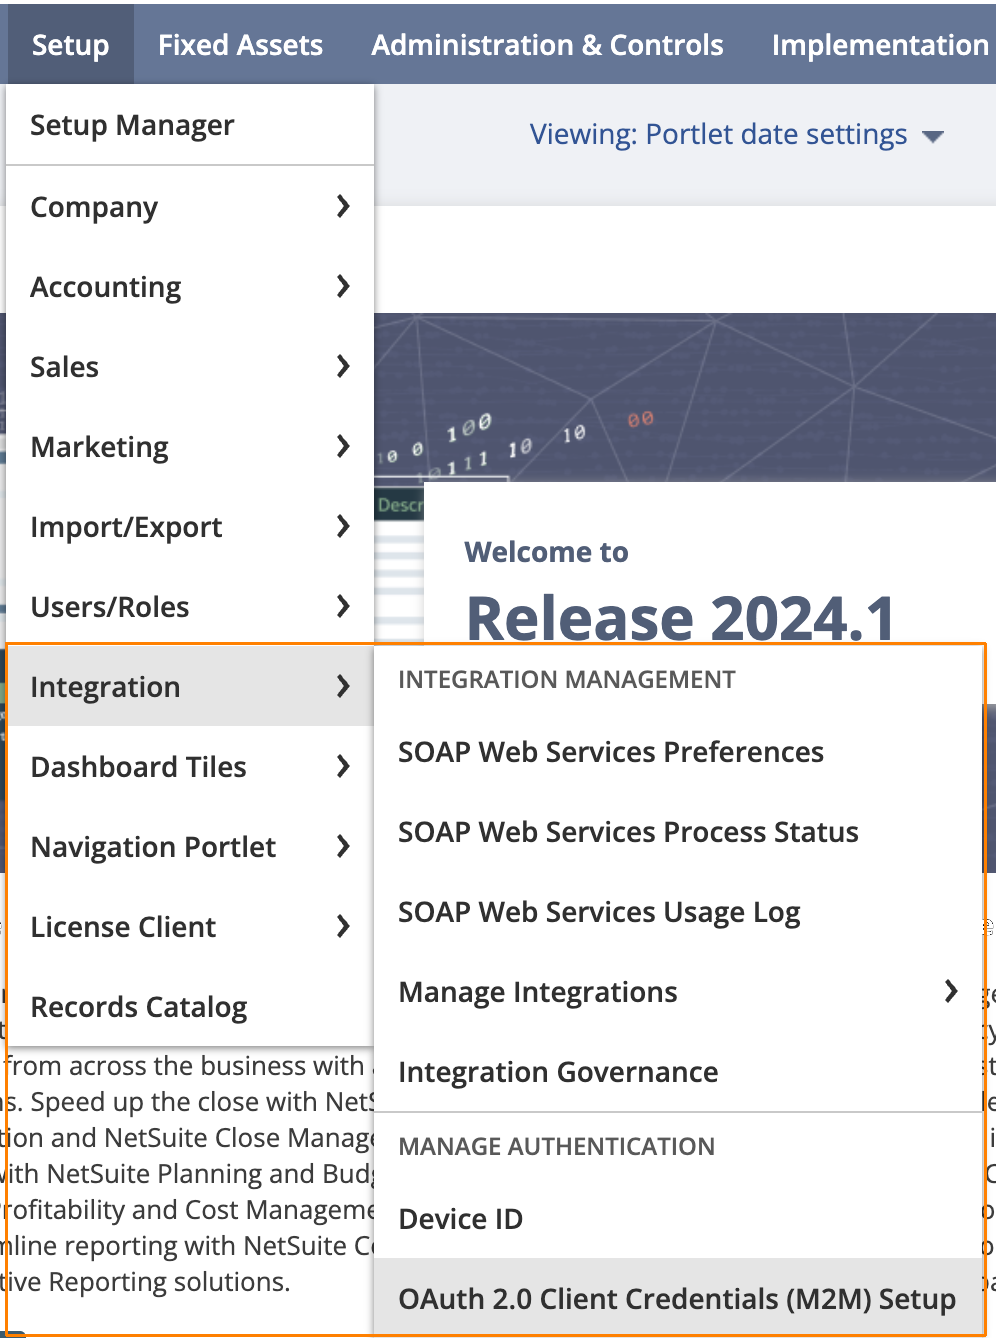
Navigate to Integrations → OAuth 2.0 Client Credentials (M2M) Setup
-
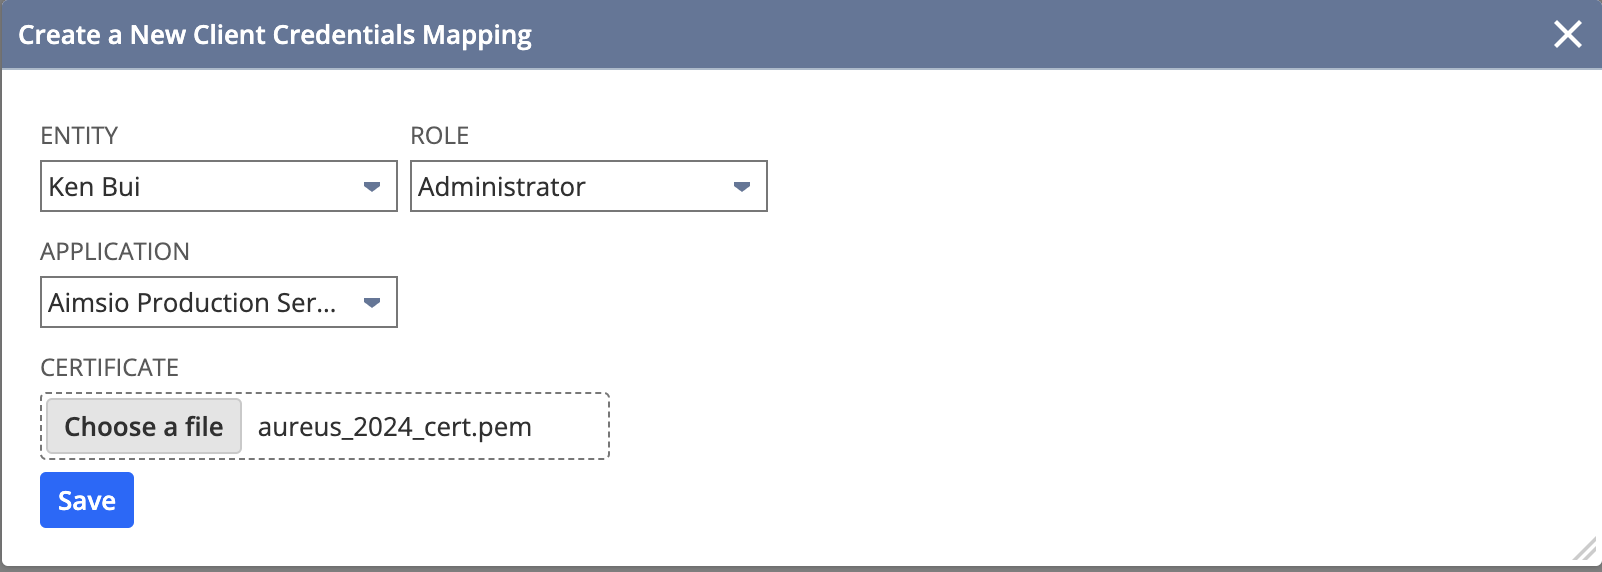
Select your user as Entity, the appropriate Role, and the Application you just created. Upload the public cert file. Once Saved, save and send us the Certificate Id.
-
In summary, here’s what we need:
-
A new integration record: client id and client secret
-
Two pem files generated on your machine (certificate and private key)
-
The certificate id of the new M2M record
-
Importing Netsuite Data
-
Aimsio supports the importing of Customers, Vendors, Employees, Projects and Items.
-
Customers are imported as Companies (Client).
-
Vendors are imported as Companies (Vendor) or Employees (Subcontractor).
- This option can be defined on our end relative to your requirements.
-
Items are imported as Service Billable Items by default.
- We may be able to assist with setting conditions to allow Items to import as other Billable Items types (ie: Equipment, Labor, etc.)
-
-
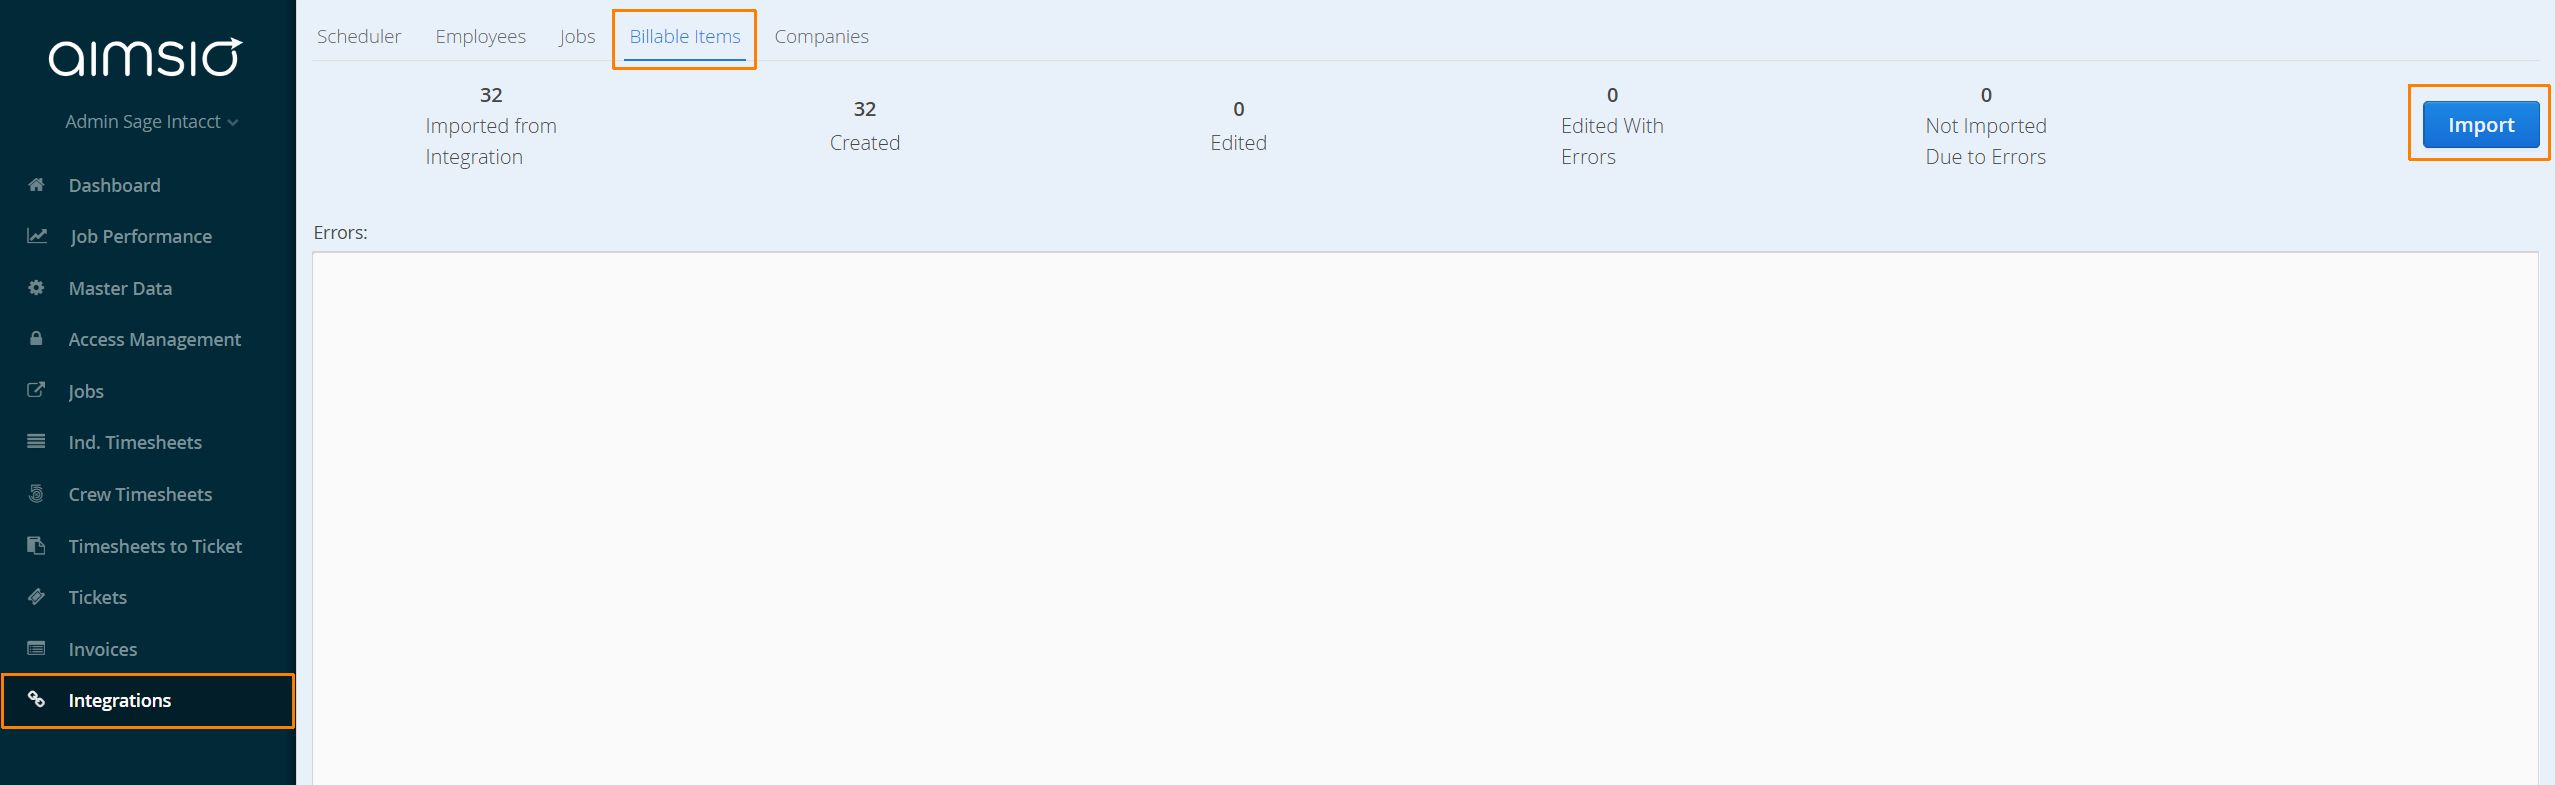
On the Aimsio Integrations page, navigate to the tab of whichever dataset you’d like to import and click the Import button on the right.
Scheduling your Import
-
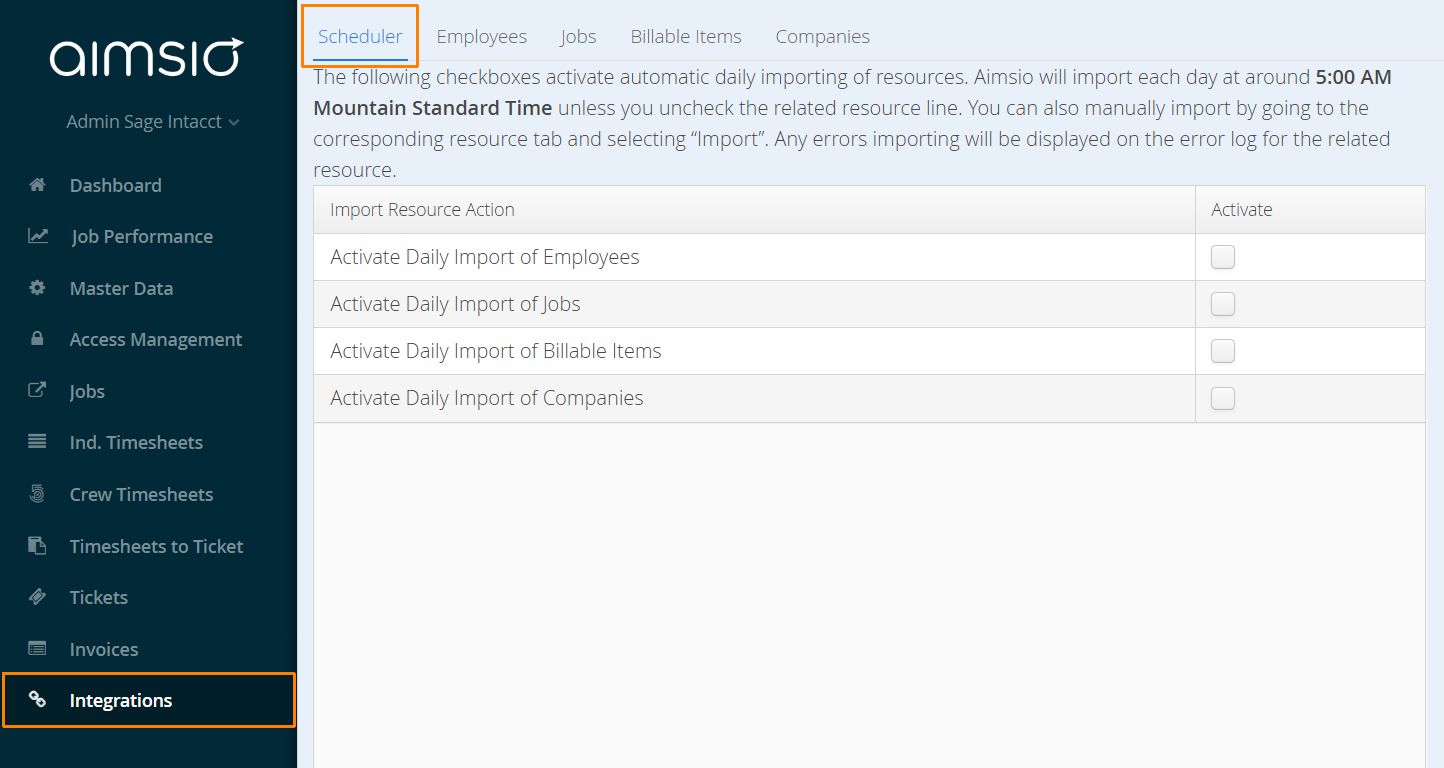
It is possible to set Aimsio up to perform an import of selected data types each morning around 5AM Mountain Standard Time.
-
Please use care when adopting this feature. If data is changed in Aimsio, after it’s imported, a re-import from Sage Intacct will take precedent and replace the information stored in Aimsio.
Exporting Jobs to Netsuite
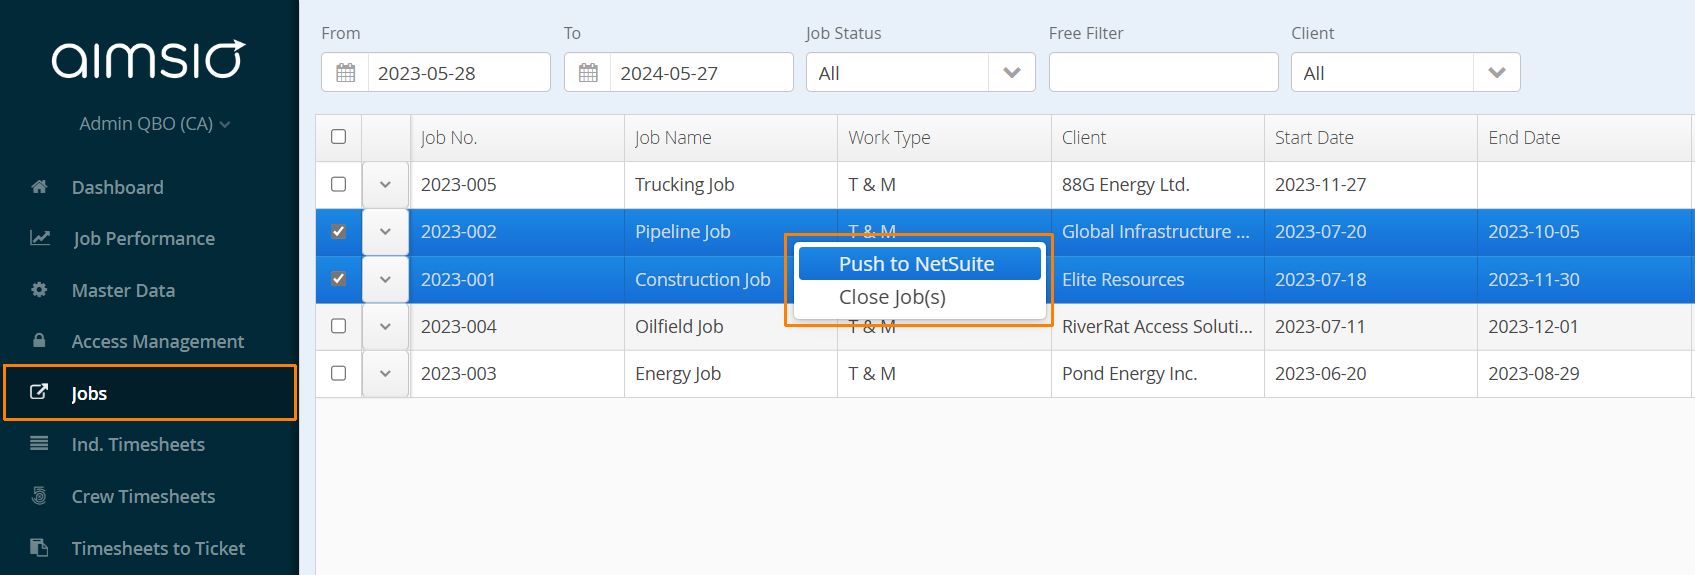
- Navigate to the Jobs page in Aimsio. Select the Jobs you would like to export, right-click and select Push to Netsuite.
Exporting Invoices to Netsuite
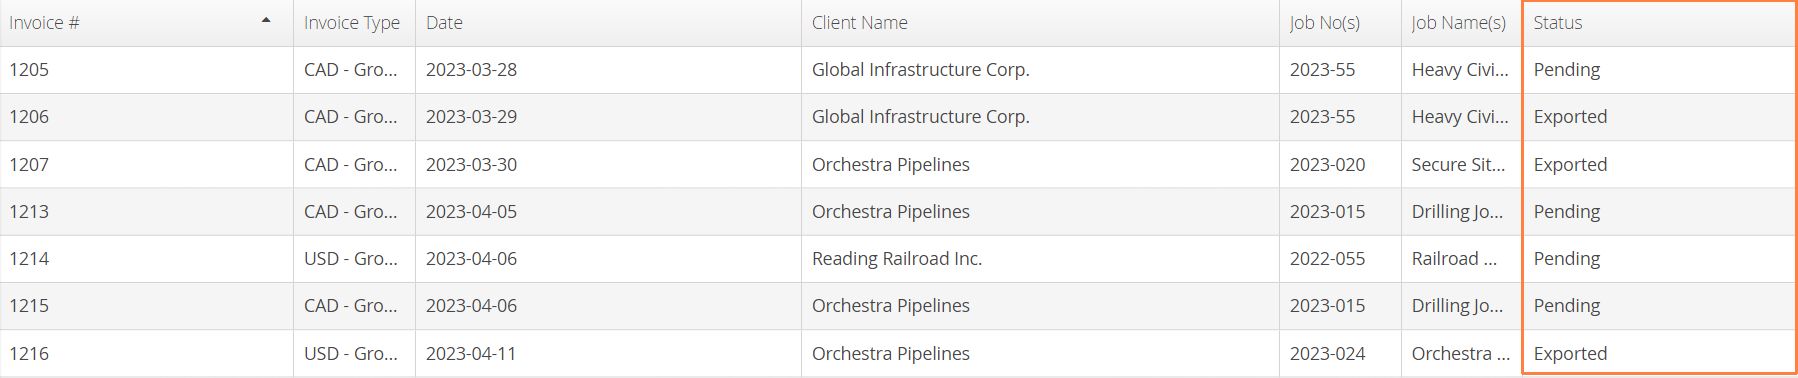
- Navigate to the Invoices page in Aimsio. Select all invoices you would like to export, right-click and select Push to Netsuite.
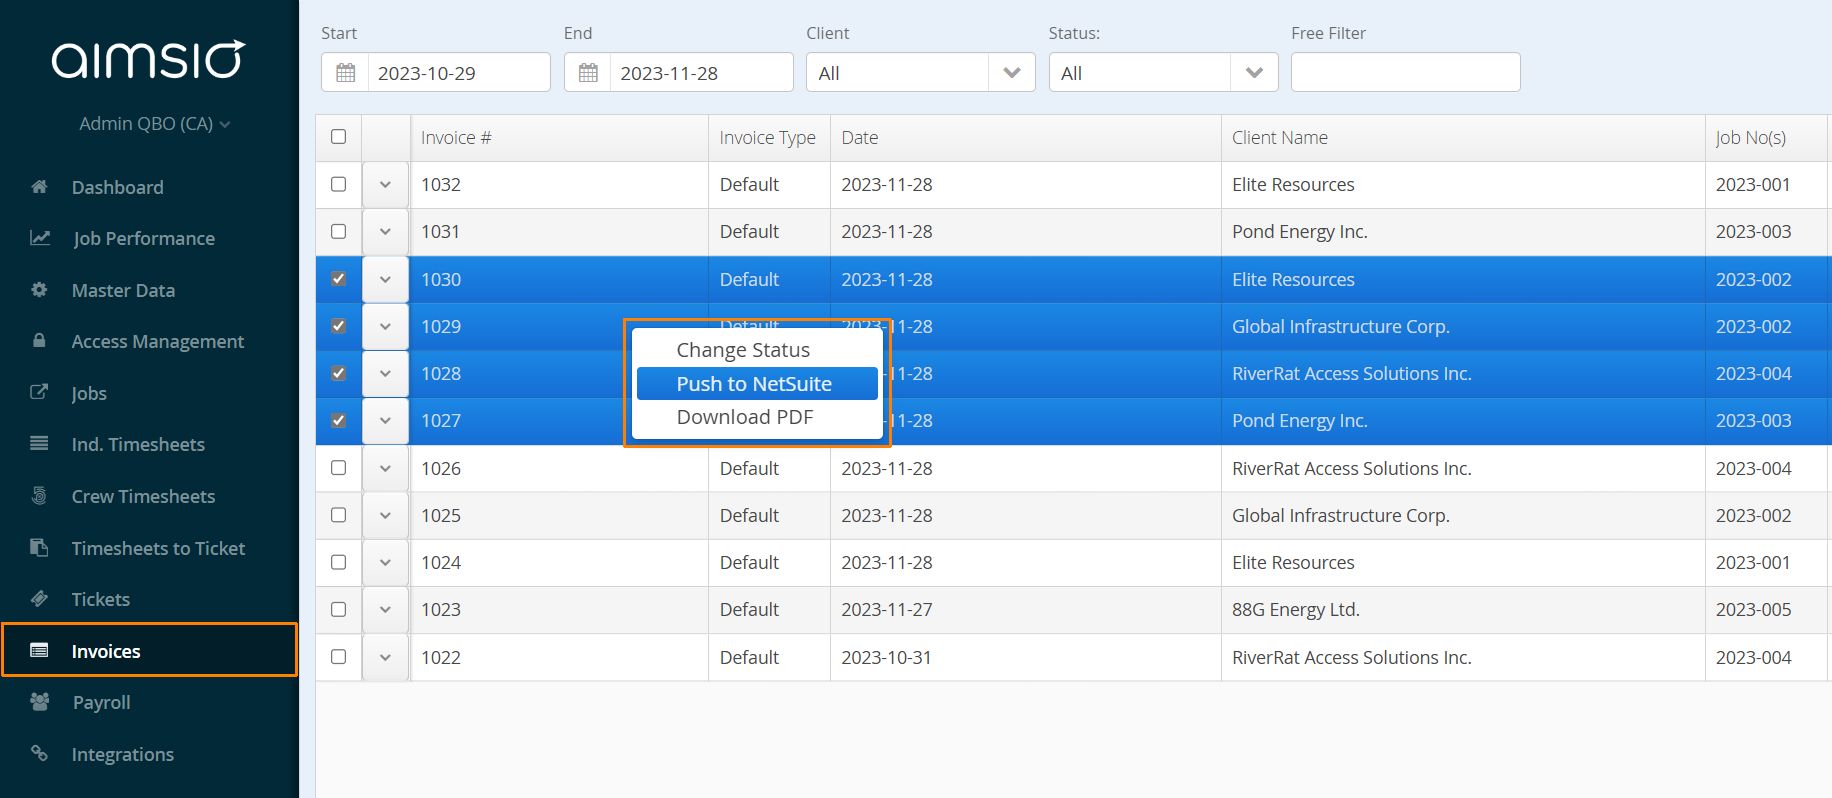
- Invoices that have been successfully sent to Netsuite will have their status changed to Exported.
Reviewing invoices in your Netsuite Account
- Information changed in Netsuite will not automatically reflect back in Aimsio. When possible, make your changes in Aimsio prior to exporting to Netsuite or a manual change on both platforms will be required.