Aimsio hosts many types of forms (like Tickets, Timesheets and Purchase Orders). While each form will have its own set of unique fields and properties, actions like saving, editing and downloading a form are the same. Aimsio ships with a set of convenient features targeted at accelerating the completion of any form.
This tutorial covers Aimsio forms via the web. For mobile app tutorials, check out:
How to Create a Form
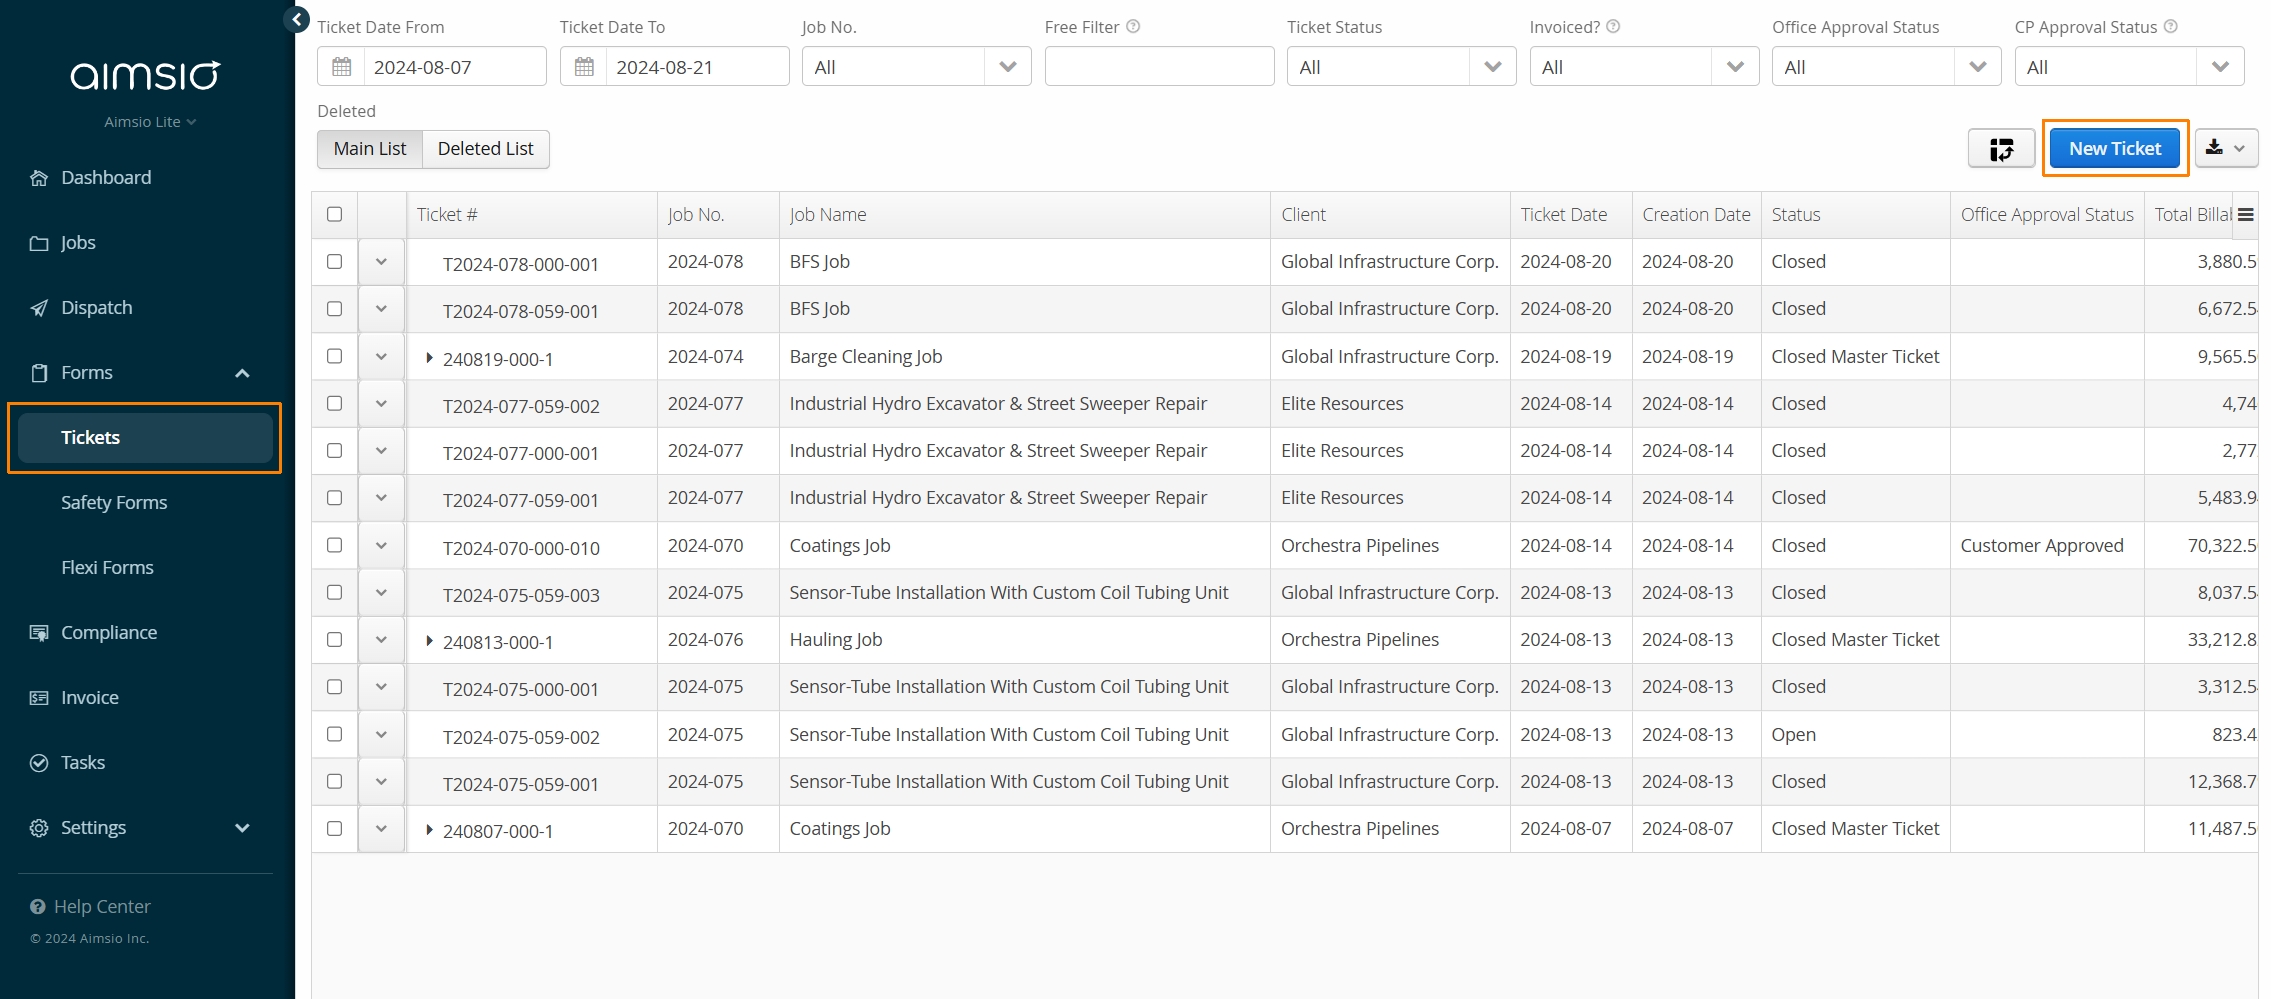
To create a form, navigate to any form page using Aimsio’s left sidebar and find the ‘New Form’ button located on the top right.
Completing & Organizing Form Data
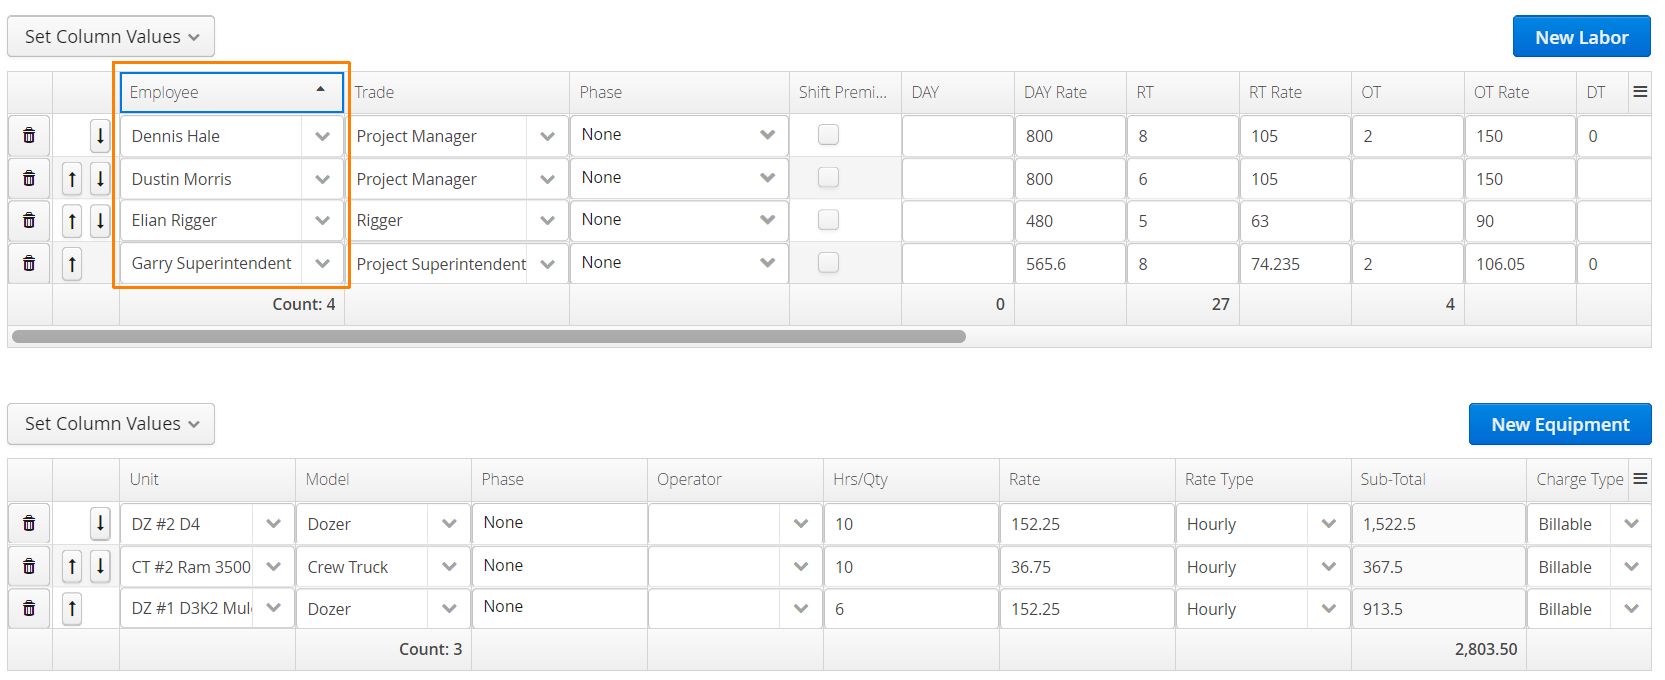
The order in which data appears in a table is preserved each time a form is saved. Users can change the order of their data by clicking on any column header to sort the table by that column.
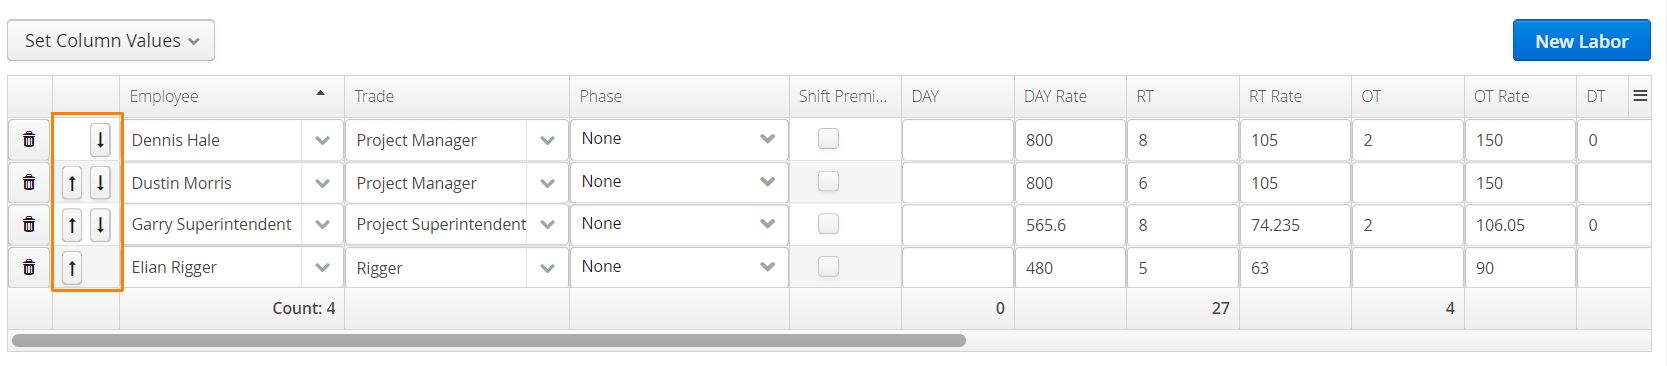
Arrow buttons on the left let users manually adjust the order of specific rows.
PDF versions of a form will mirror the same order found on tables. A new version of the PDF must be generated each time changes are made.
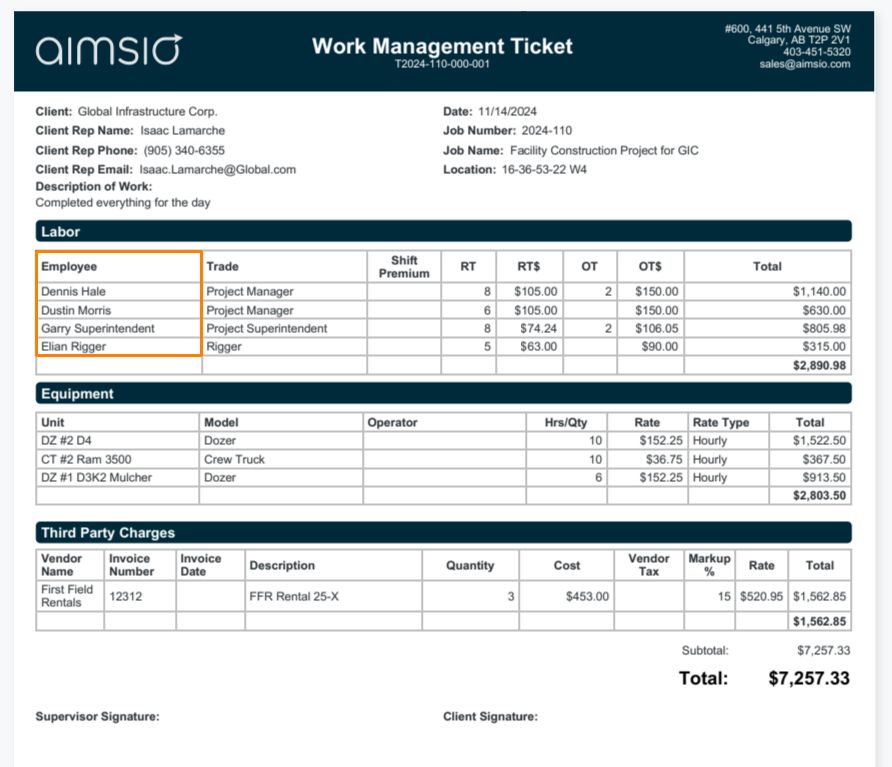
Users can input data manually or by using the Set Column Values button found on the top left above a table.
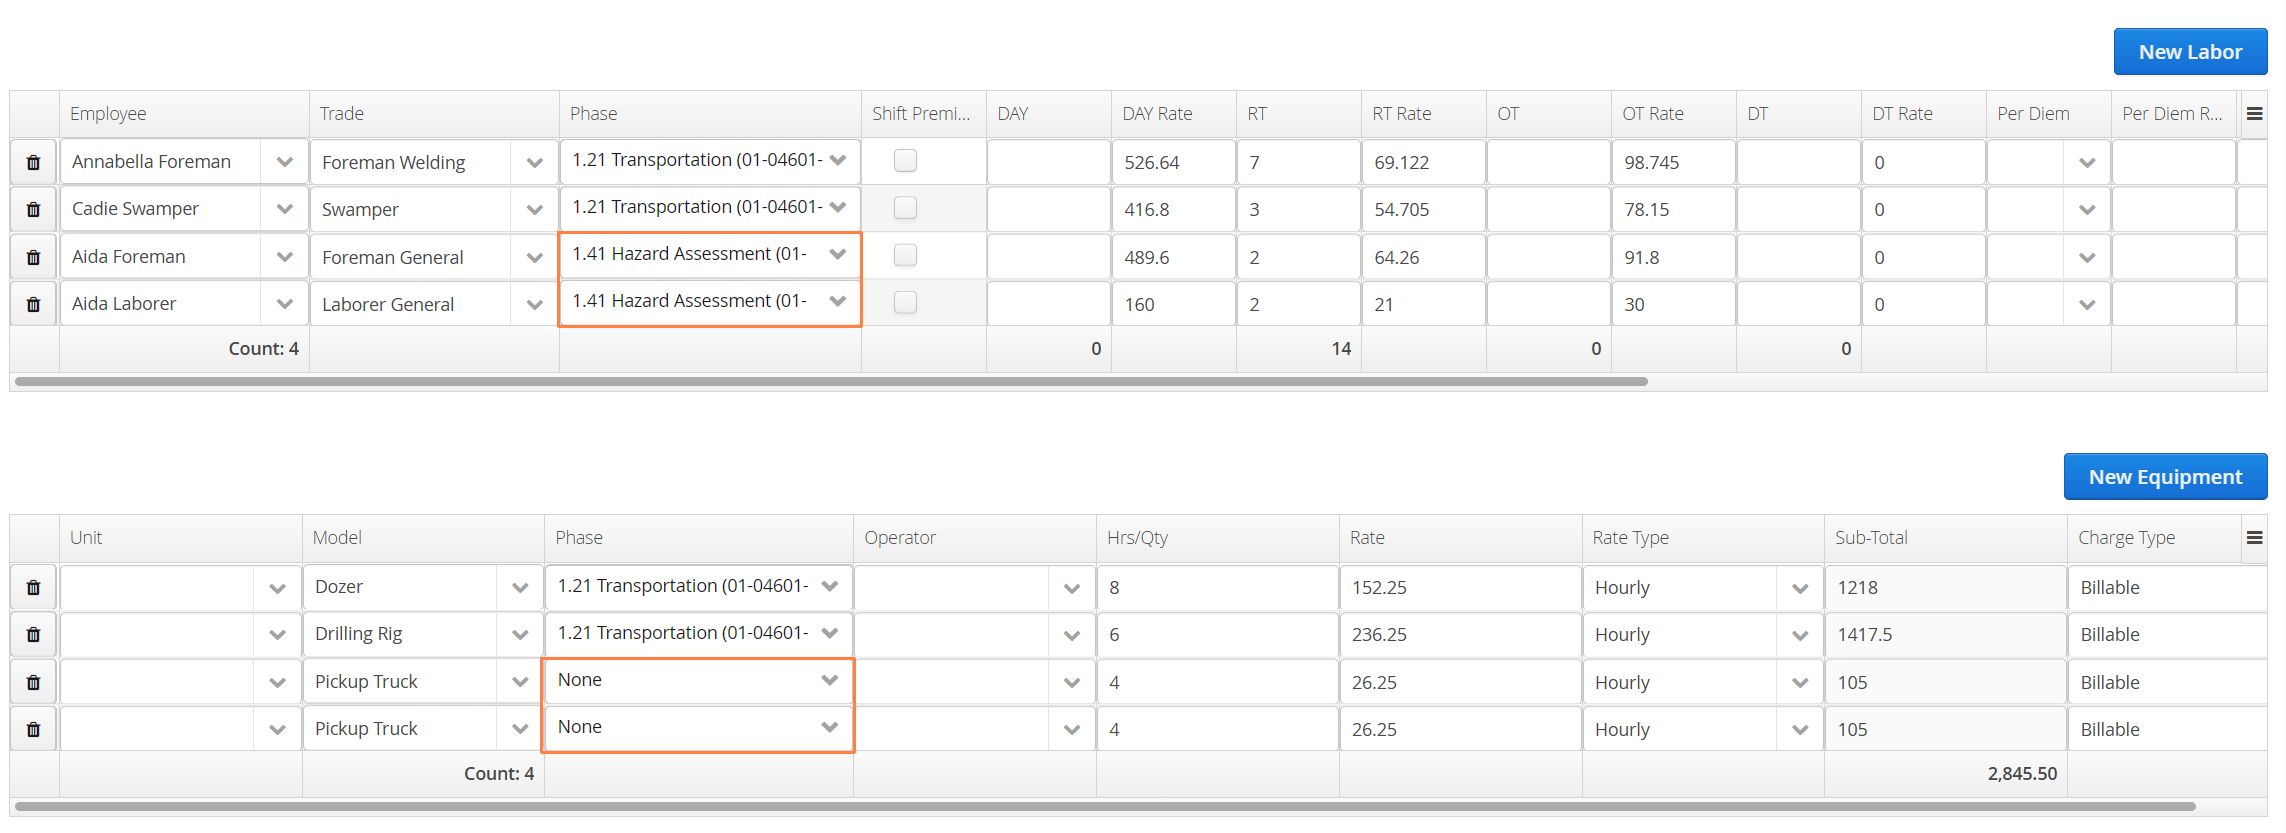
This action gives users the ability to batch-fill every row under a selected column. This can be useful for quickly inputting hours worked or attributing a specific WBS Activity (Phase) to each row.
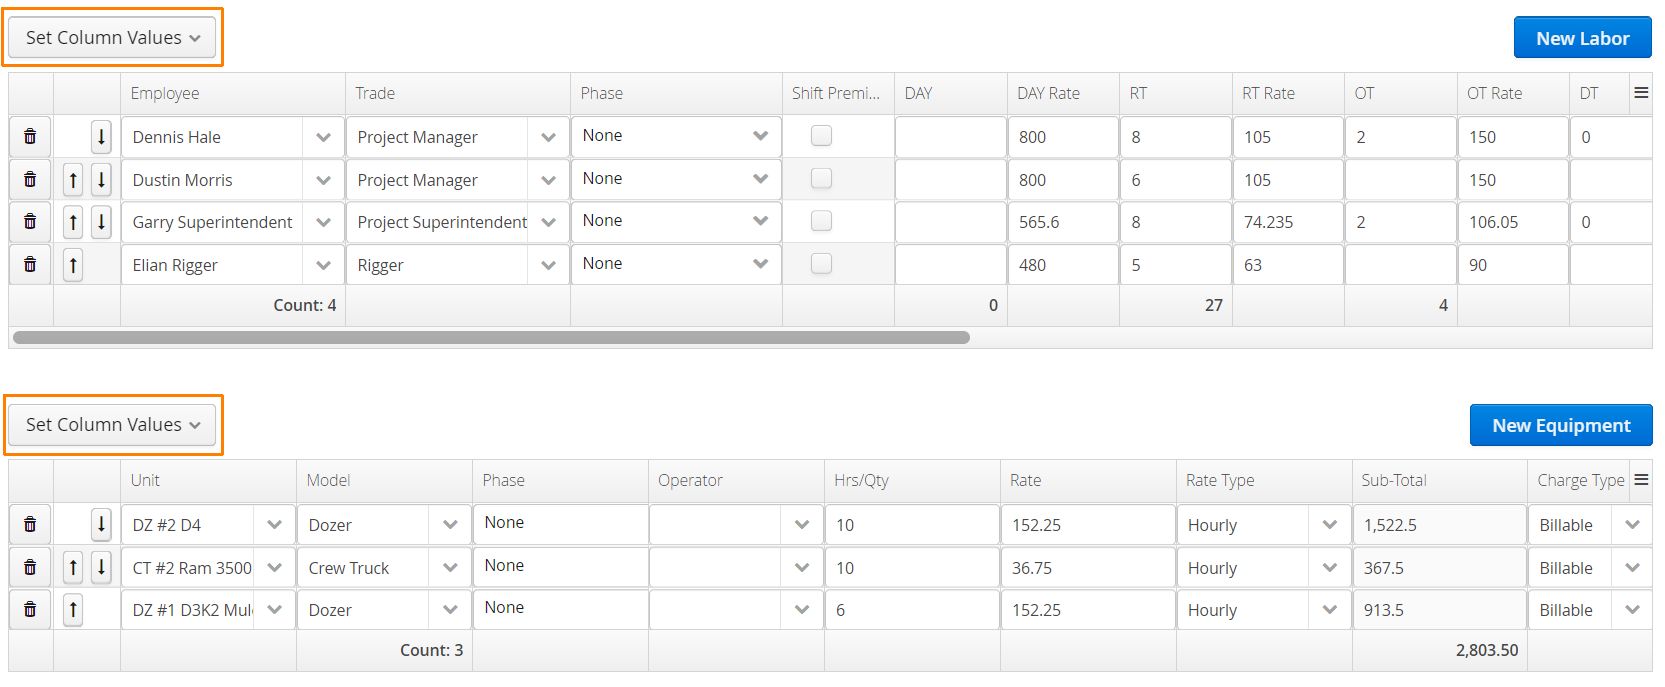
Clicking on the Set Column Values button will present every column visible in the current table. First, select any column.
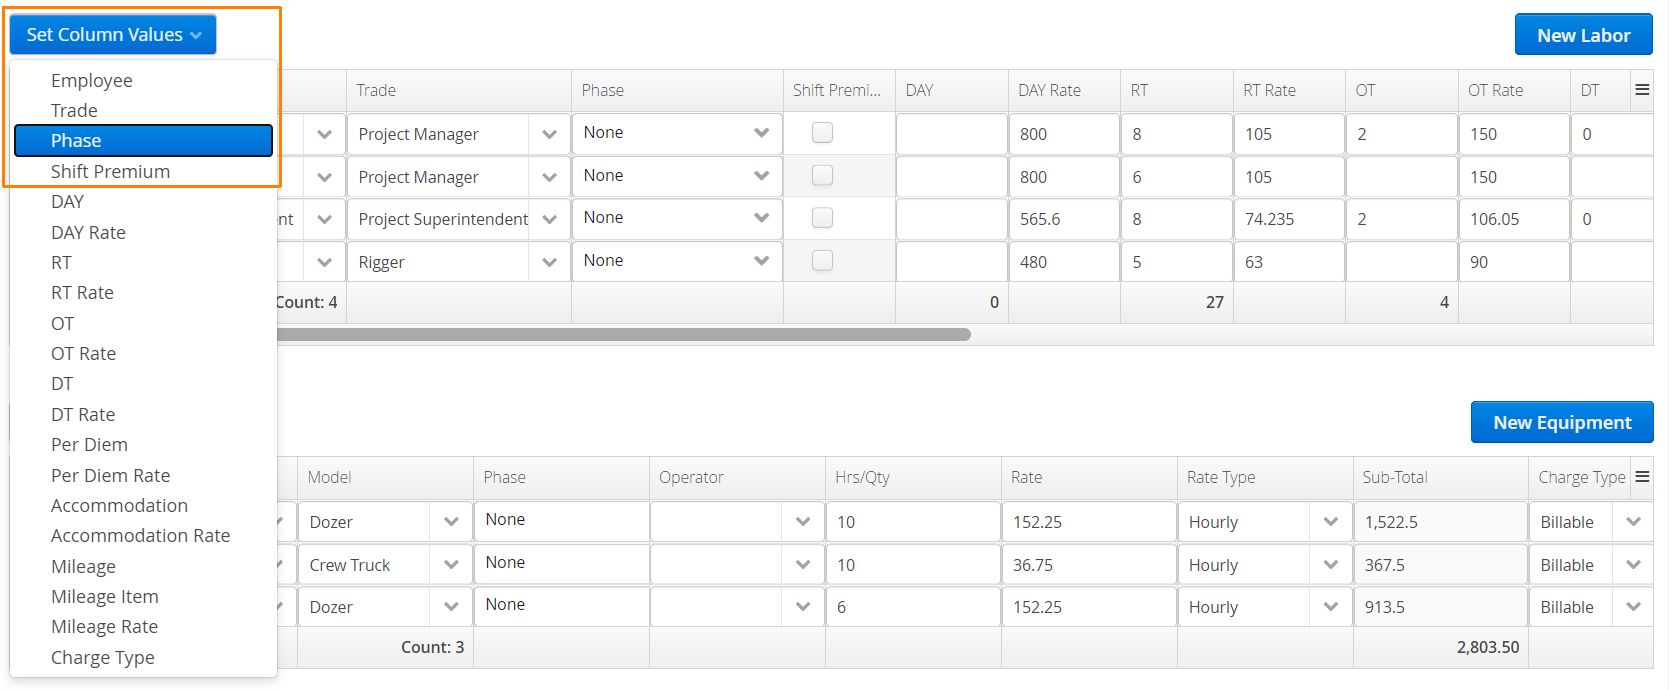
A window will open allowing users to input the value for that column.
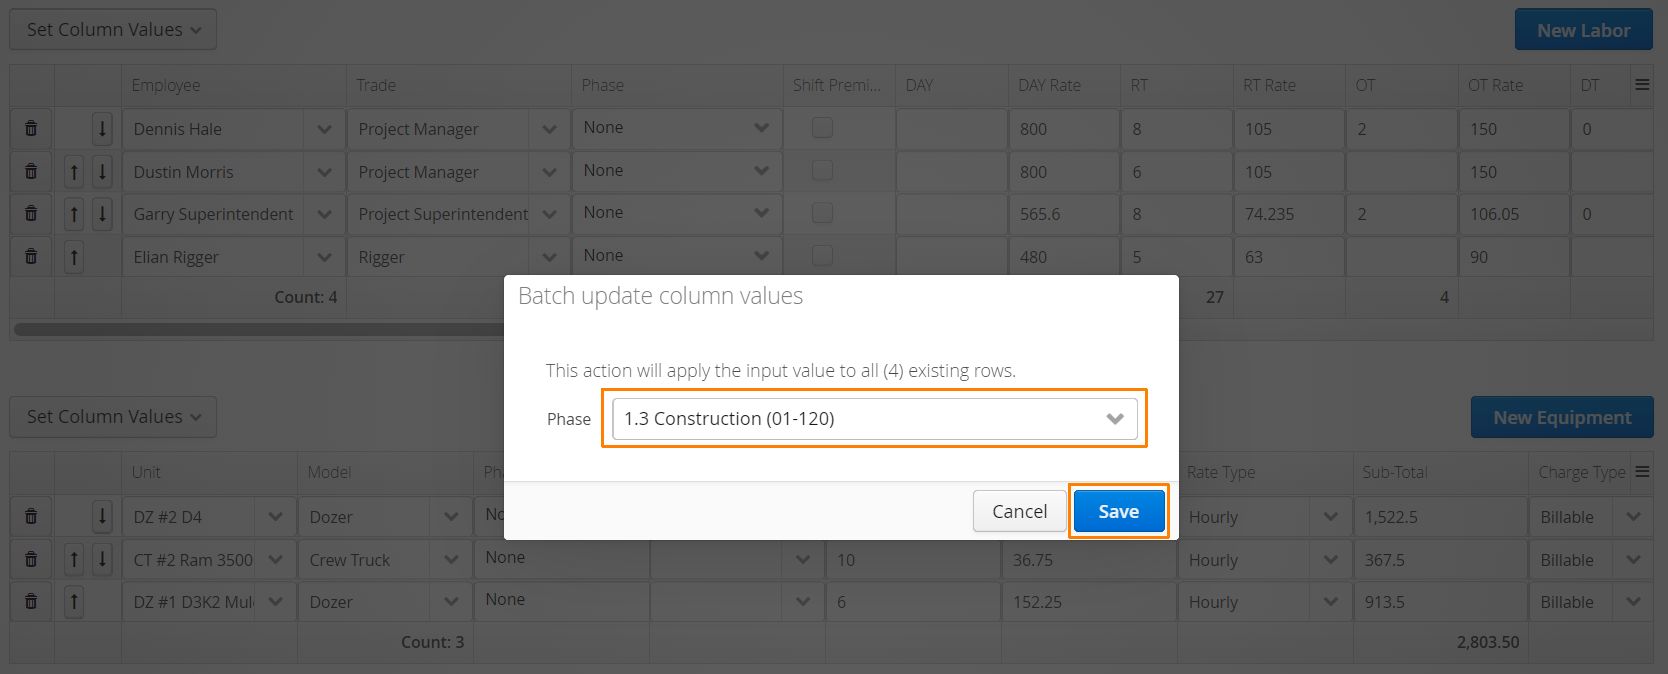
After clicking save, every row in that column will store the selected value.
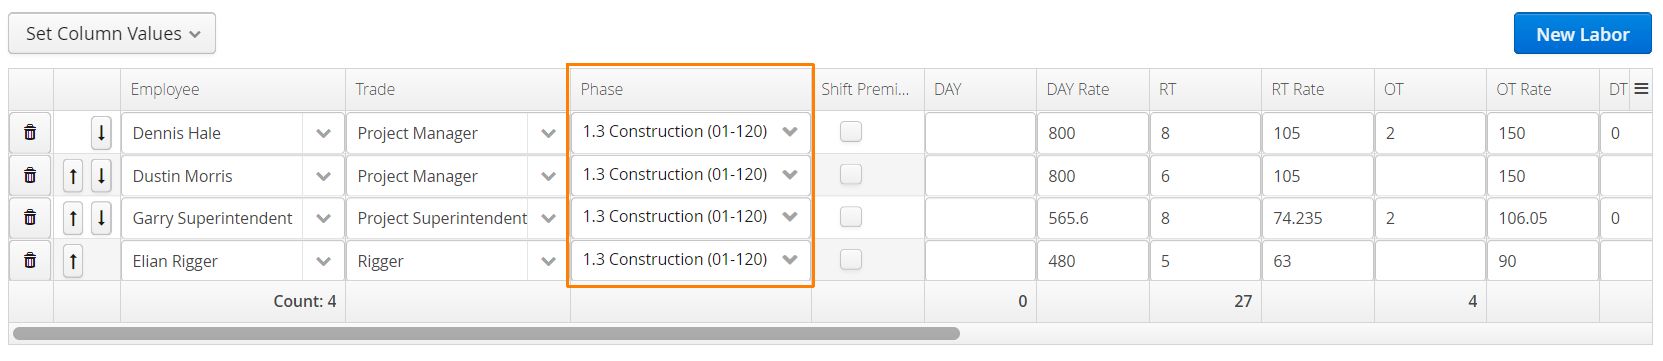
These features are currently only available for the web version of Aimsio. Stay tuned for future updates on iOS and Android.
Form Filters
Every table on Aimsio web forms will include a set of enhanced filters that let users quickly isolate information they’re looking for.
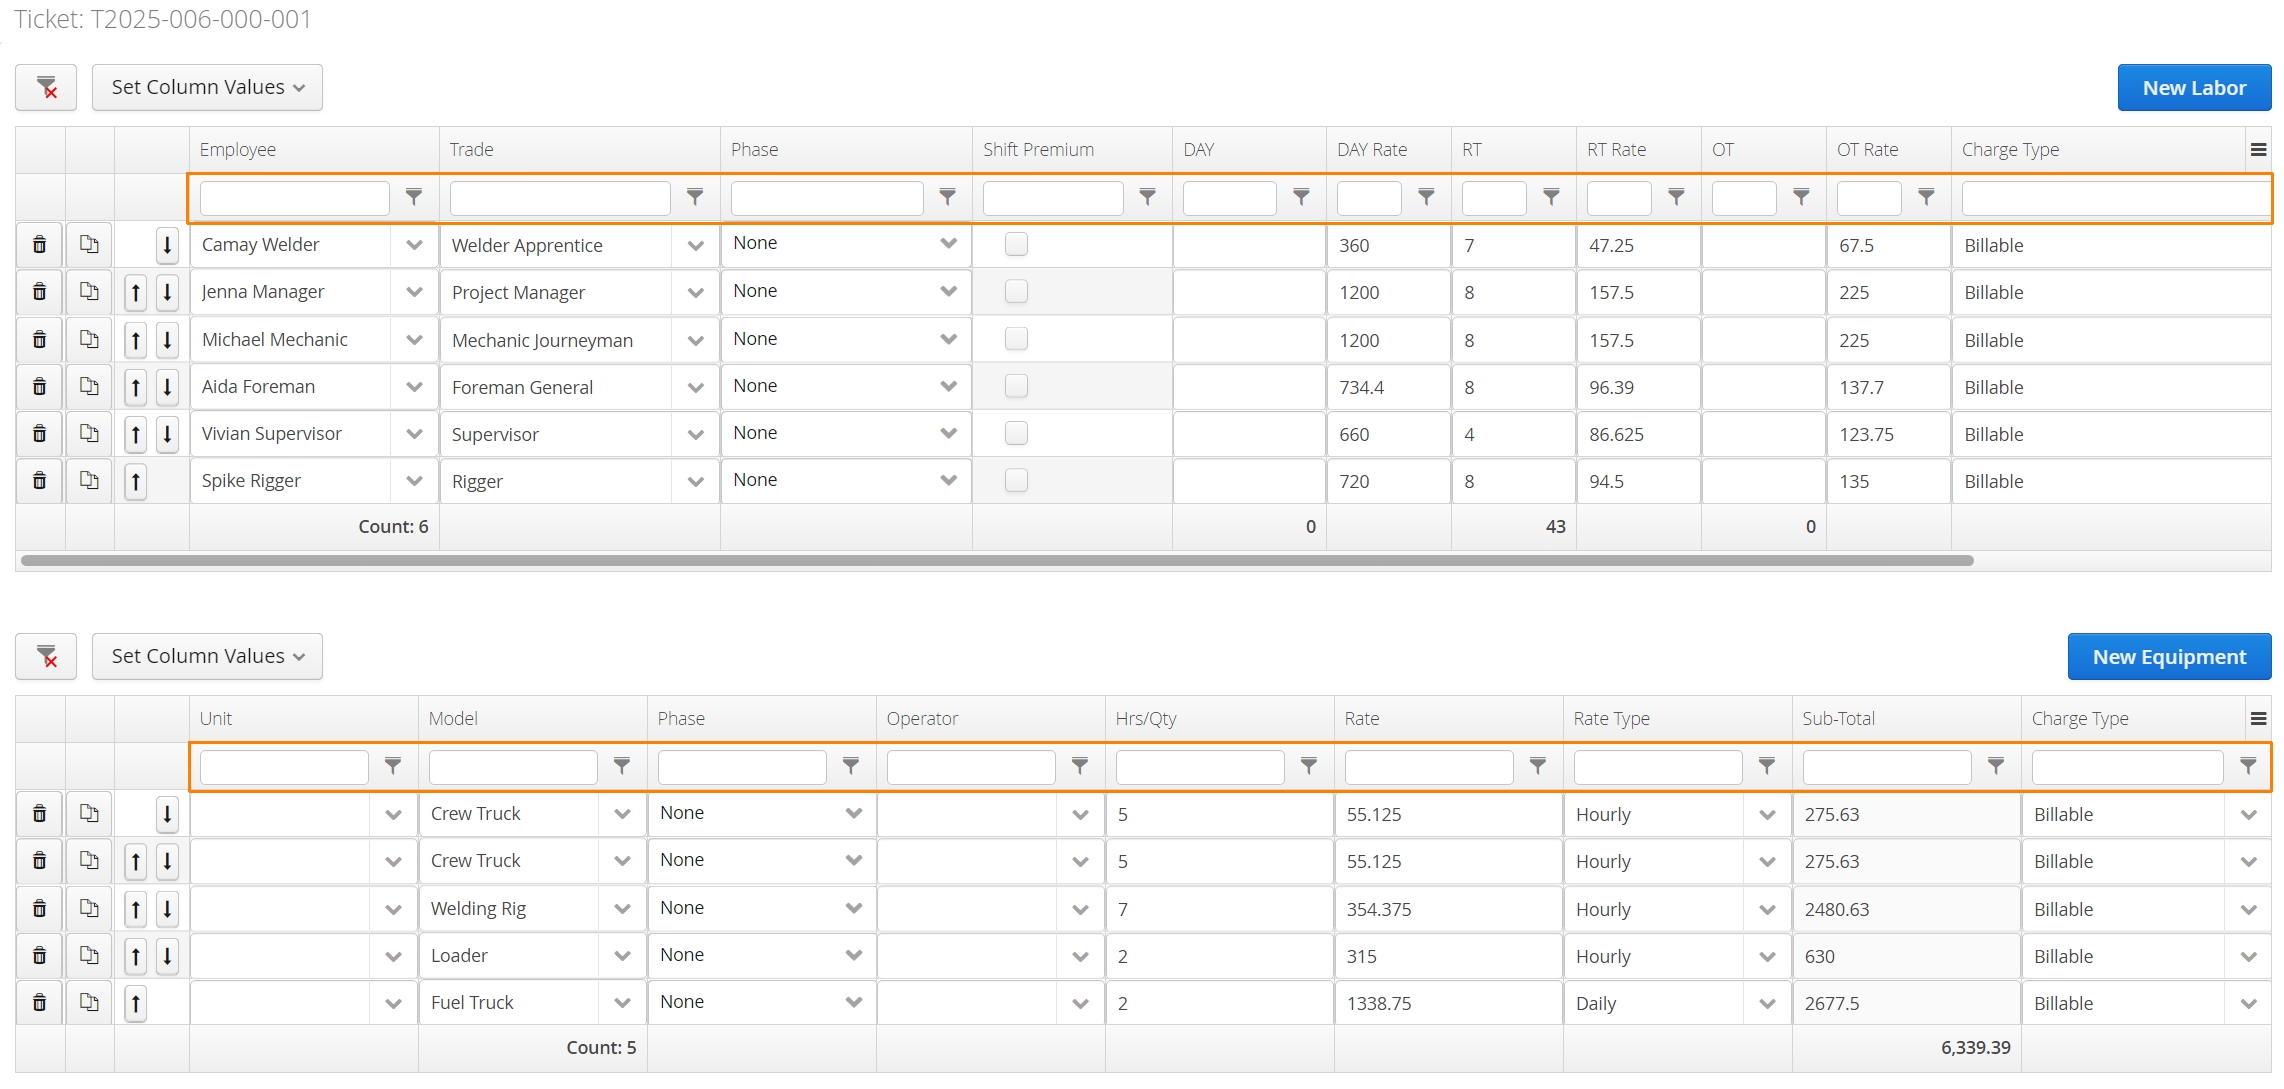
Each column will come with it’s own free filter, for users that prefer to free-type.

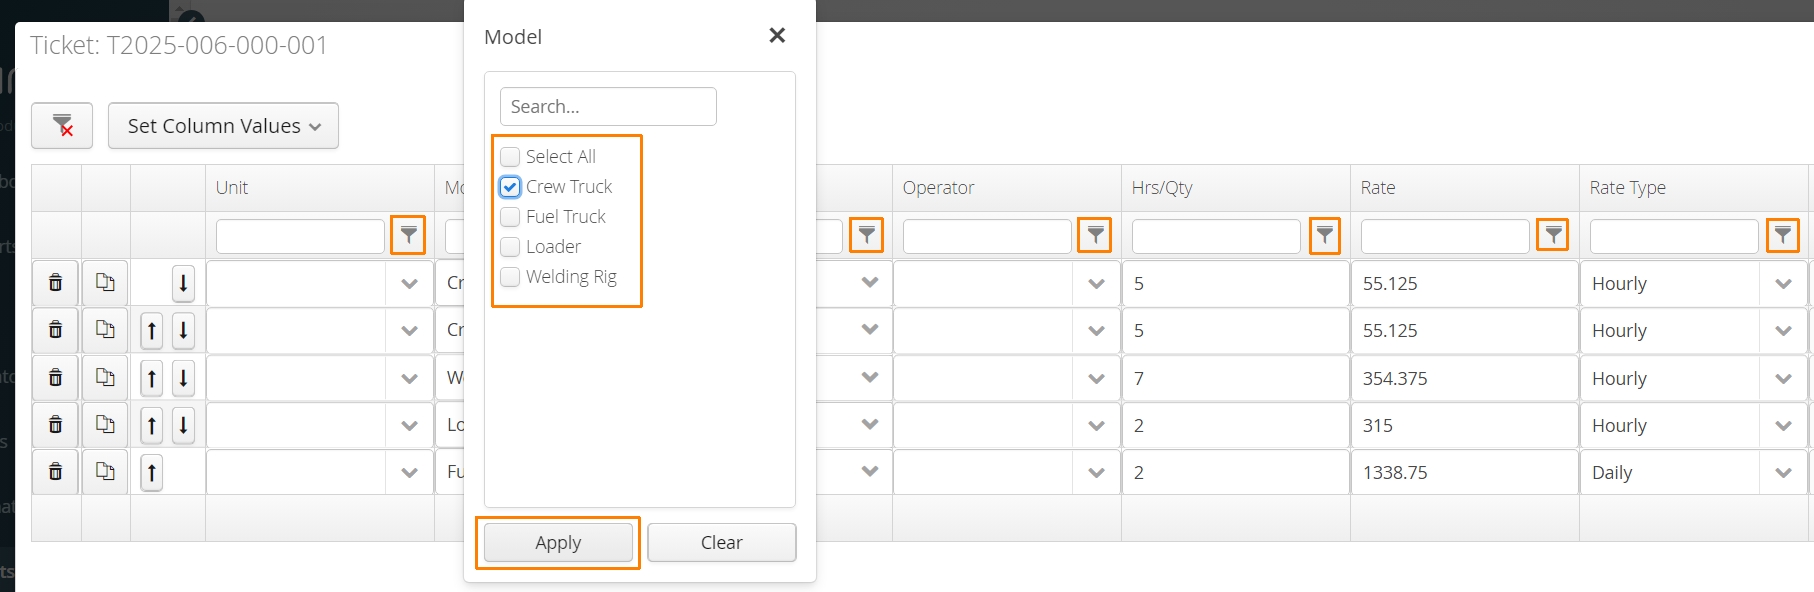
Users can also choose to click the filter icon to bring up a list of all values included in the column and filter for one or more at the same time.
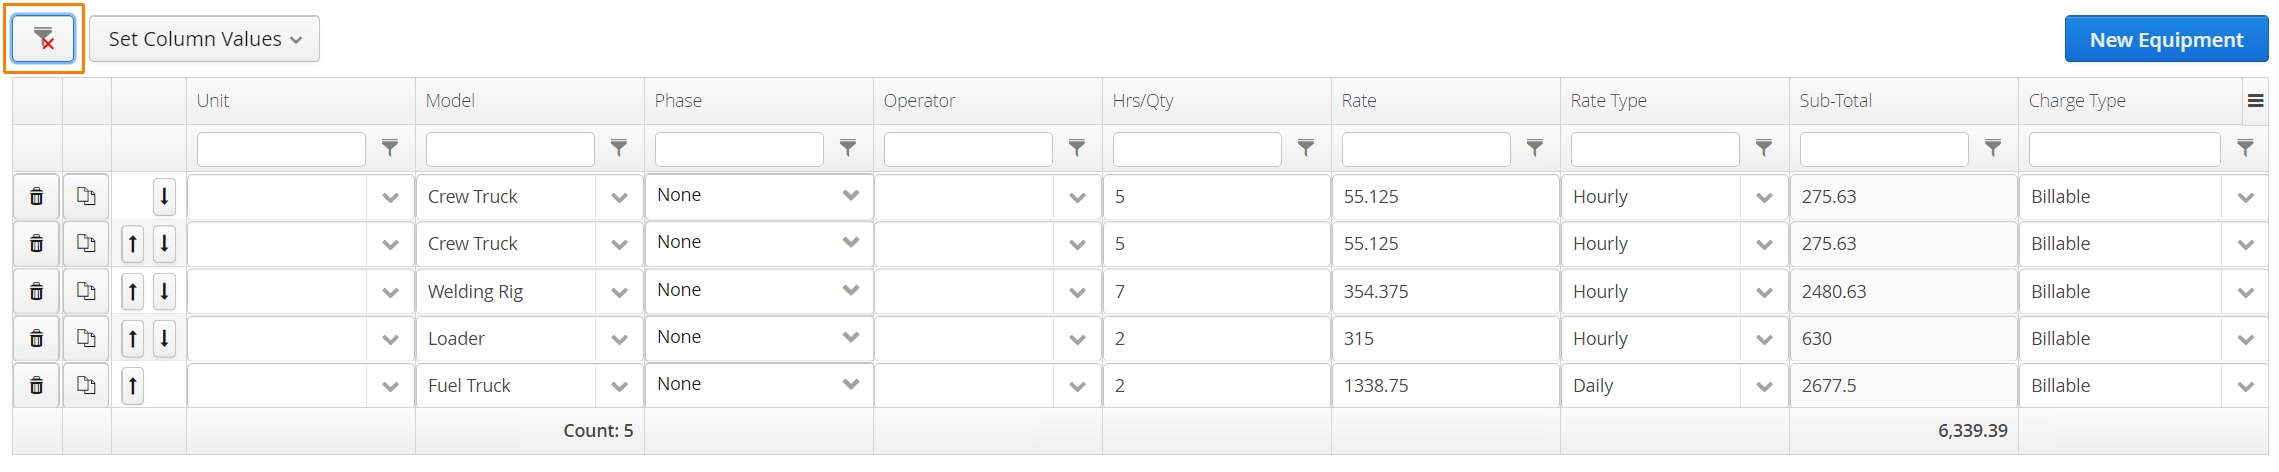
To clear all active filters, users can click the icon on the top left of the table beside the Set Column Values button.
How to Save a Form
When saving a form, users are required to choose one of the following:
-
Save
-
Save and Close
-
Save and Submit
Save buttons are located on the bottom right of a form and will influence the status of the form’s completion.
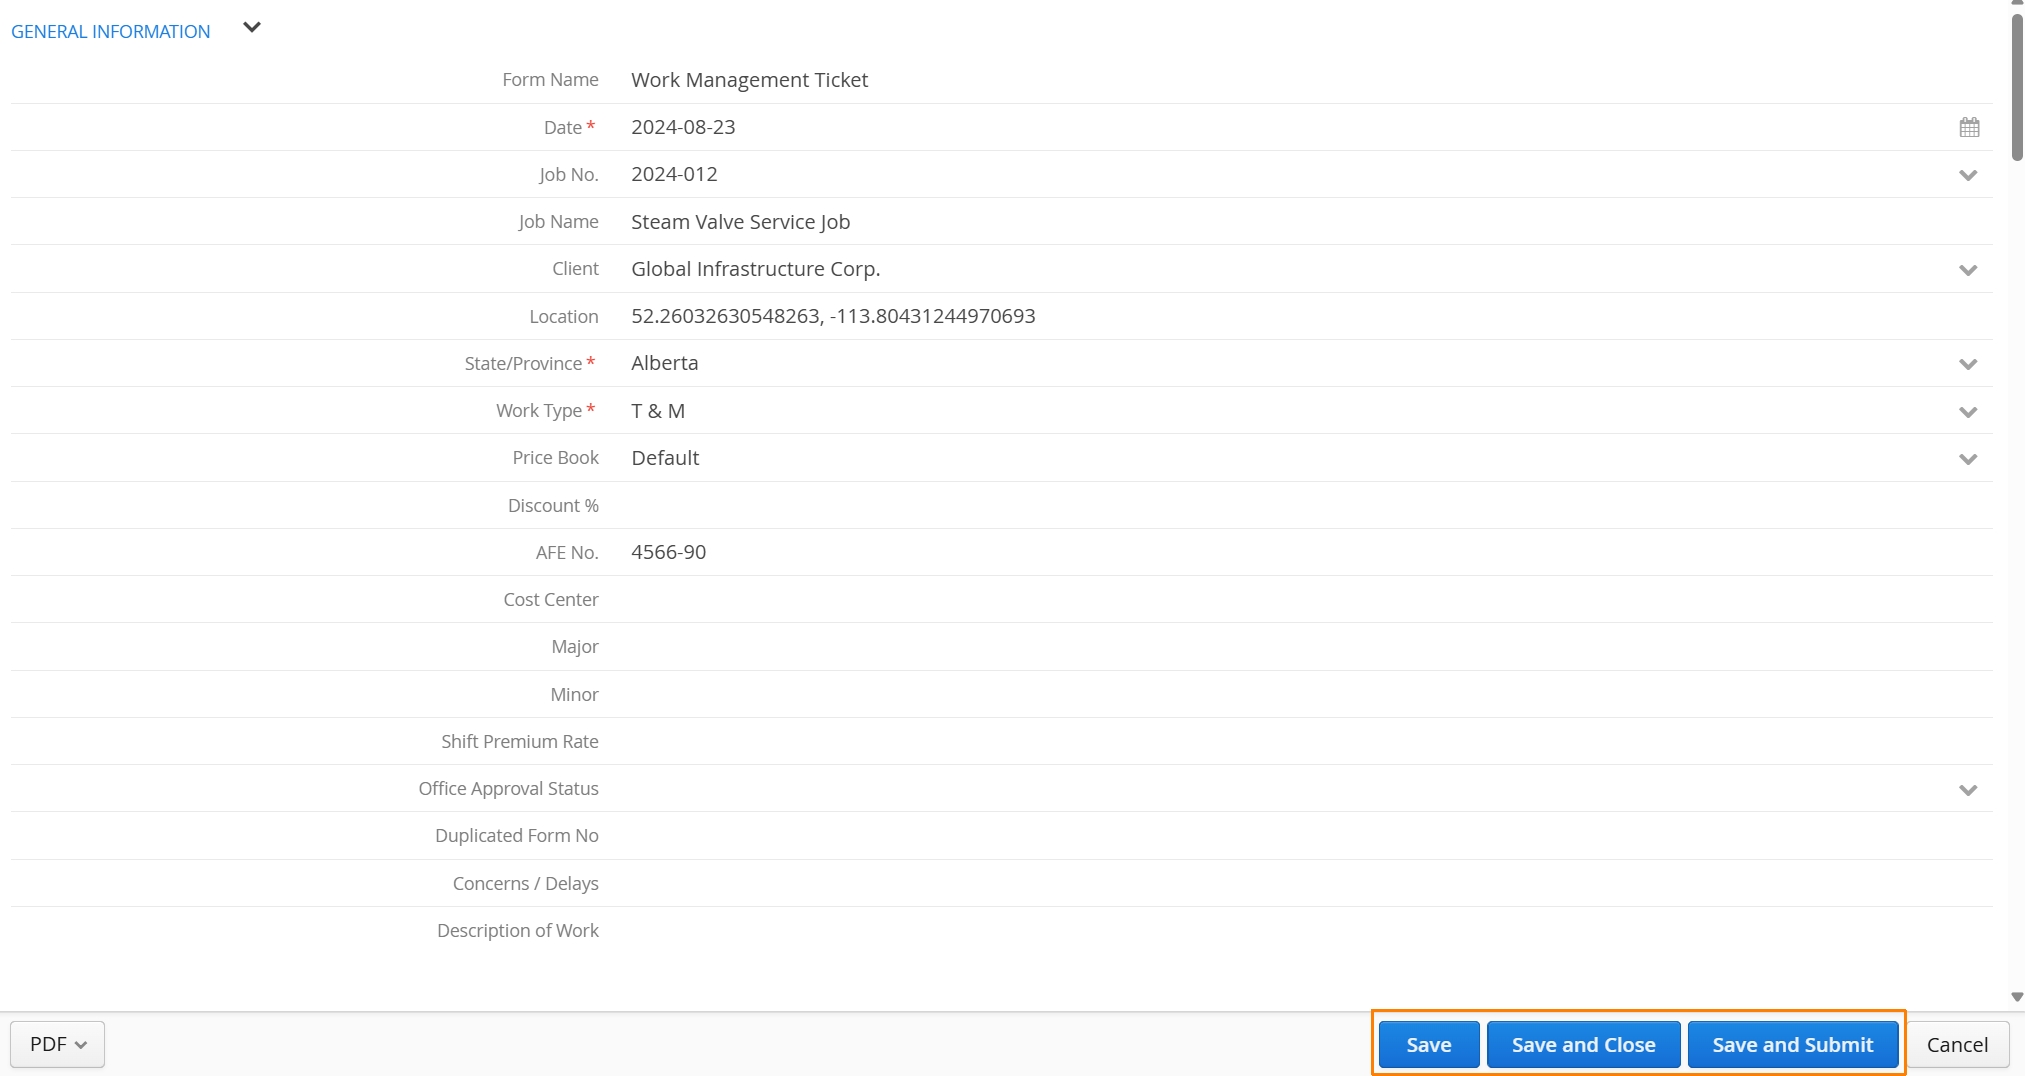
Save
A users work will be saved and the form window will remain visible. Consider it a ‘quick save’, in the event you need to step away temporarily. A record of the form will be saved in your account. Users can immediately pick up where they left off.
Save and Close
If a user is not finished with a form and will need to make changes in the future, they can select ‘Save and Close’ to close the form window. This leaves the status of the form ‘Open’ and edits can still be made by the user responsible for creating it.
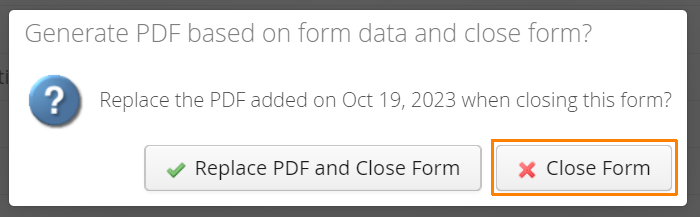
If the form is already submitted, Save and Close will prompt users to generate an updated version of the PDF copy. If changes are client-facing, select Replace PDF and Close Form.
Users can bypass this step by selecting Close Form.
Save and Submit
When a user is finished with a form, they should select Save and Submit. This will change the status of the form (Ticket, Timesheet or Purchase Order) to ‘Closed’ and a PDF copy of the form will be generated. Only authorized users will have the ability to edit the form moving forward.
A preview of the finished PDF will appear, giving users the ability to print or download the PDF copy. Aimsio will store the PDF and it can be downloaded anytime.
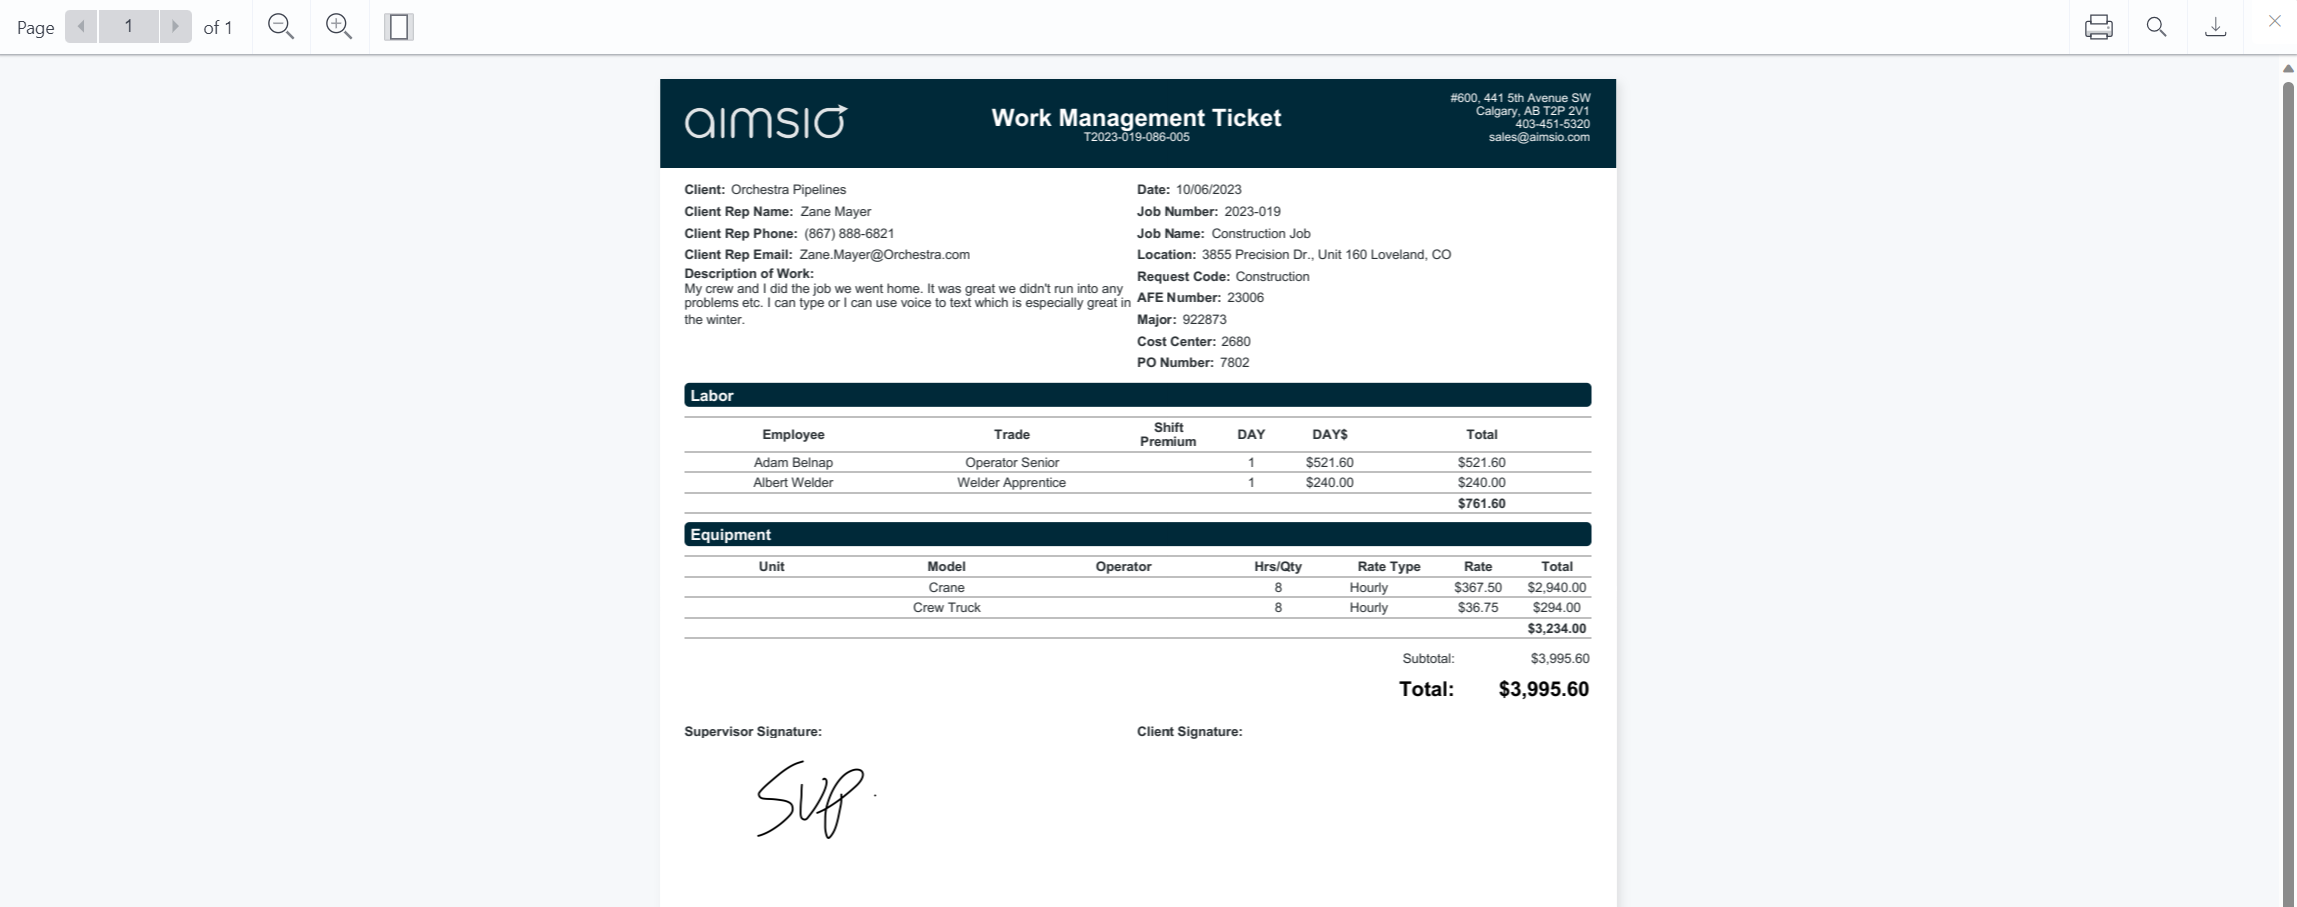
The PDF preview window can be quickly closed using the ‘Esc’ key. Users can also click the close ‘x’ icon on the top right.
Form Status
‘Form Status’ indicates the state of a form’s completion. Form Status is either ‘Open’ or ‘Closed’.
An ‘Open’ form should inform accounts that the form is being worked on, or that the form has been re-opened and additional changes are needed.
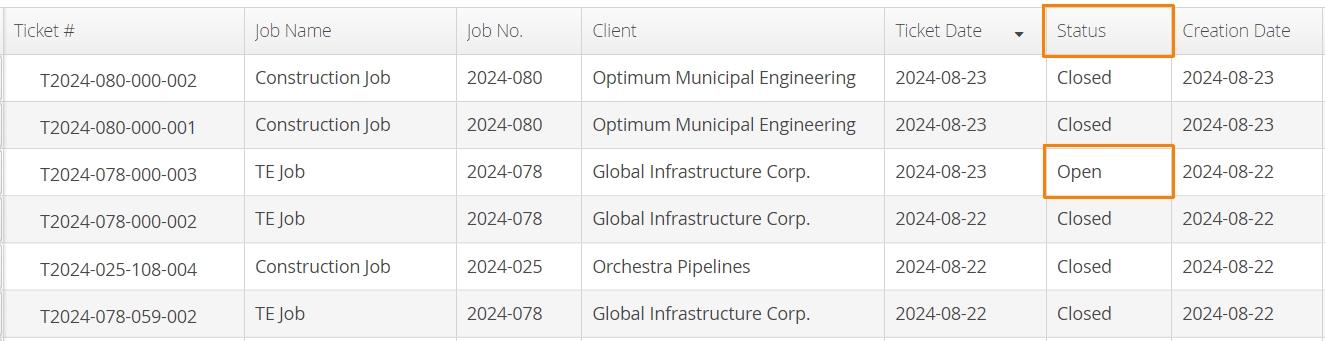
While a form is ‘Open’, the original creator is still authorized to make changes. ‘Open’ forms cannot be Invoiced or sent for approval using our Client Portal.
A ‘Closed’ form indicates that the user responsible for creating the form has submitted it. Accounts should treat ‘Closed’ forms as complete, though they still may need to be reviewed or approved by a customer.
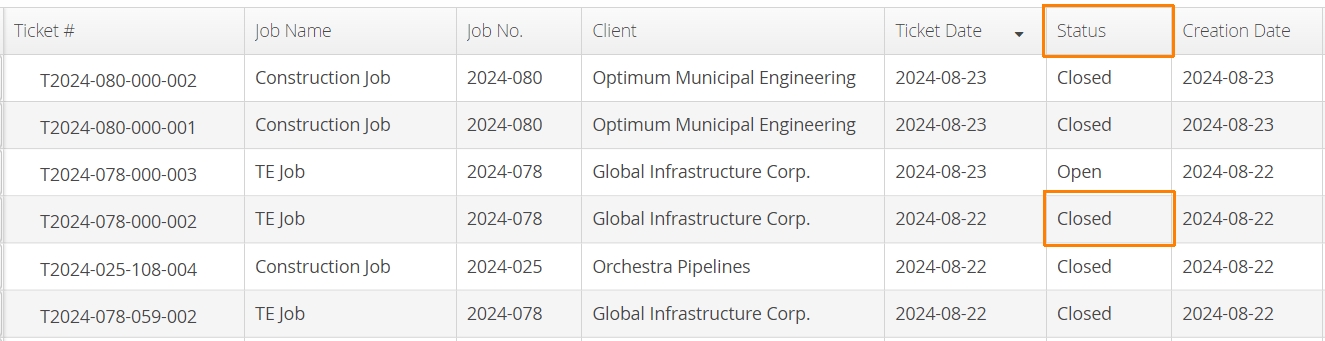
‘Closed’ forms can only be edited by users with the appropriate permissions. A ‘Closed’ form can be re-opened, changing its status back to ‘Open’, giving the original creator the ability to make changes.
Approval Status
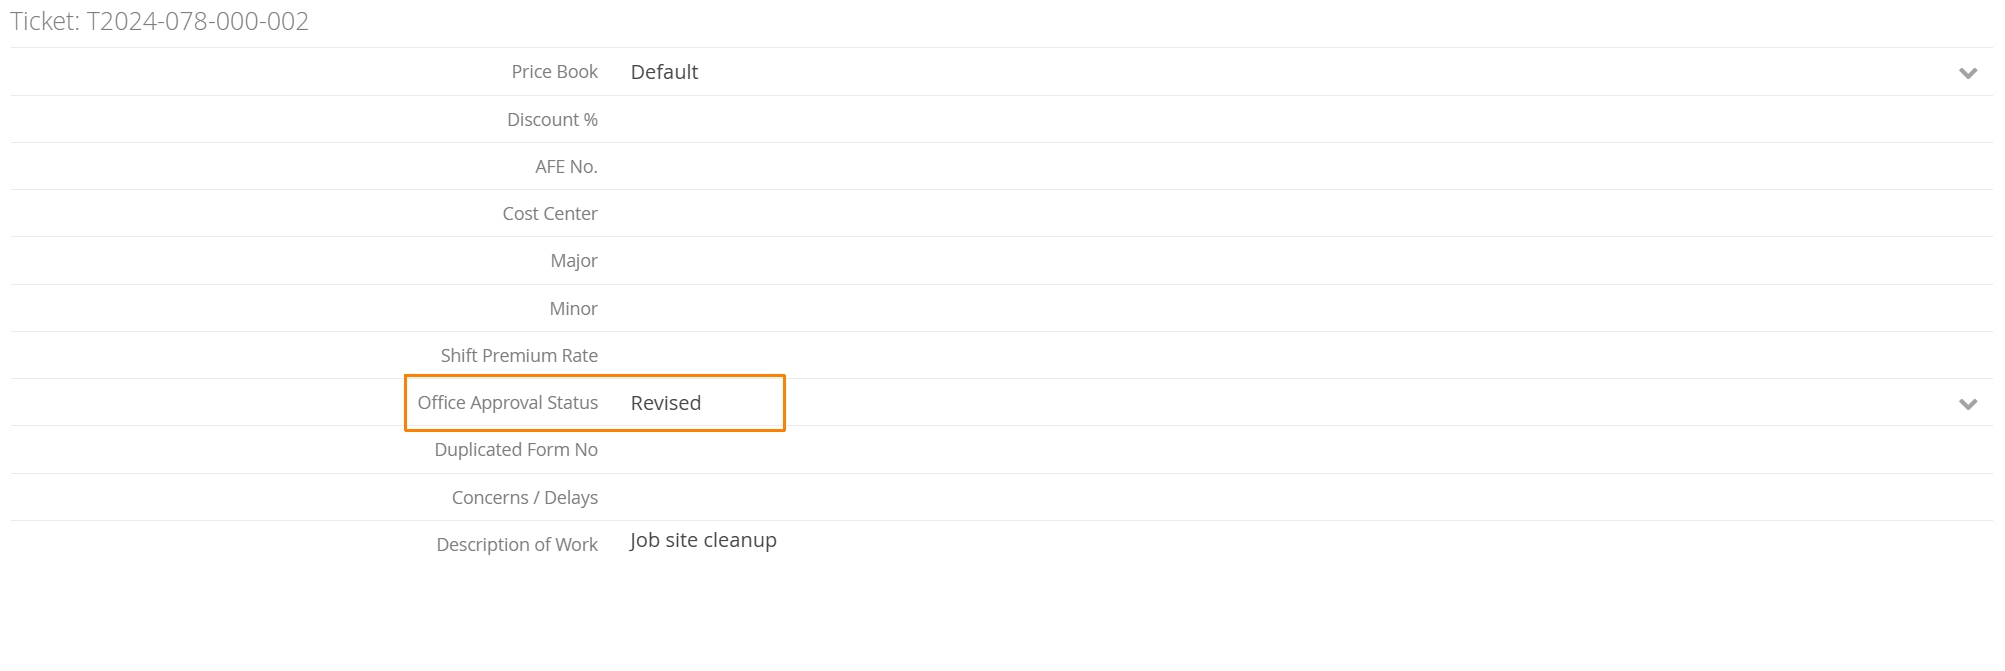
A form’s ‘Approval Status’ will indicate whether a form has been internally or externally approved. Forms may have multiple approval statuses. We give accounts the flexibility to use their own approval conventions.
Aimsio provides accounts with a status field for internal approvals and a separate status field for form’s that have been sent externally to your customers using our Client Portal.

For more information on sending documents to your clients for approval see our Client Portal documentation.
How to Review and Approve Forms
‘Approval Status’ of a form can be changed from a form’s listing page, or by editing a form and changing the approval status field.
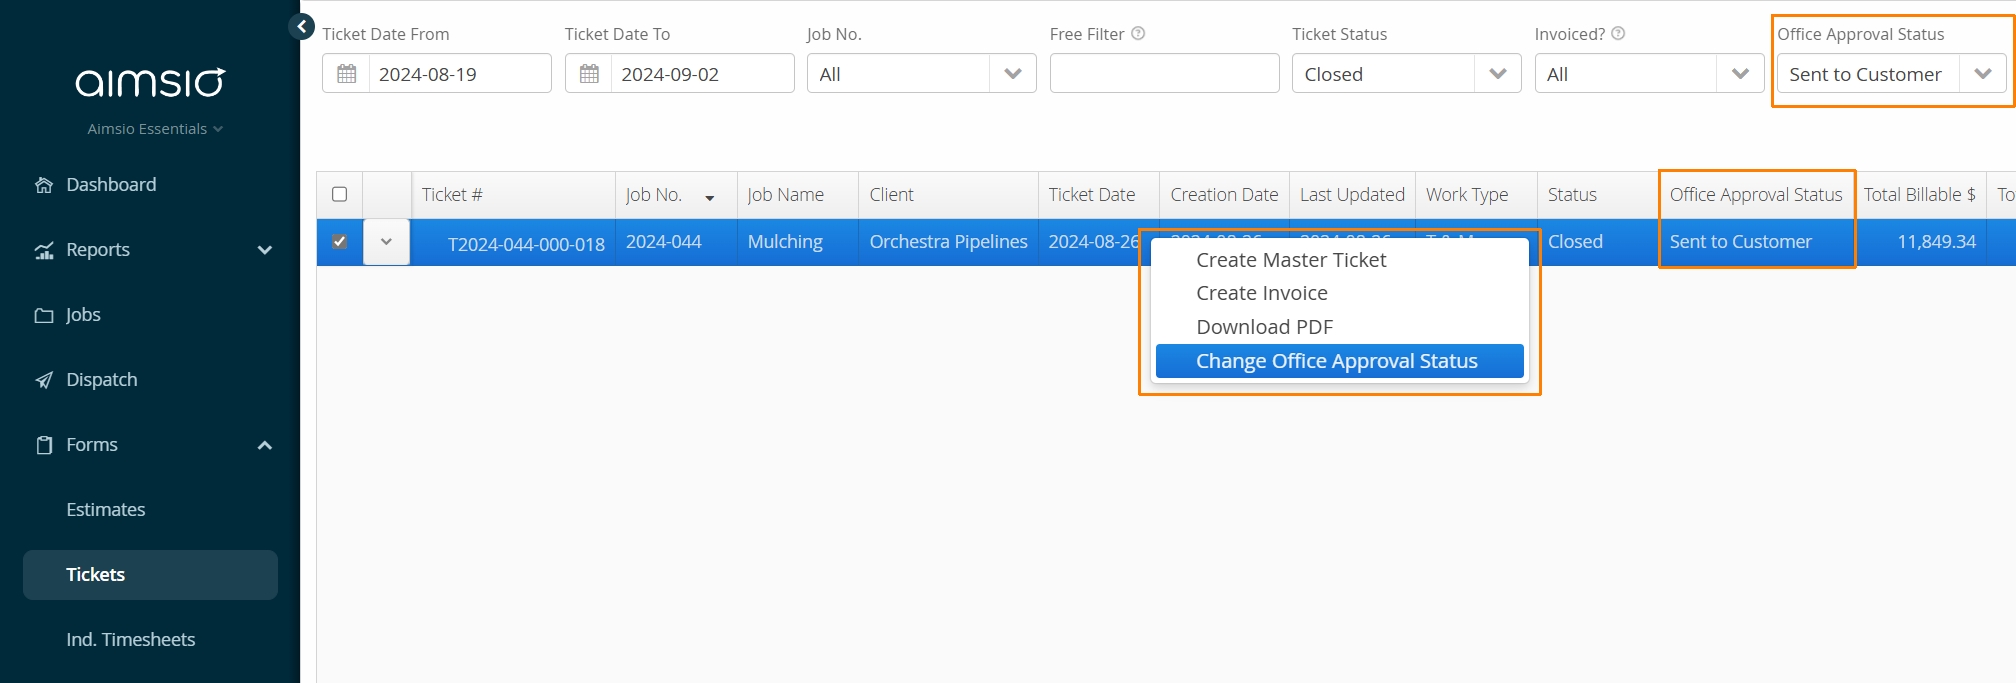
Users can change the approval status of forms in bulk, by selecting one or multiple entries using the left column, using a right-click action over the selection and selecting ‘Change Review Status’ or ‘Change Approval Status’.
Users can leverage Aimsio filters along the top of the page to list form entries that are both ‘Closed’ and requiring approval.

Forms have an ‘Approval Status’ field that can be accessed and changed while completing or editing a form.
How to Send Forms to Customers for Approval
Users can send forms digitally to customers using our Client Portal. Customer can approve the form and automatically update the form’s approval status in your account.
For more information, read our Client Portal Guide.
How to Remove the Approval Status of a Form
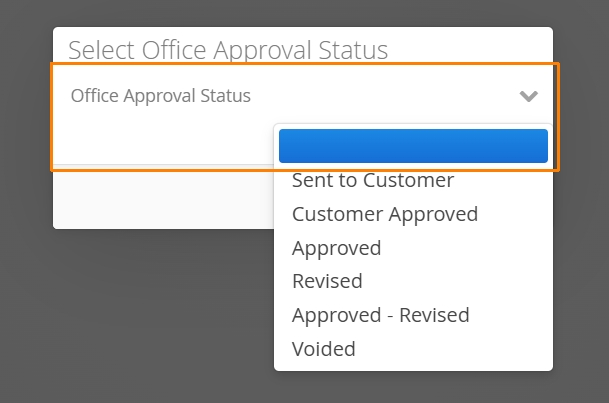
First, filter the page by the ‘Approval Status’ of the form you’re looking to remove. Right-click and select which status you’d like to remove.
Select the blank field from the status list to remove any status.
How to Duplicate a Form
Most forms that have been created in Aimsio can be duplicated. This can really speed up the process of completing forms daily, when the information on each form will contain much of the same information.
To duplicate a form, use the action button to the left of the form and select the Duplicate option.
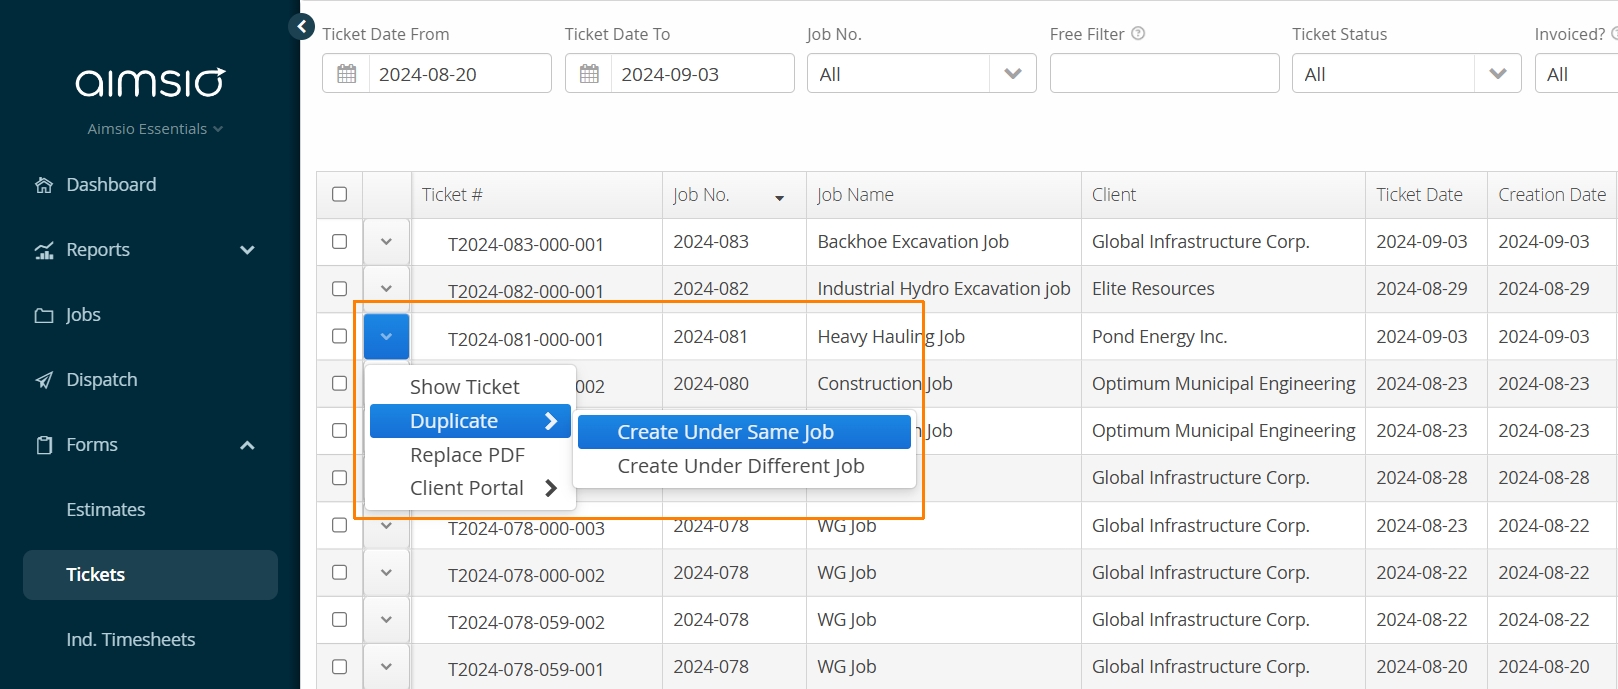
Some forms support being duplicated under a different Job.
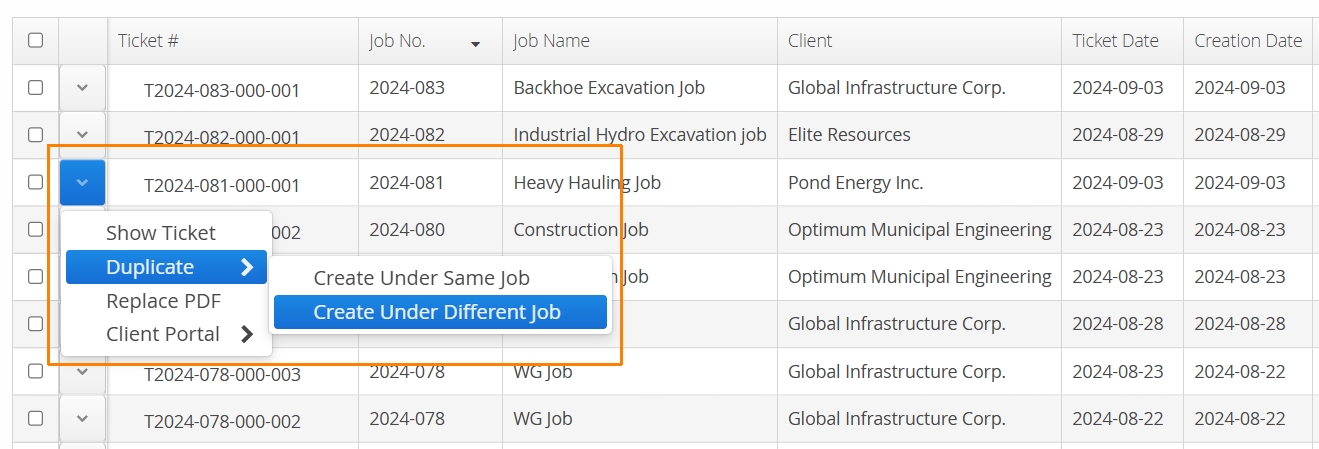
If a form is being duplicated for a different Job or Client, users will have to select the new Job Number before the new form is created.
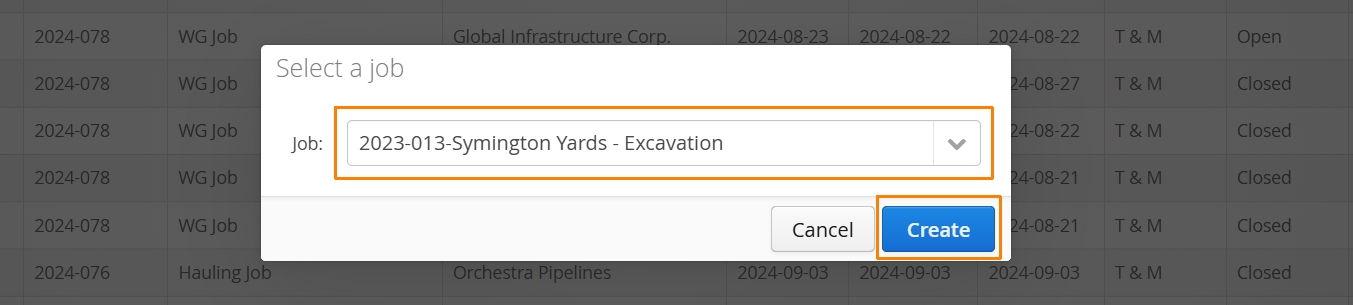
It is not possible to change the Job Number or Client on a form as it’s being created. Users must Duplicate the Form under a different Job first, then the original form can be deleted.
How to Edit a Form
To Edit a form, use the Action button to the left of any form and select Edit.
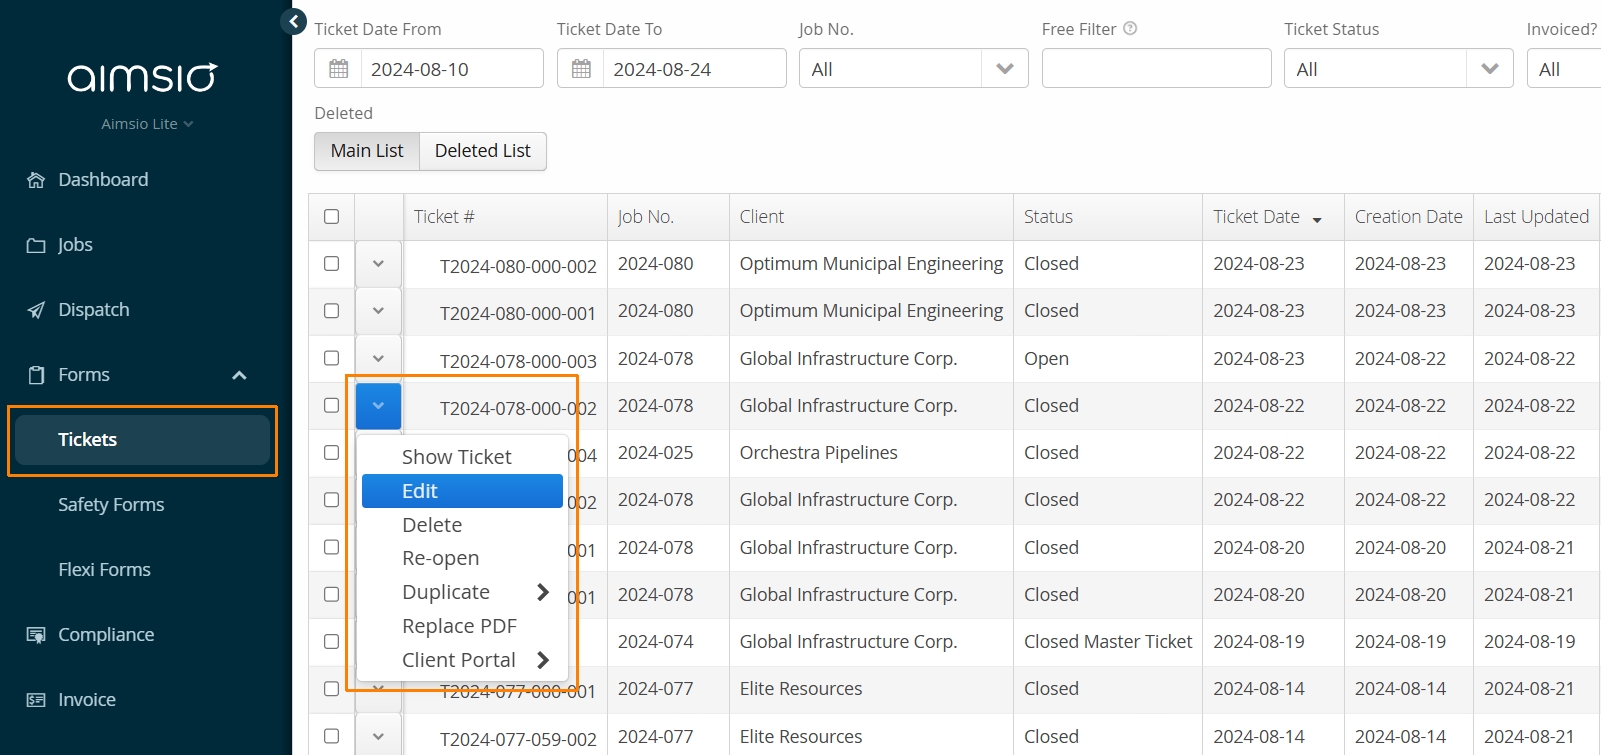
- Edit any information on the form as required and select Save and Close (bottom right).
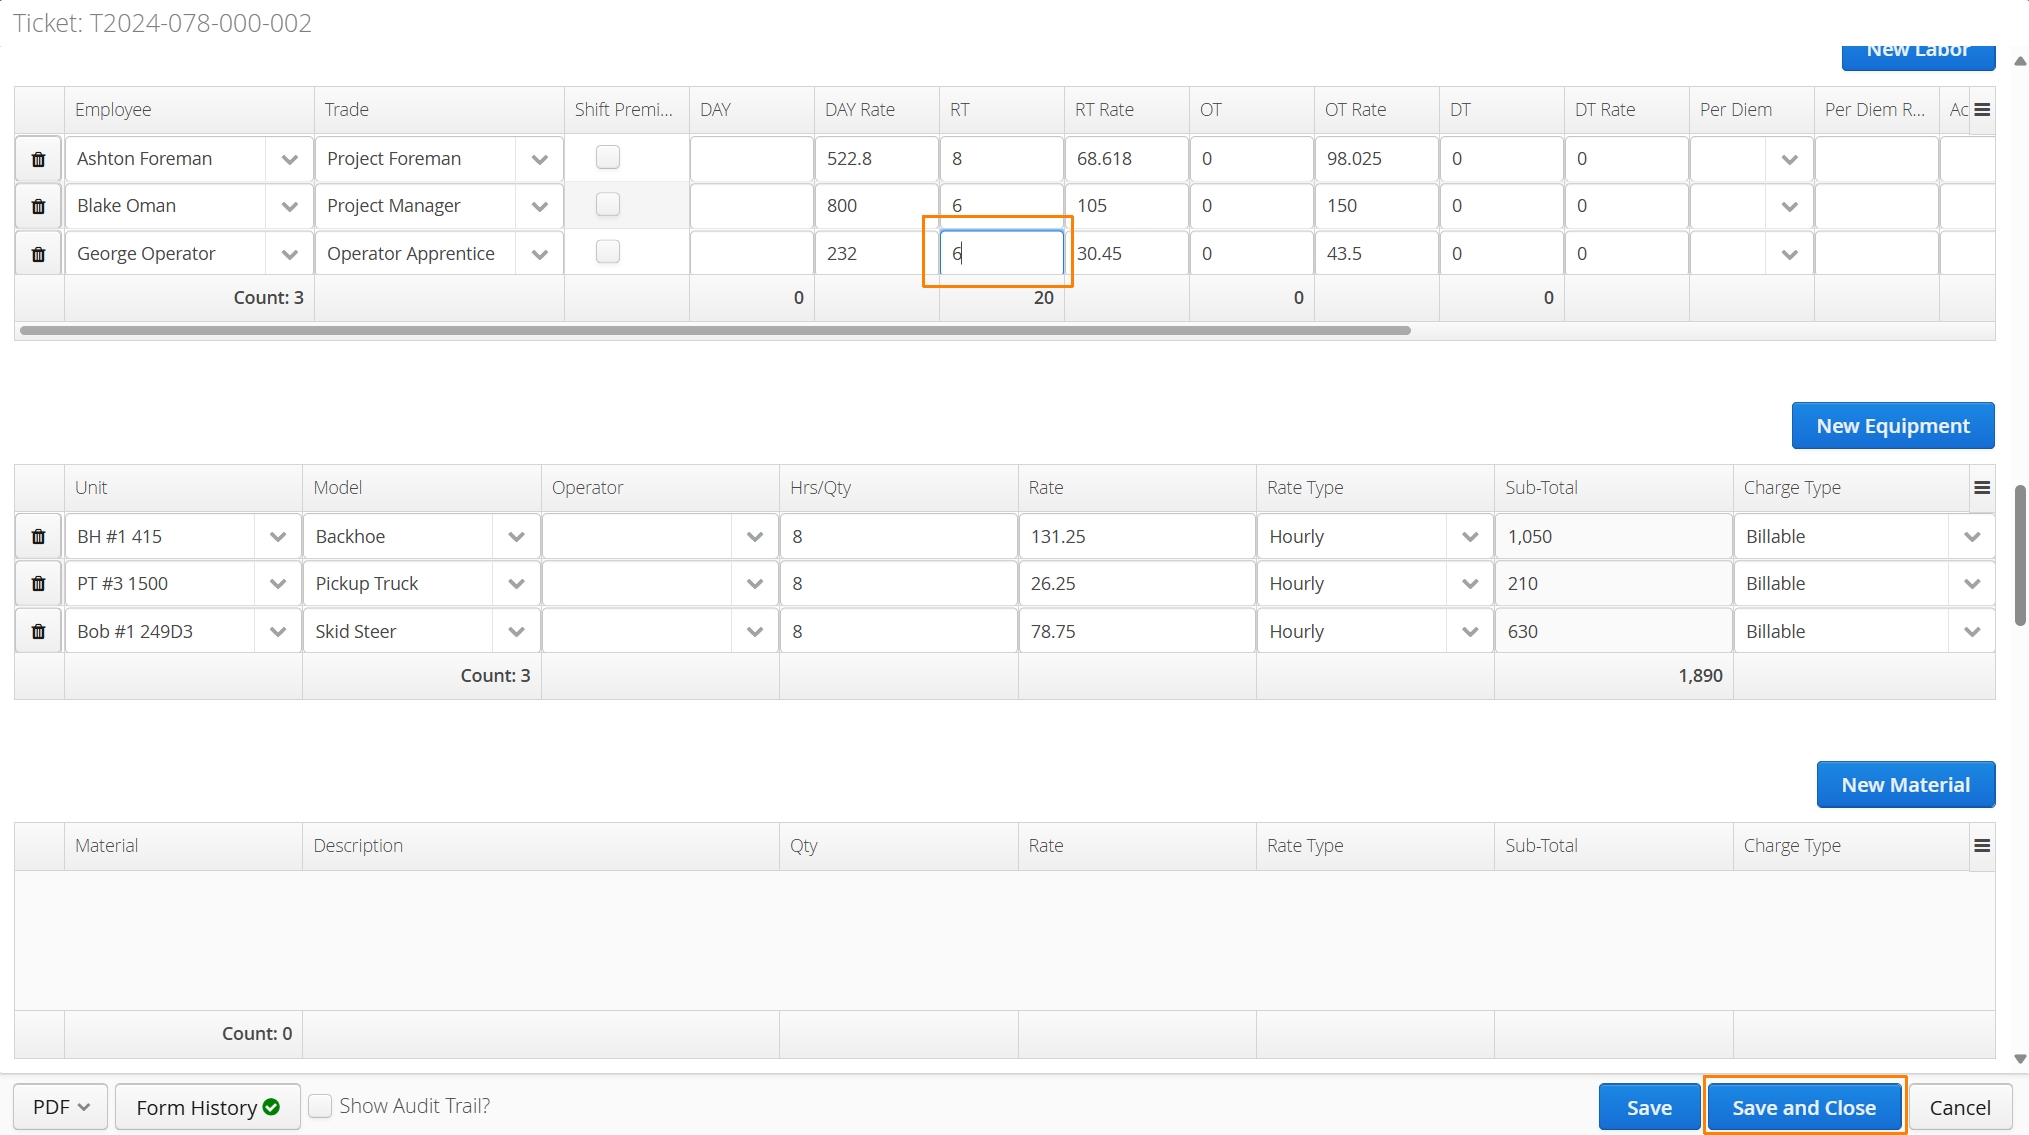
After a form has been edited, saving the form will prompt users to select whether they’d like the PDF copy of the form updated to reflect the changes.
How to Re-open a Form
To Re-open a form, use the Action button on the left to the left of any ‘Closed’ form and select Re-open.
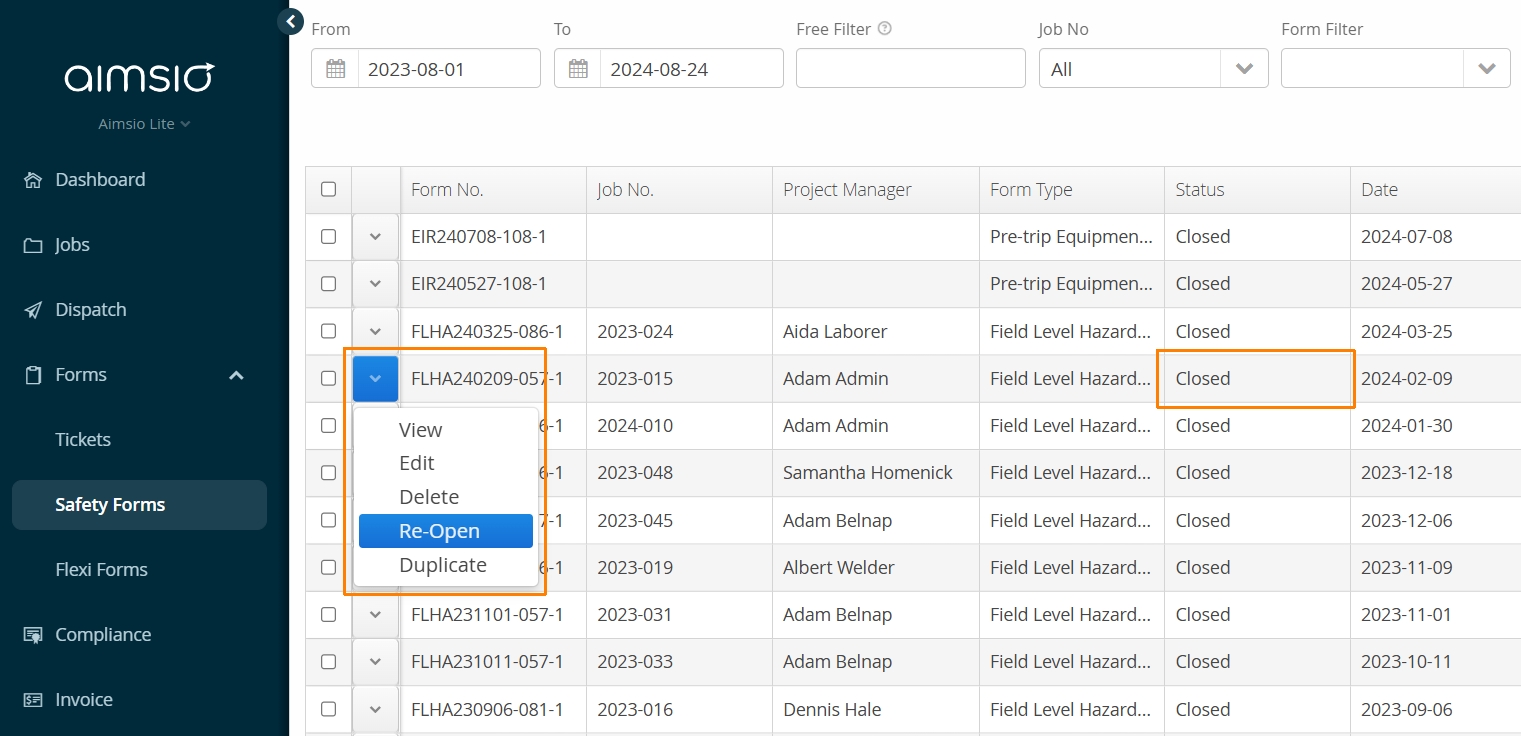
- After selecting Re-open, users are prompted to confirm the action, indicating that the ‘Form Status’ will be changed back to ‘Open’, making it available for editing by the original creator.
Users will have access to the form on Aimsio’s web portal or mobile app, depending on where it was initially saved. After they make changes, they can resubmit the form, changing its ‘Form Status’ back to ‘Closed’.
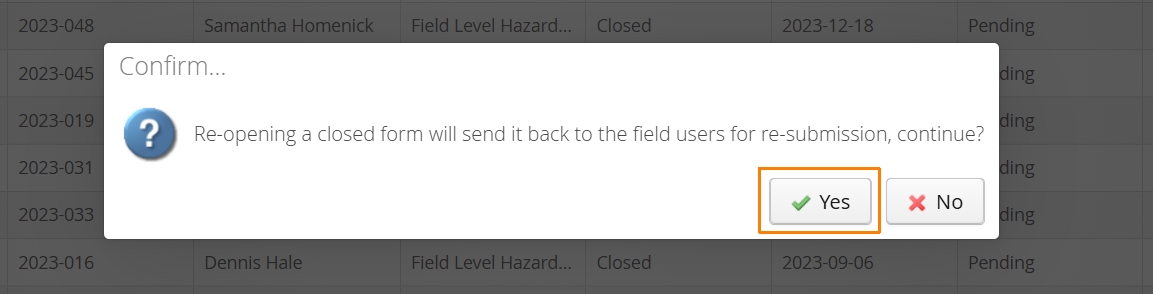
- When a form is re-opened, a dialogue box will appear allowing a message to be delivered to the original form creator. Aimsio will deliver the message via SMS to the User.

A valid phone number must exist in the User profile in order to receive SMS notifications.
How to Download Form PDFs
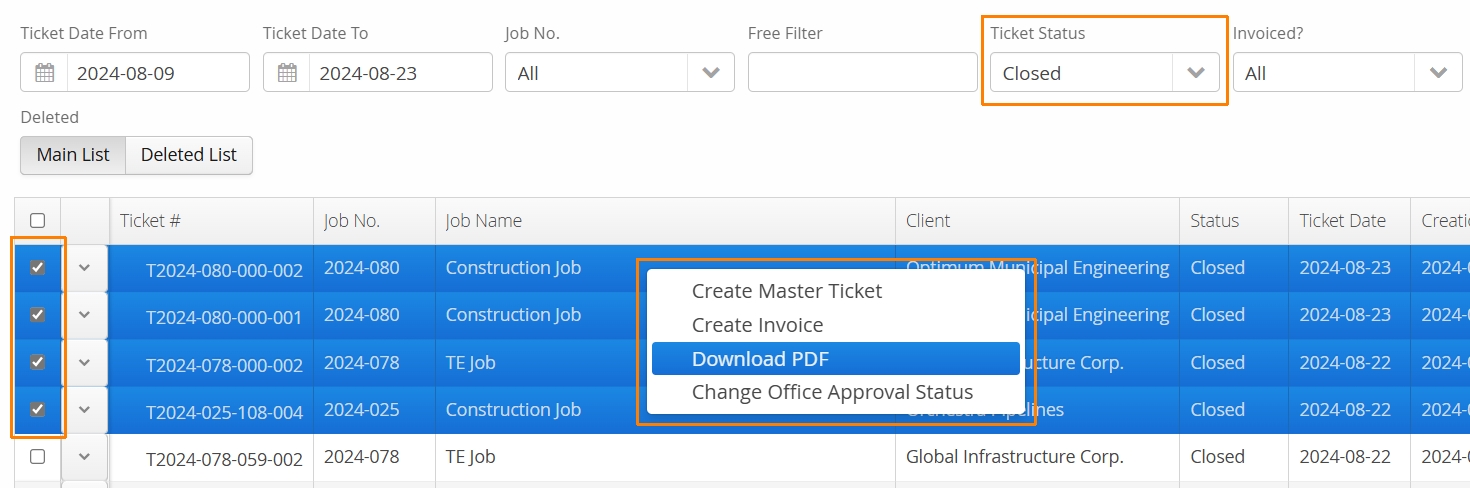
Once a form has been submitted, its PDF can be downloaded from the corresponding form’s listing page. To download PDF versions of your forms, use the select box located on the far-left column and choose the forms you’d like to download. Once selected, right-click on your selection and select Download PDF.
Consider using filters to make bulk-downloading more convenient. Ensure the Form Status is set to Closed. You can also filter by Date Range and Job Number.
How to Delete a Form
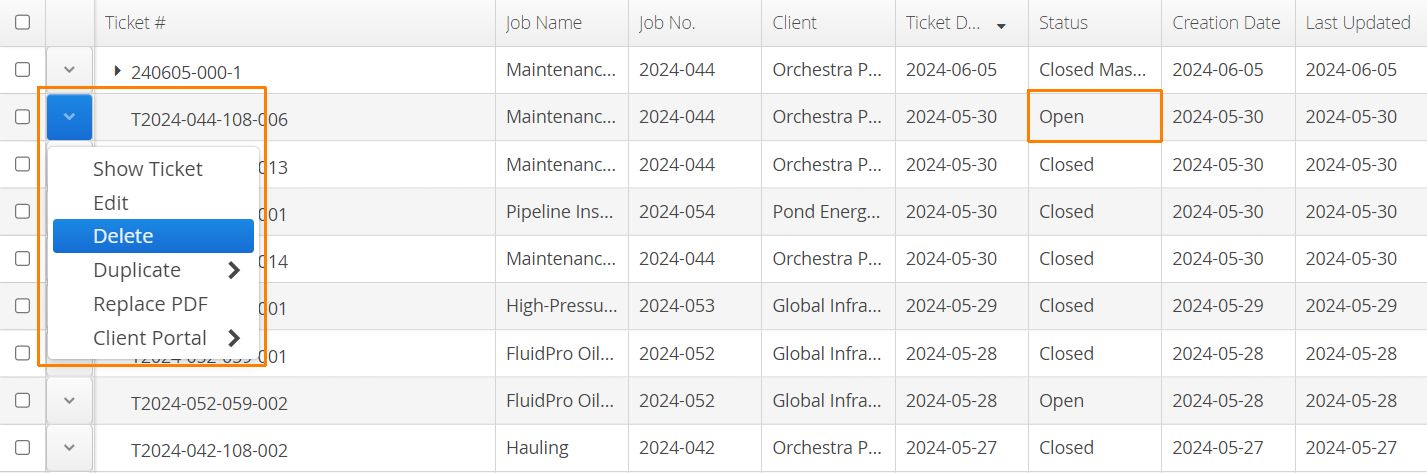
All forms (e.g. Ticket, Crew Timesheet, Individual Timesheet, Change Order etc.) in Aimsio can be deleted, if the permissions associated to your User account allow it. To delete a form, users can use the action button to the left of a form (on the main form page) and select Delete.
Only creators of the form can use the Delete action while the ‘Form Status’ is ‘Open’. If the Form Status is Closed, only authorized users will have the ability to delete the form.
How to View Form History and Audit Trail
Aimsio will begin tracking any changes made to a form after it’s been saved. To see these changes, users will need to enable the Audit Trail or view the Form History.
This feature is only accessible via Aimsio’s web portal and may be tied to the permissions on your user account.
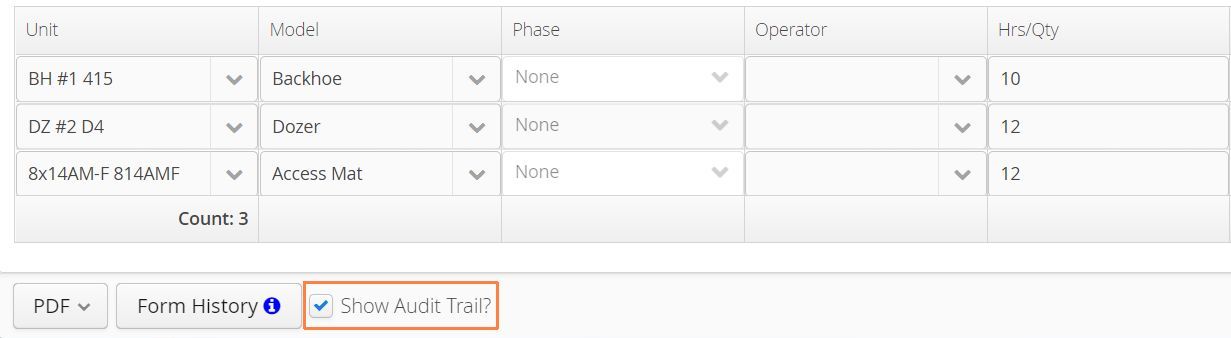
- At the bottom left of a form, users will find the Show Audit Trail? checkbox.
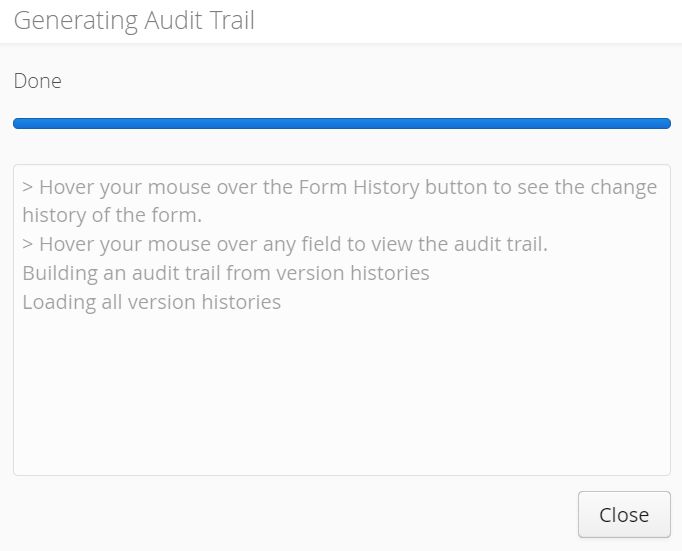
- A new audit trail will be generated every time this box is checked. A window will popup once the process is complete. Click Close on the bottom right.
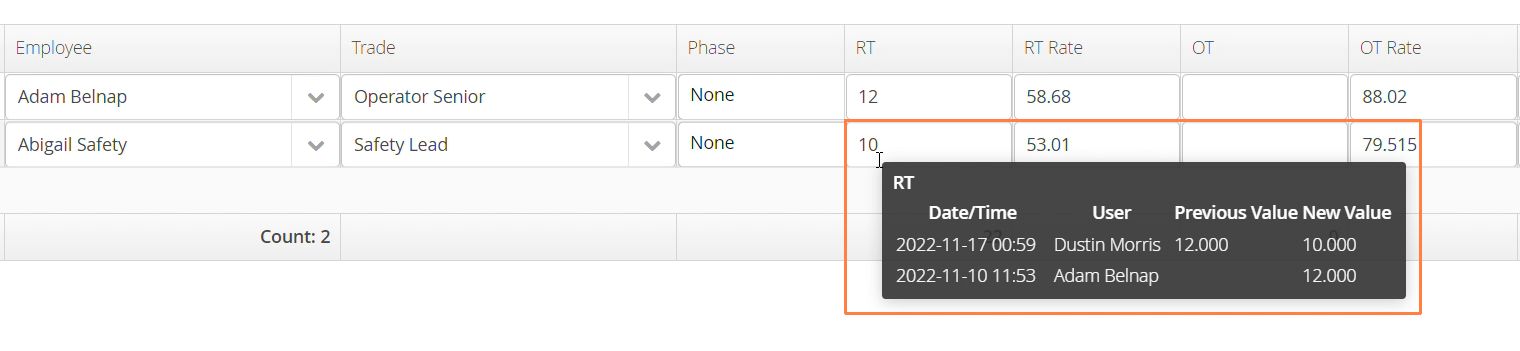
- To view the audit trail, hover the mouse cursor over any field value. A small popup will appear outlining the Date/Time of the entry, the User responsible for the input and any history of the value changing (Previous Value / New Value).
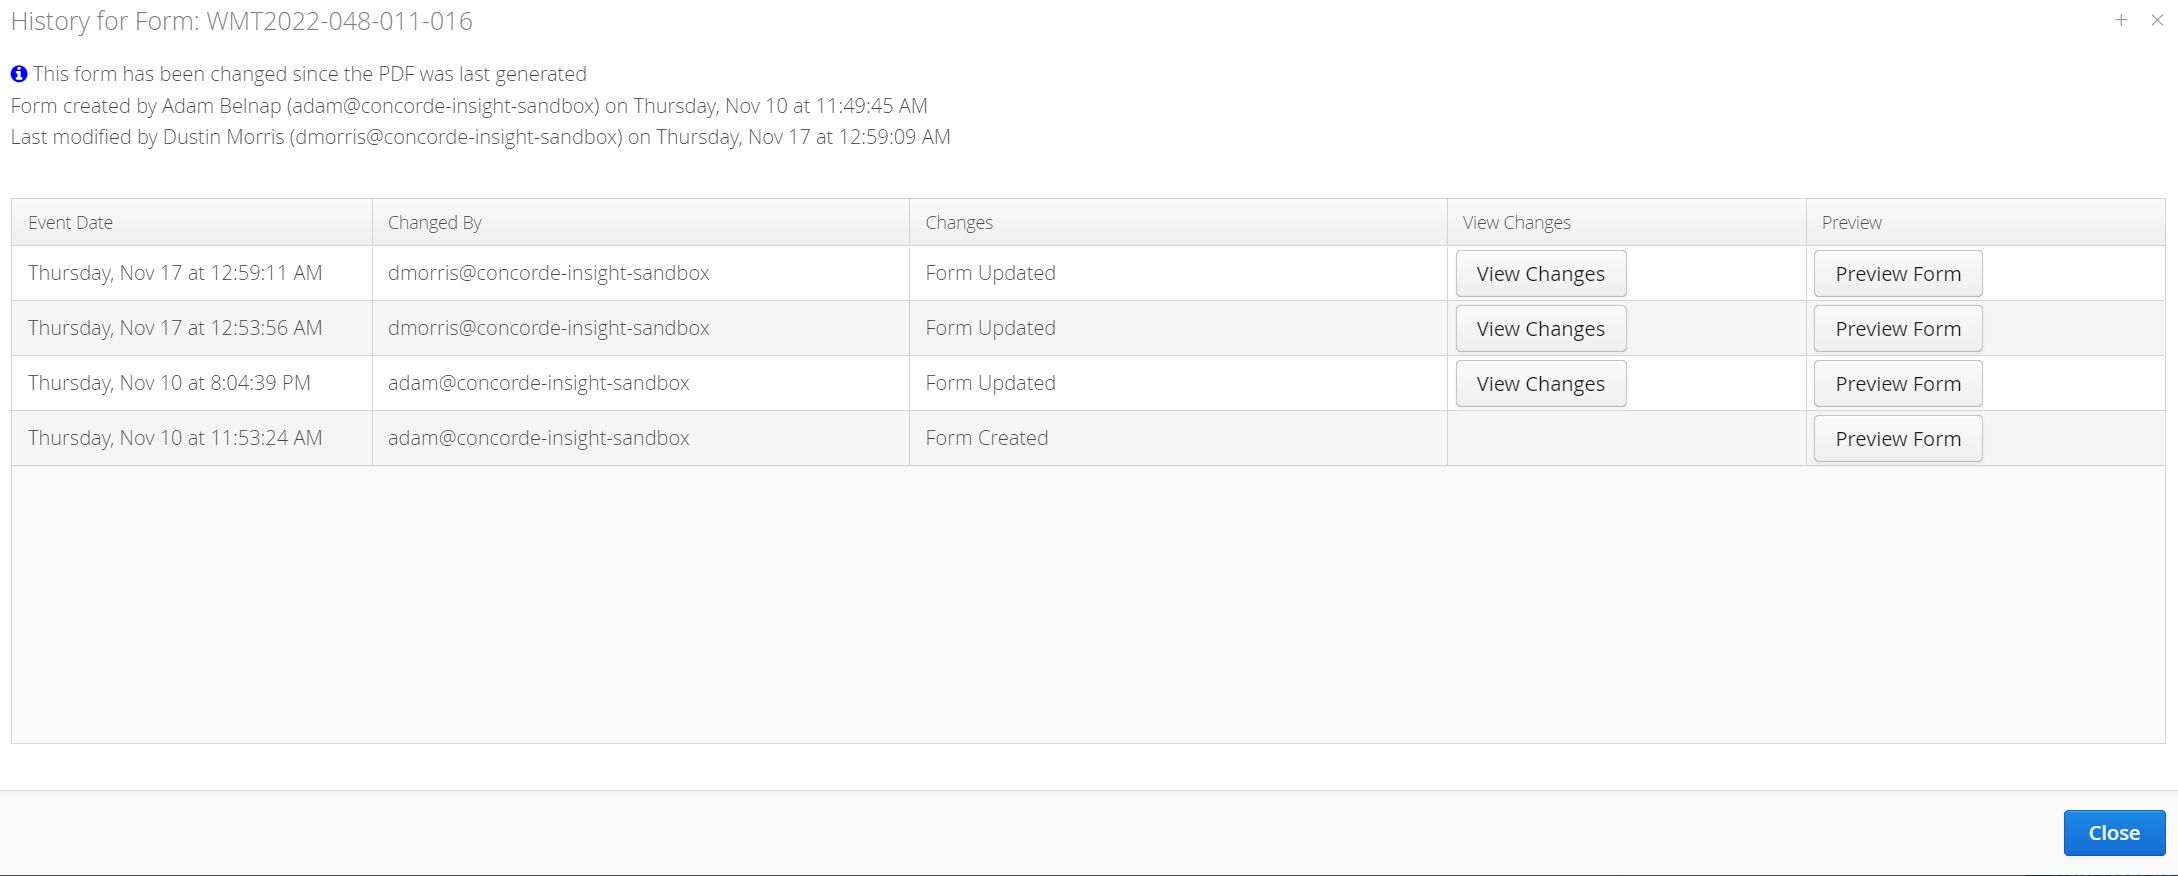
- It’s also possible to view a history of changes to a form by clicking the Form History button beside the Show Audit Trail? checkbox. This is located at the bottom left of a form.

- This window will include a list of all changes, the date of those changes and the user responsible. Authorized users can also click View Changes to review what was changed and Preview Form to preview the form in its previous state.
How to Use Restrict to Phase
Forms that track activity against a WBS Schedule may include a Restrict to Phase. This field can assist users with quickly associating all line items on the form to a specific WBS Activity.
Locate the Restrict to Phase field after starting a new form. Select the appropriate WBS Activity that relates to the work being recorded on your form.
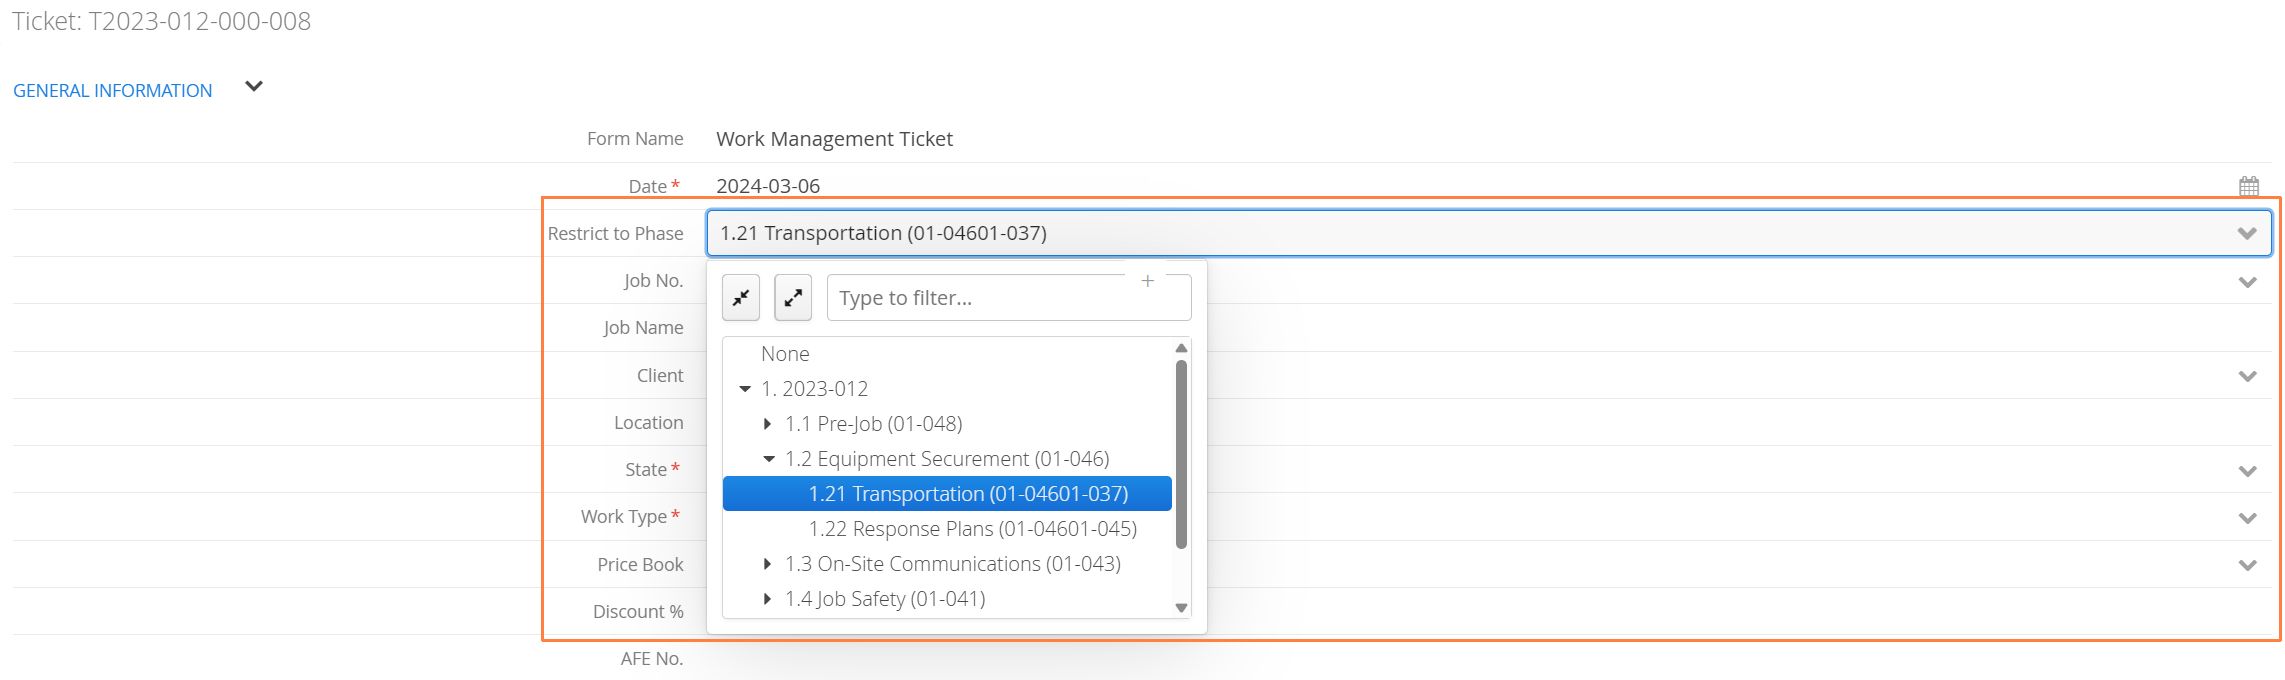
Once an activity is selected, every newly entered line item on the form will automatically have the phase selected. The Phase column will also be locked.
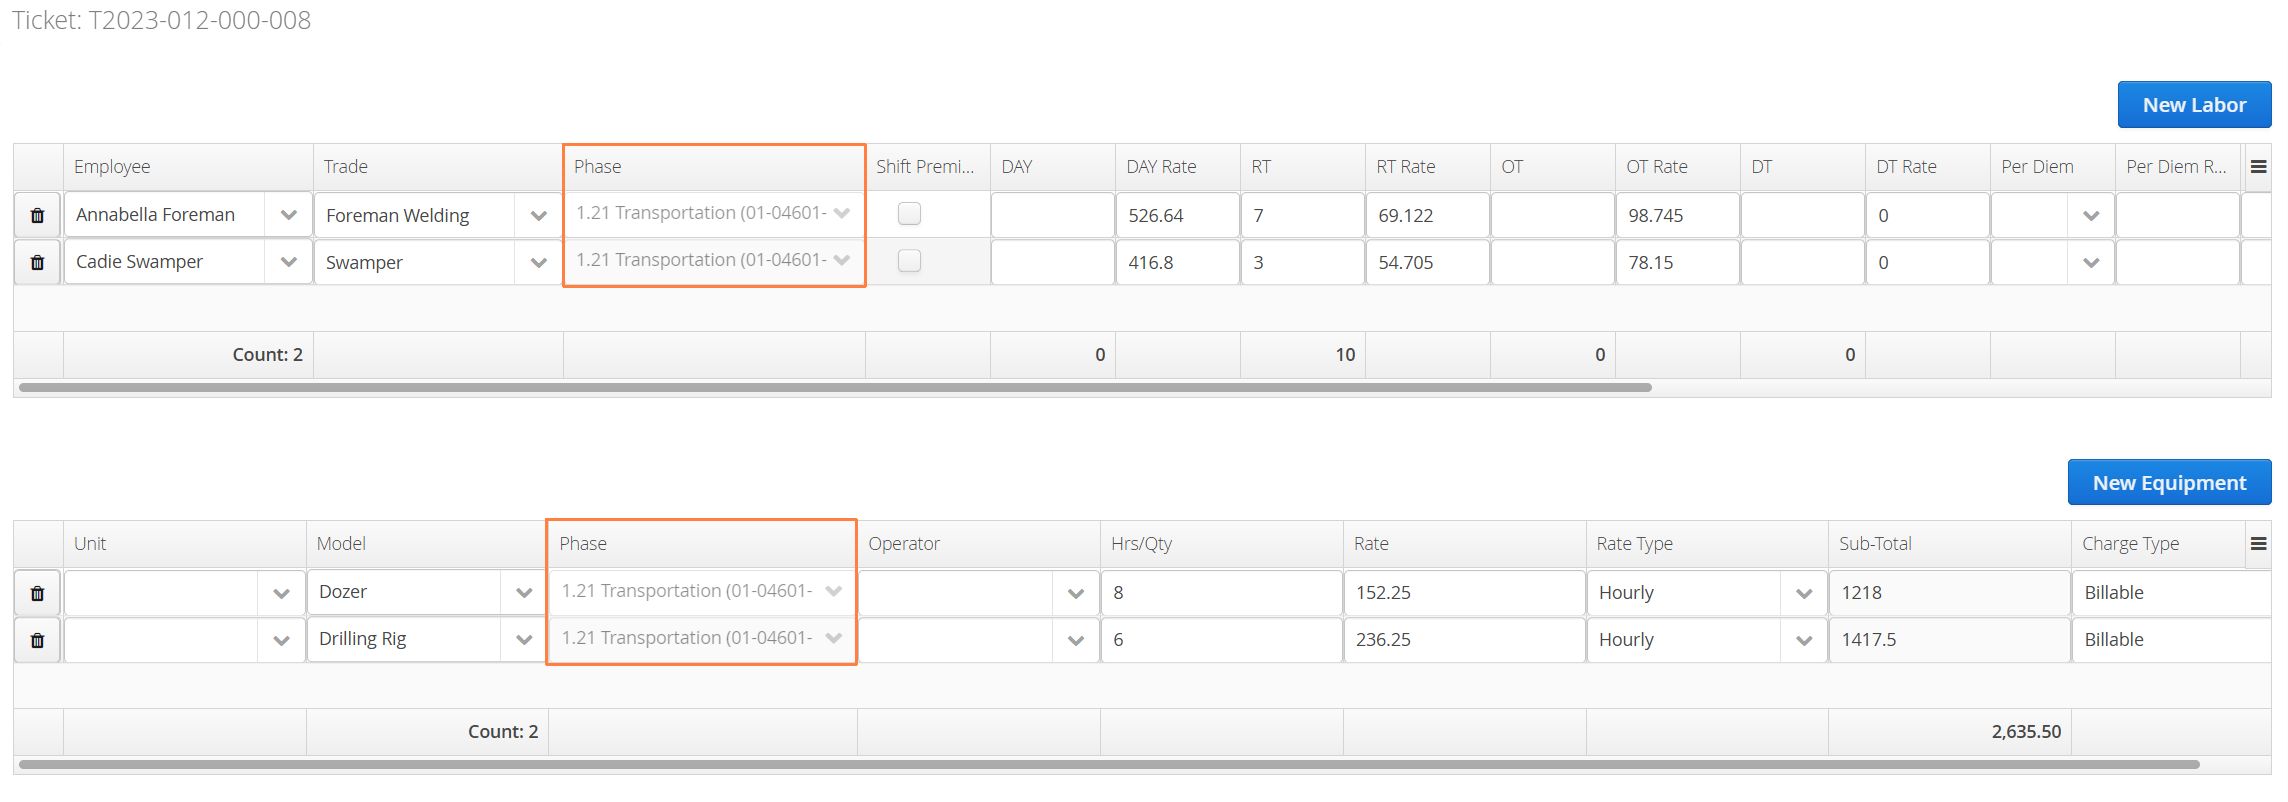
If multiple activities are being recorded on a single form, it’s recommended to start by using the Restrict to Phase field that relate to the majority of the work, entering those line items first, then returning to the Restrict to Phase field and selecting None.

When None is selected, Aimsio will not retroactively overwrite line items that have already been entered. The Phase column will no longer be locked and newly entered line items can be manually associated to a different WBS Activity.
If users select the wrong Restrict to Phase activity, after the work has been recorded, Aimsio will override all existing line items to the newly selected phase.