Job Board Overview
The Job Board enables dispatching and operations staff to view and manage the landscape of Jobs in the form of a Job Card.
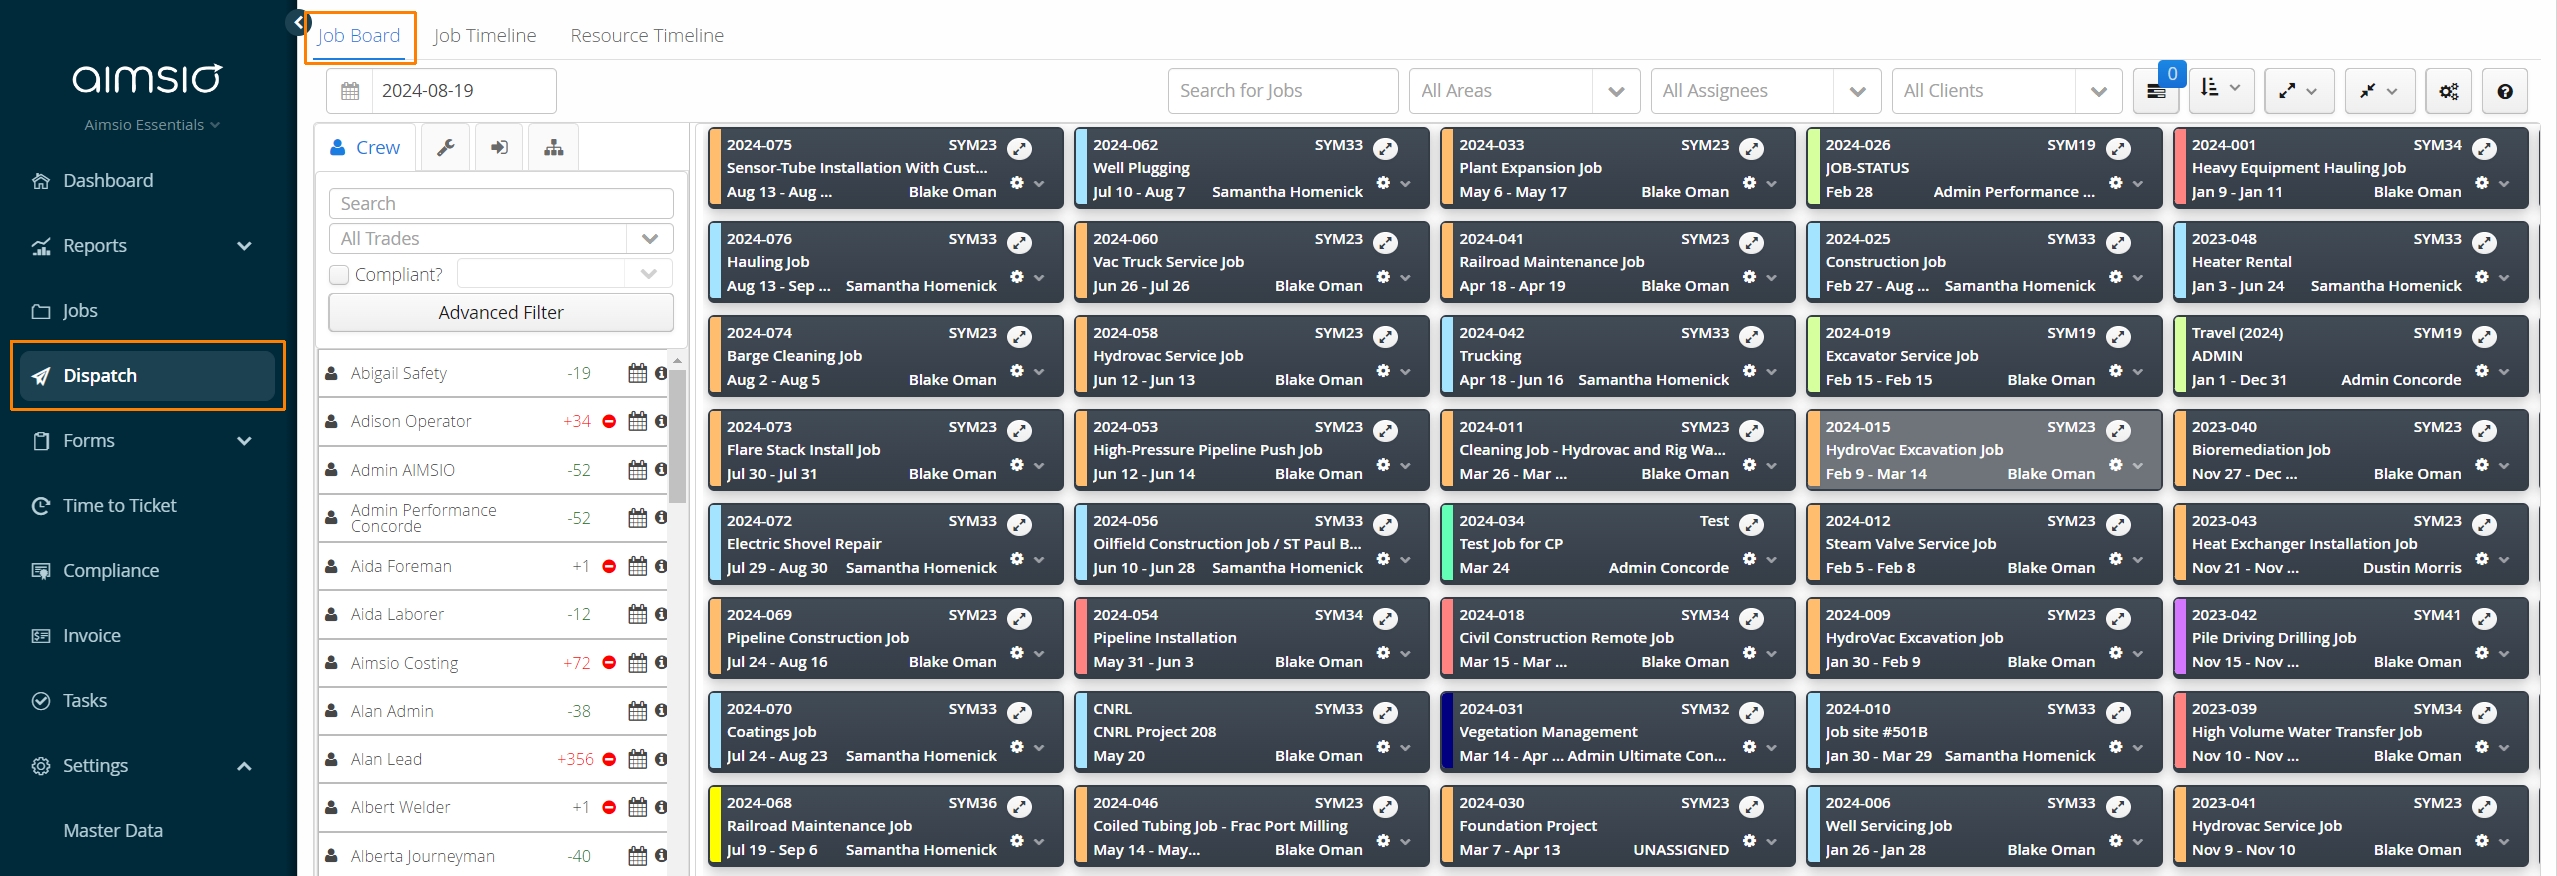
Time is fixed to a daily snapshot, meaning you’ll always be viewing jobs and assignments that are active based on the selected reference date (defaults to present day).
To Dispatch Crew (Employees) and Equipment, resources can be dragged and dropped onto a Job Card, assigning them to the Job. Assignment dates can then be modified if required.
Once resources have been scheduled on a Job Card, dispatchers can send crew custom messages or assignment confirmation requests, if required.
Job Board Filters

Global Filters (Left)
-
Free Filter: Search jobs board by freeform text.
-
Area Filter: Filters Jobs and available Resources by Area.
-
Assignee Filter: Search Jobs by the Assigned User.
-
Client Filter: Search Jobs by Client.
Employees and Equipment must be associated to an Area or no resources will be displayed when using the Area filter.
Global Options (Right)
-
Task List: See a running list of Dispatch-related tasks.
-
Sort: Sort Jobs by Start Date, End Date, Supervisor Name, Company Name, or Job Number.
-
Expand: Expand (open) all Job Cards.
-
Collapse: Collapse (close) all Job Cards.
-
Color Settings: Choose whether colors correspond to an assigned Supervisor, Area, or Client.
-
Icon Legend: Job Board icon definitions.
Dispatch Colors
The Color Assignment settings determine what each color represents on both the Job Board and Job Timeline. Aimsio will look at the information for each Job to determine what color to associate for its Client, Area or Supervisor.
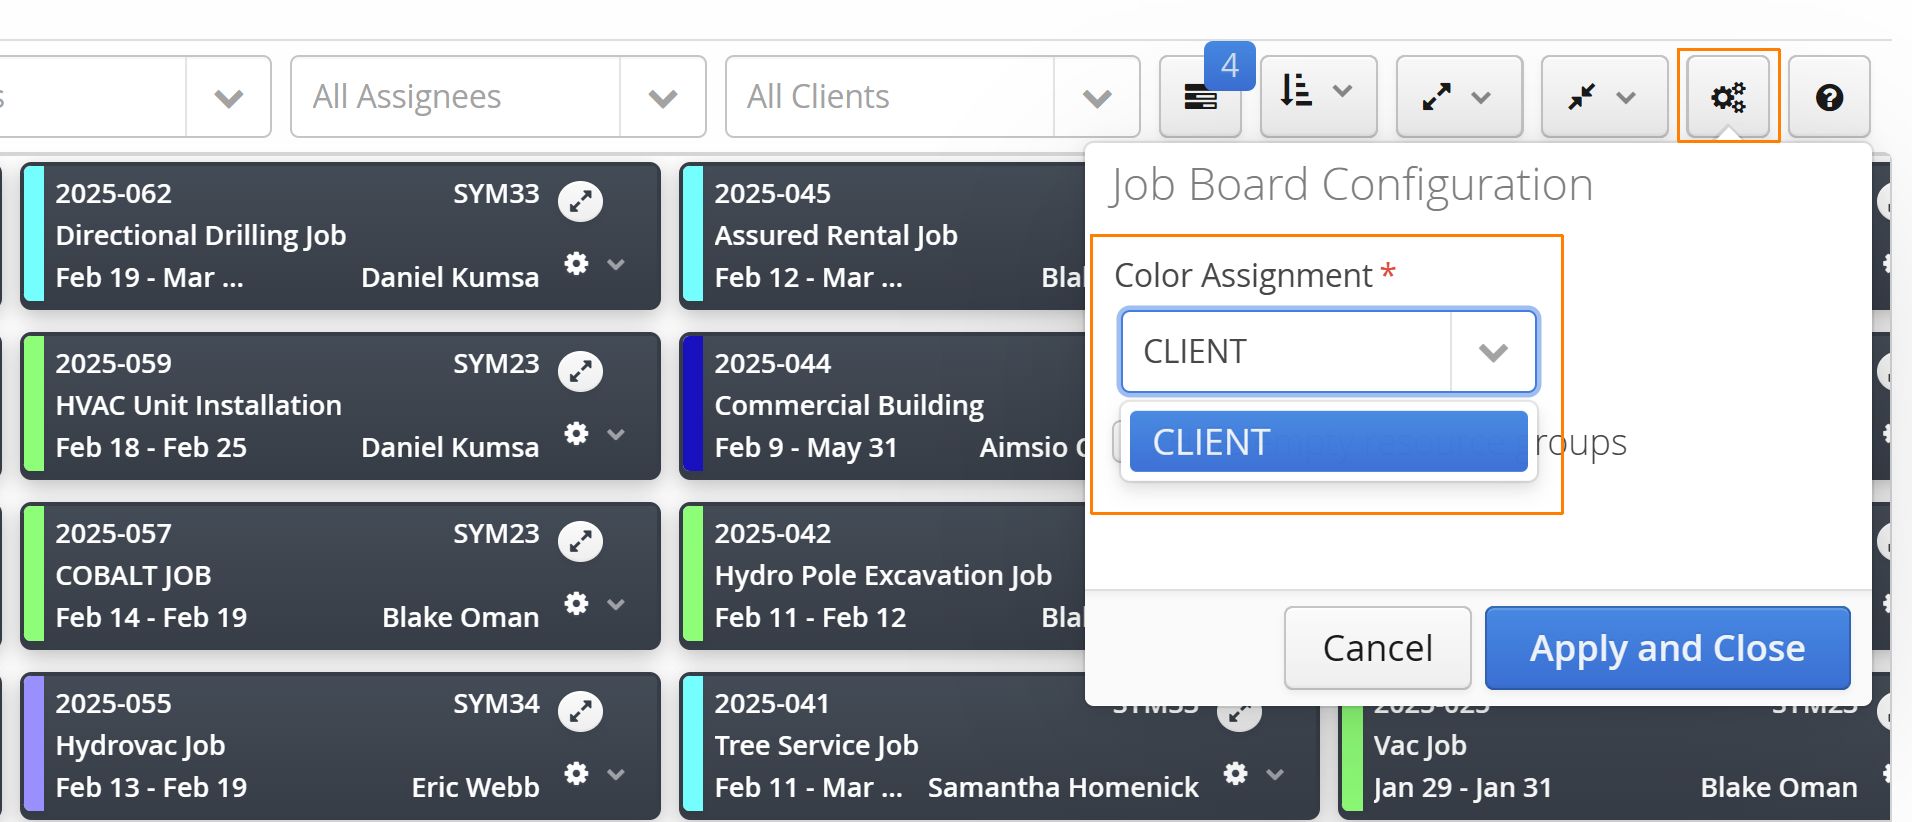
These are global settings and will change how the Dispatch Job Board and Job Timeline are seen by every user in your account.
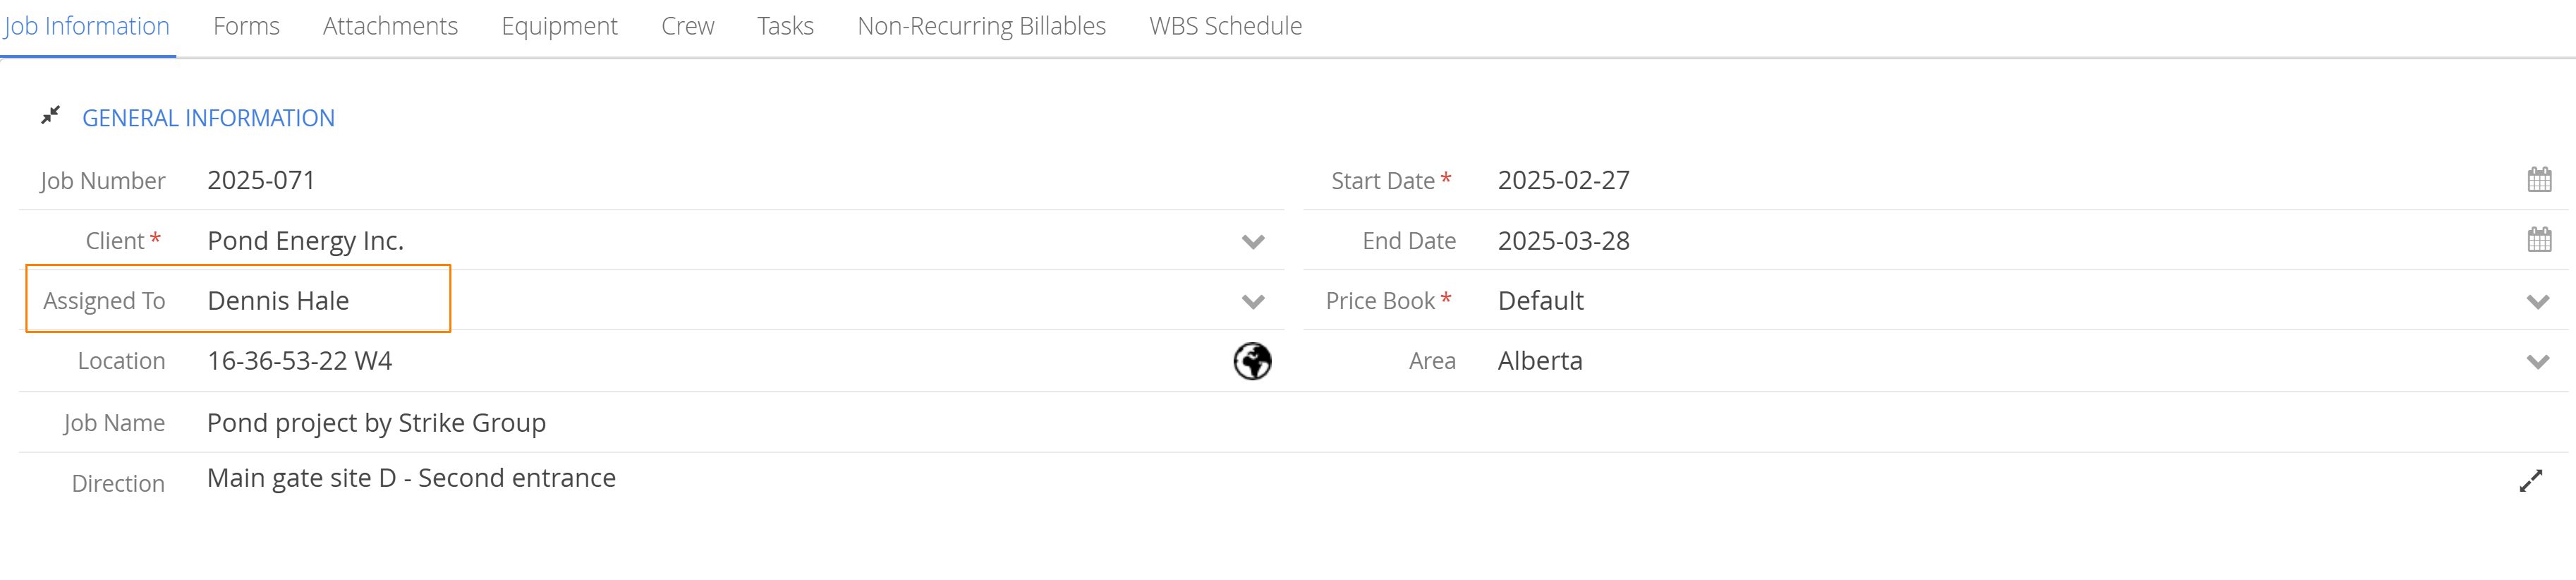
Note that Supervisor refers to the ‘Assigned To’ field on the Job Form.
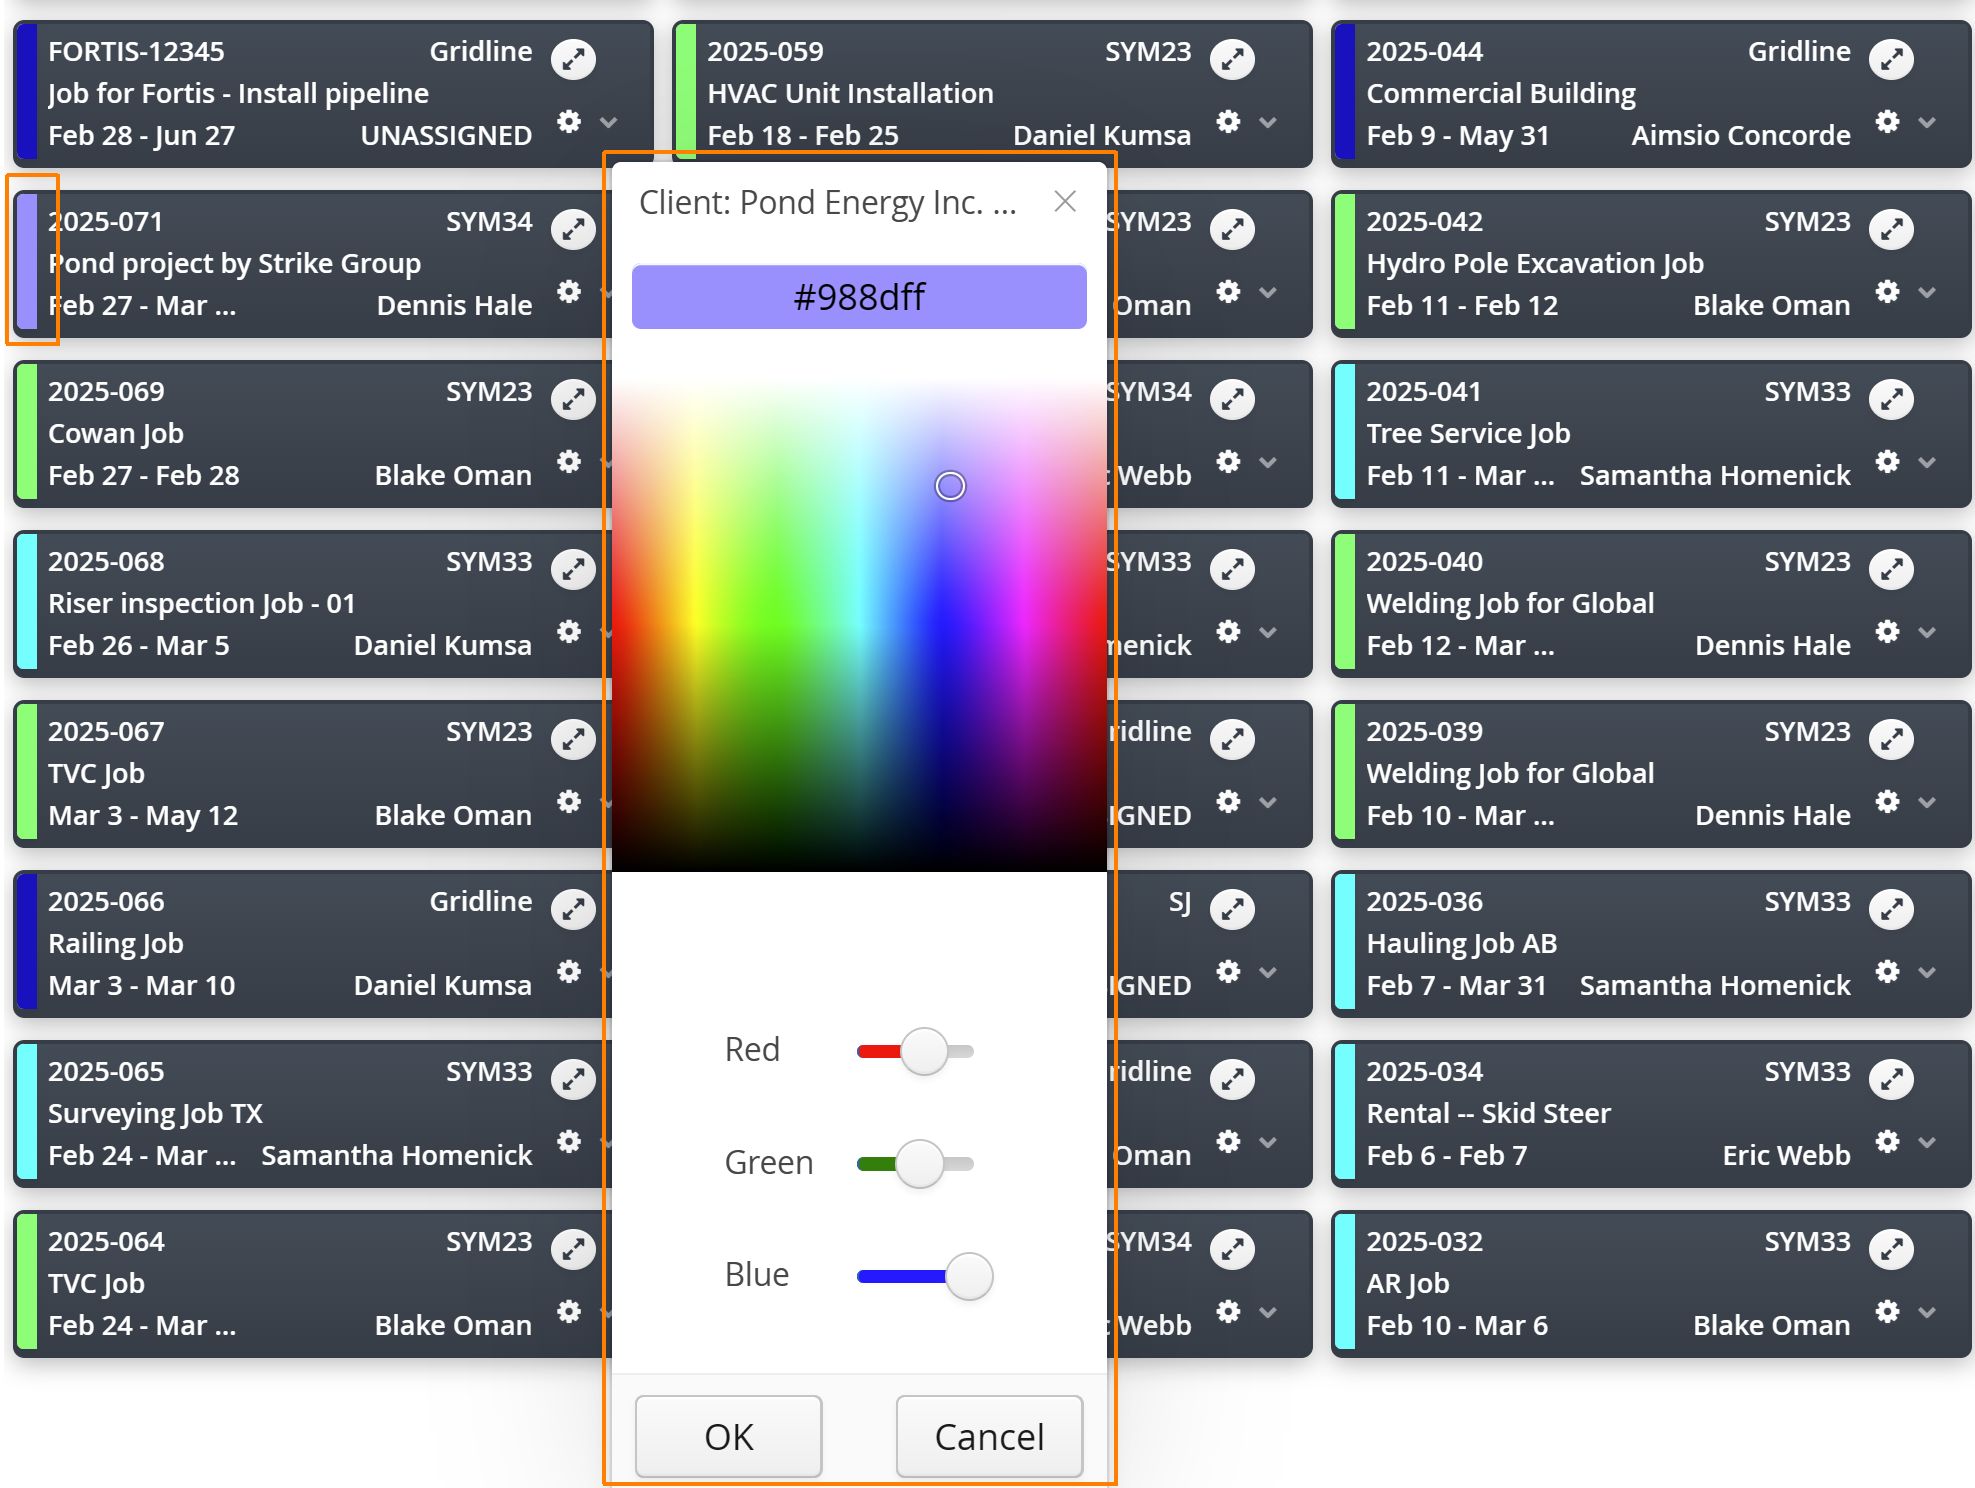
At first, Aimsio selects a random color and associates it to whatever value it can find. If Aimsio can’t find a value for the color assignment, it will display as black. To change a color, simply click on the color bar to the left of any Job Card. Type in a custom hex code, or click and drag the color slider.
Crew and Equipment Filters
-
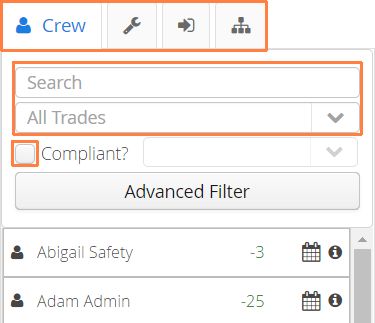
(Top) Filter the type of resource to be assigned to the Job Card
-
Crew
-
Equipment
-
Placeholder
-
Resource Template
-
-
(Middle) Free-text search for any resource by name, or filter by Employee Trade / Equipment Class
-
Compliant Checkbox: Filter whether available Crew are compliant as per our Compliance module.
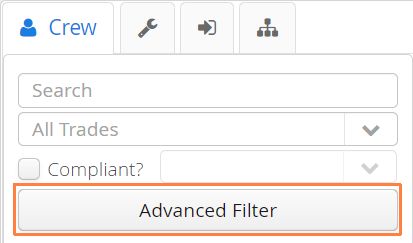
Advanced Filter
The Advanced Filter provides more granularity when filtering for available resources.
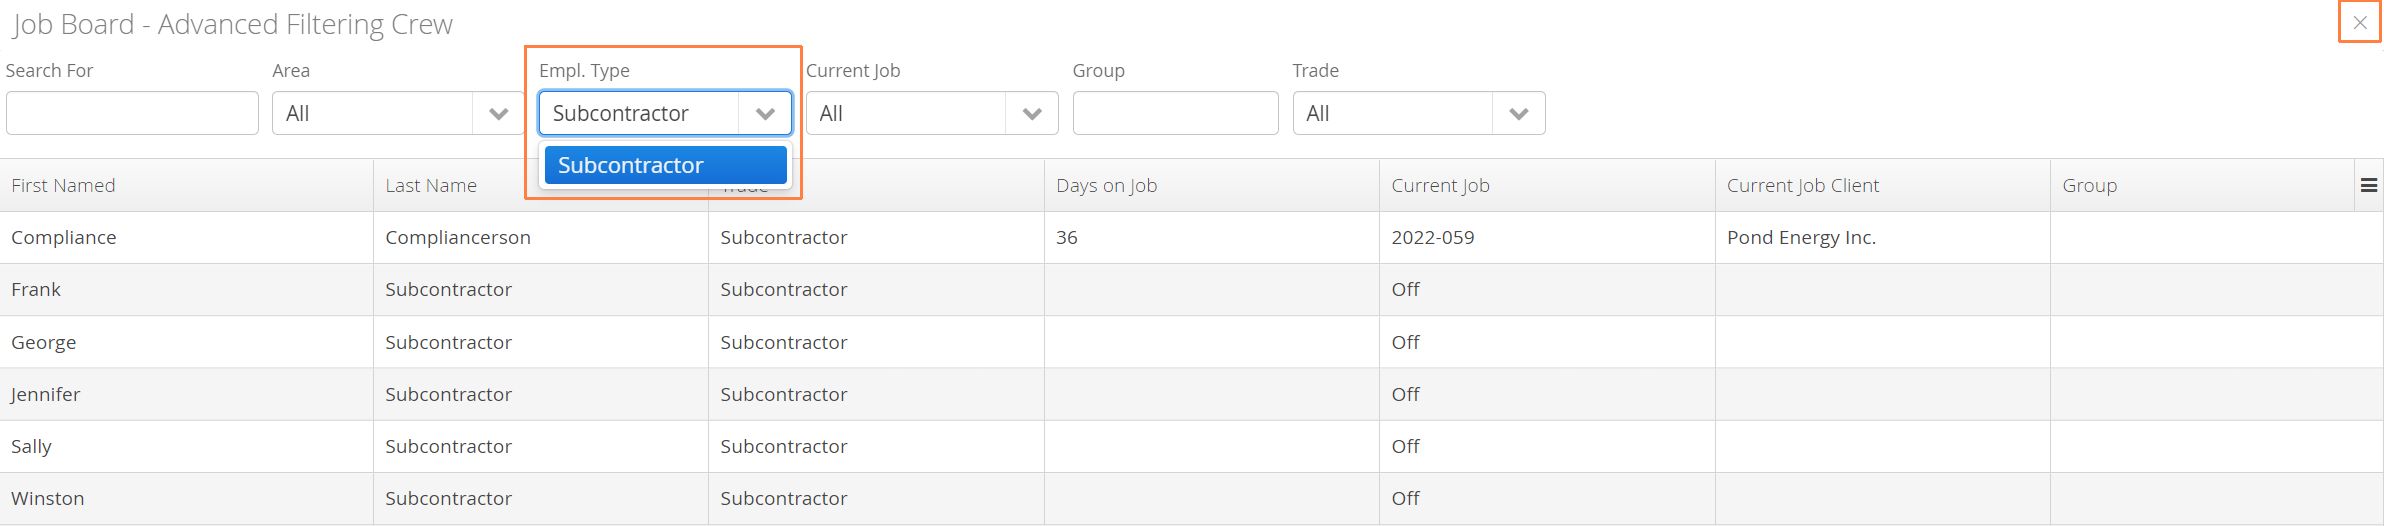
Search for resources by their associated Area, Employee Type (ie: Direct-hire, Subcontractor), or Group. Once your parameters are set, exit the Advanced Filter by clicking the X at the top right-hand side of the window.
Job Card (Closed)
-
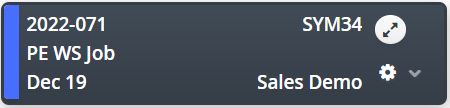
When a Job Card is closed, it will display the following information:
-
Job Number (top left)
-
Start Date - End Date
-
Client Name
-
Name of Aimsio users in the Assigned To field on the Job
-
Job Card Actions / Options (bottom right)
-
-
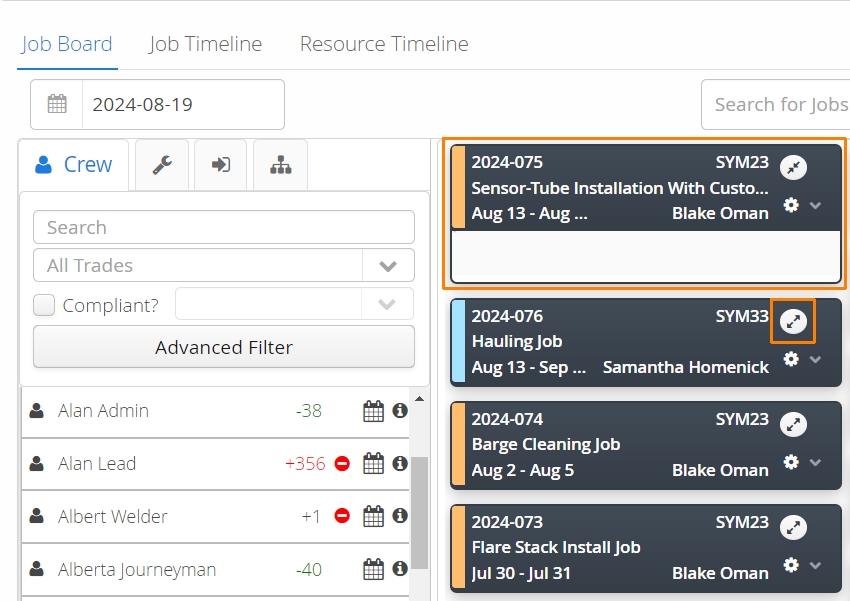
To expand (open) the Job Card, click on the icon located on the top right corner.
Job Card (Open)
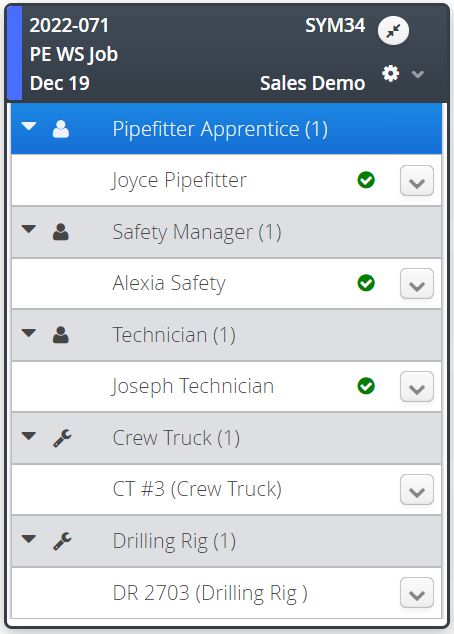
- When a Job Card is open, it will display any assigned Crew or Equipment resources, sorted by their Labor Trade or Equipment Class.
-
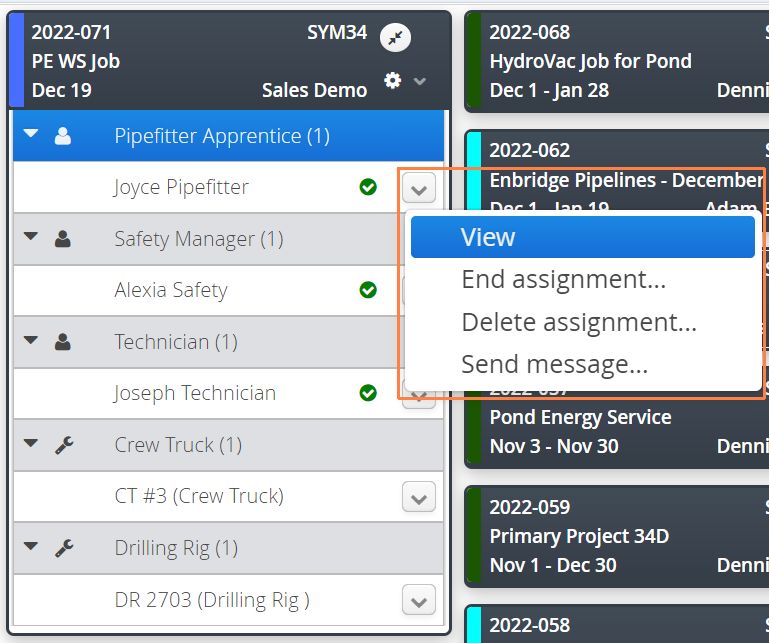
Click on the action button to the right of an employee name to View/Edit their dispatch assignment dates, End their assignment, or Delete the current assignment. You can also use this menu to send a one-way email or SMS message.
-
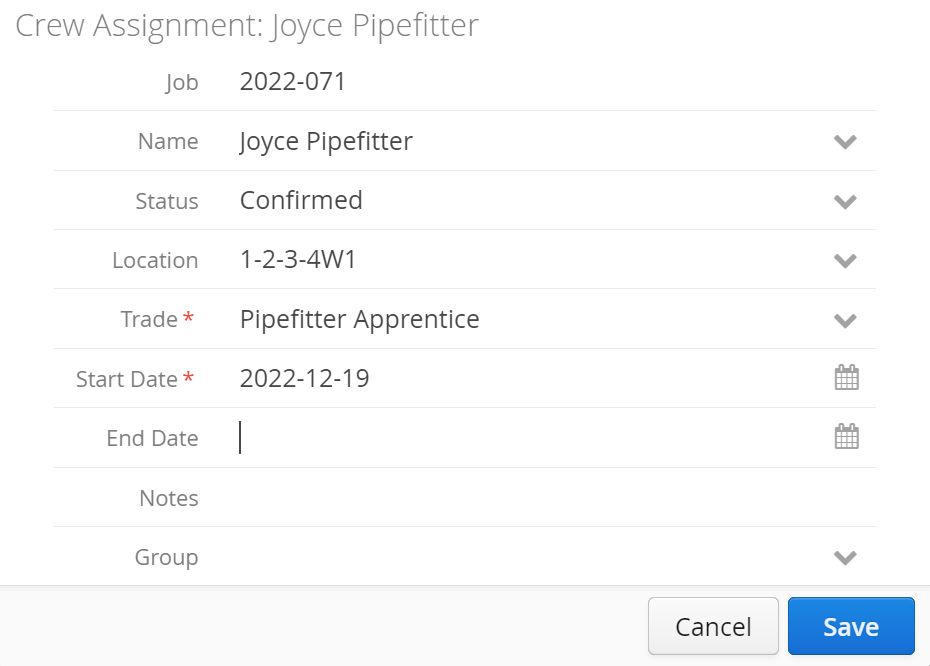
Crew assigned to a Job will use their default Trade, but this can also be changed and will only apply for the job they are currently assigned to.
How to Assign Crew or Equipment to a Job Card
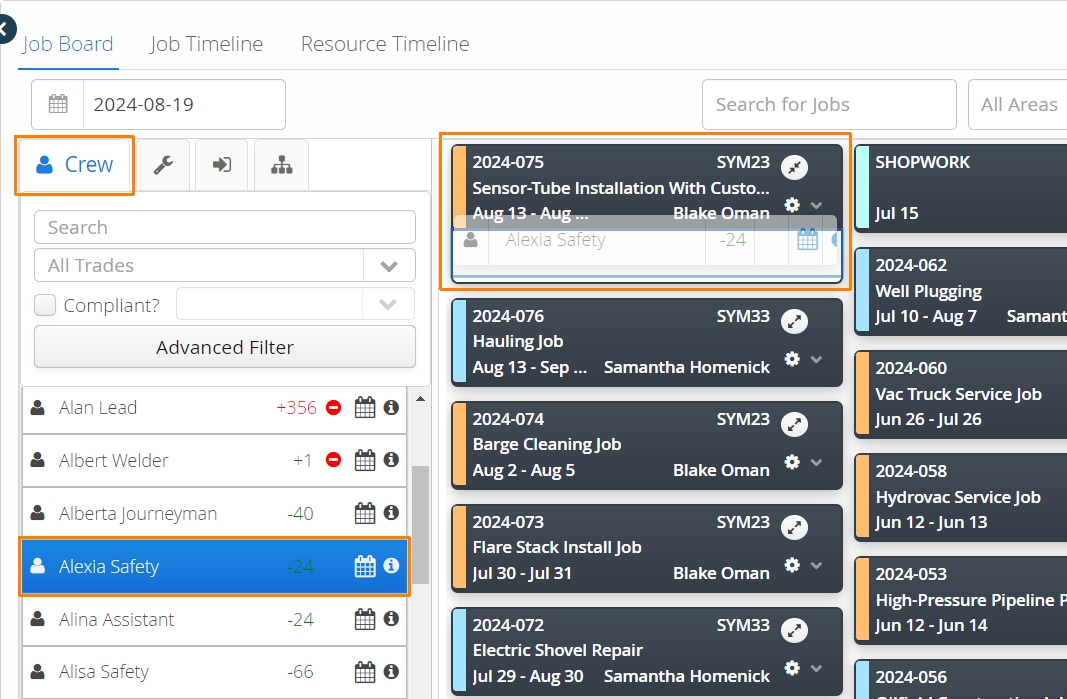
On the Job Board, Employees and Equipment can be assigned by dragging and dropping them onto a Job Card. Resources can be dropped one-by-one, or multiple resources can be selected at once and dragged over together.
Employee and Equipment schedules inherit a Job’s End Date when being dragged and dropped onto a Job Card. If a Job does not have an End Date, the resource will be scheduled indefinitely (TBD) on the Job.
While it’s possible to adjust schedules after they have been assigned, the process of dragging and dropping resources ends up being more suitable for short term Jobs, or Jobs where the resource will be allocated for the entire duration of the Job.
If users want more control over the dates of resources when scheduling, using the Job Timeline view is generally recommended**.** This view can be accessed from a Job Card (covered at the bottom of this article), or by navigating to the Job Timeline tab from the Dispatch page.
- Identify which Job Card you’d like to add resources to. Click the expand icon on the top right of the Job Card to open it to view any previously scheduled resources.
- Ensure you have the correct resource tab selected (Crew / Equipment). Locate the resource you would like to assign then left-click and drag and drop the selection into the Job Card:
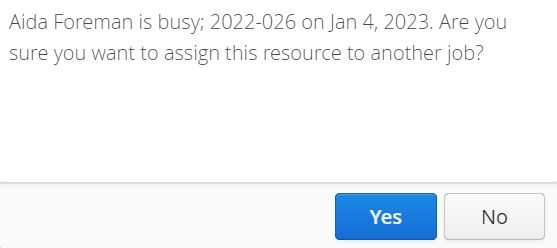
If a resource is already assigned to another Job for this day, an alert will popup asking you to confirm if you want to assign the resource to another job. You may adjust your resources accordingly after this, or click Yes to continue if assigning this resource to another job on the same day is your desired outcome.
- Resource is now assigned to the Job. Notice a busy icon placed to the right of the resource. The resource will stay assigned to this job going forward until the Job has ended, or the individual assignment is given a strict end date.
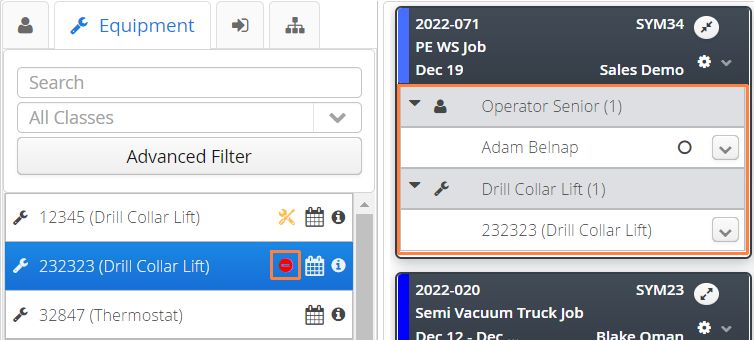
To view what resources have been assigned to a Job Card, click the Expand icon on the top right of the Job Card.
Crew / Equipment Schedules
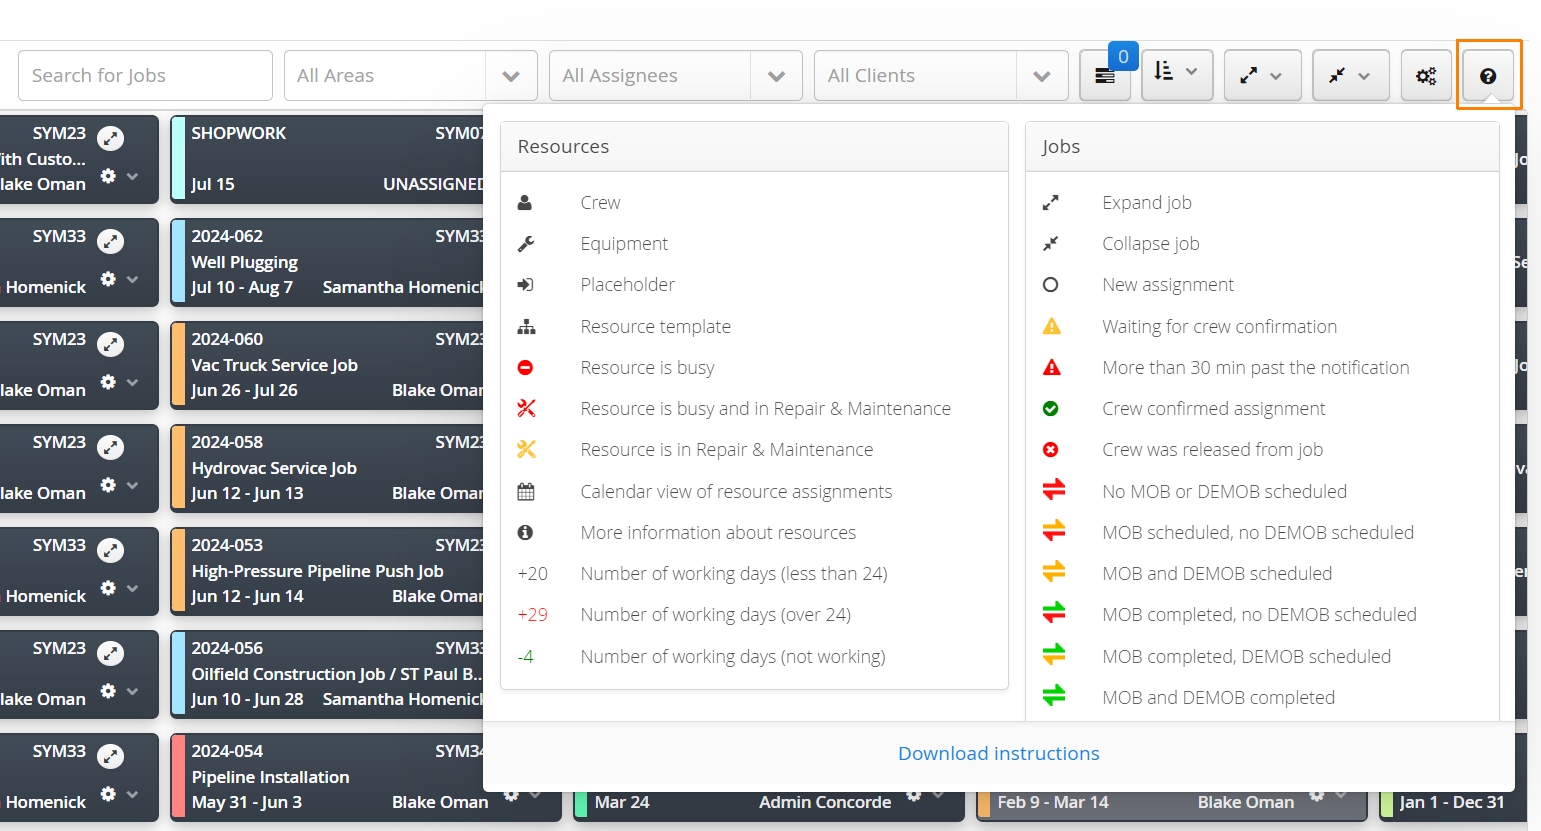
Aimsio’s Job Board can provide a quick glance at the working schedule of a given Employee, or piece of Equipment. Click on the question icon on the far top right of the Job board to bring up a legend defining what the numbers and icons on the Job Board represent.
Once a resource has been assigned to a Job, a number will appear to the right of the name indicating how many consecutive days a resource has, or hasn’t been working.
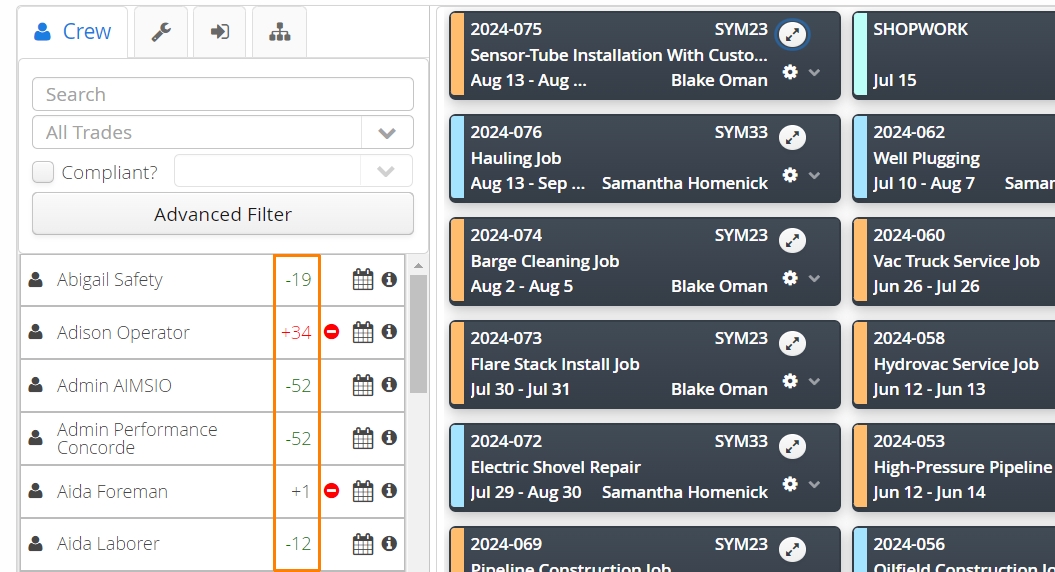
Red numbers beside an Employee indicate that they have been scheduled on the same Job for over 24 days.
Green numbers indicate the number of days the Employee has not been working since their last scheduled assignment.
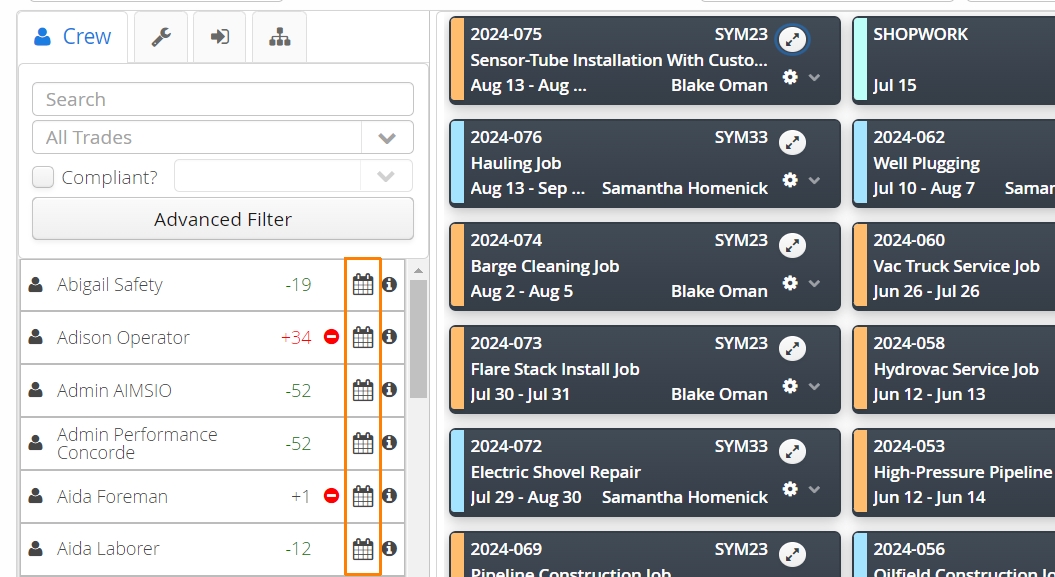
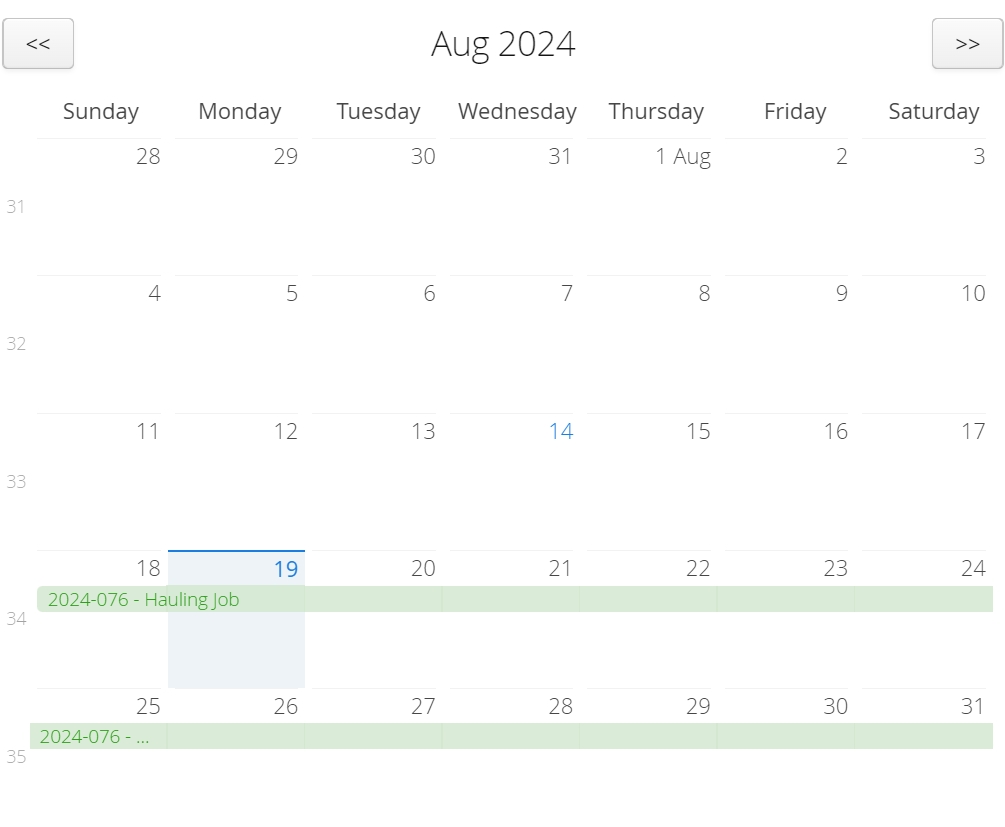
Clicking on the calendar icon beside Crew or Equipment will bring up the current schedule.
Resource Groups
Resource Groups are groups that can be created specifically for a Job, organizing the way your resources are scheduled.
Resource Groups can only be created using the Job Board.
Common examples of groups we see are based on shift work (e.g. Day Shift or Night Shift).
Resource Groups can be created under a Job using the Dispatch Job Board by clicking on the gear icon on a Job Card.
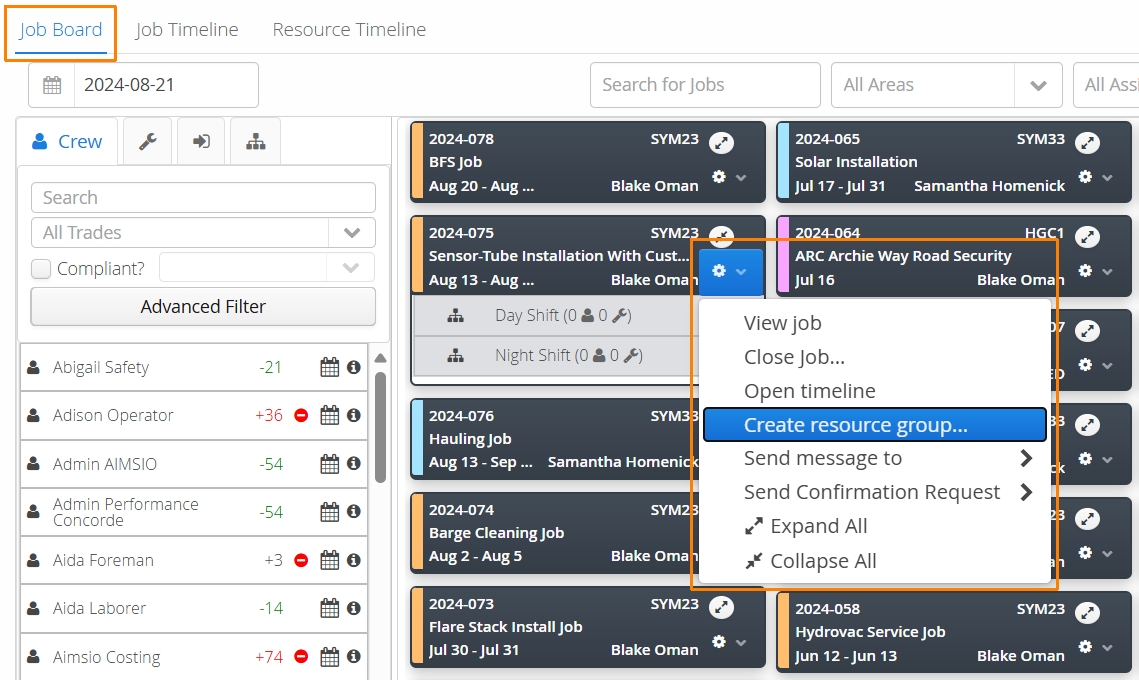
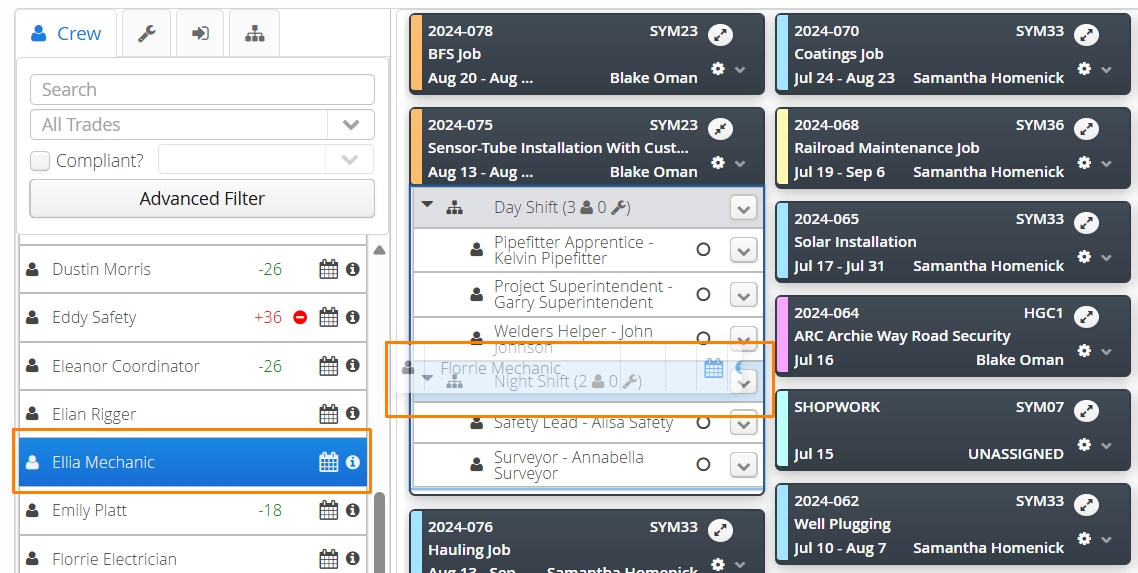
Once groups are created, resources can either be dropped into a group..
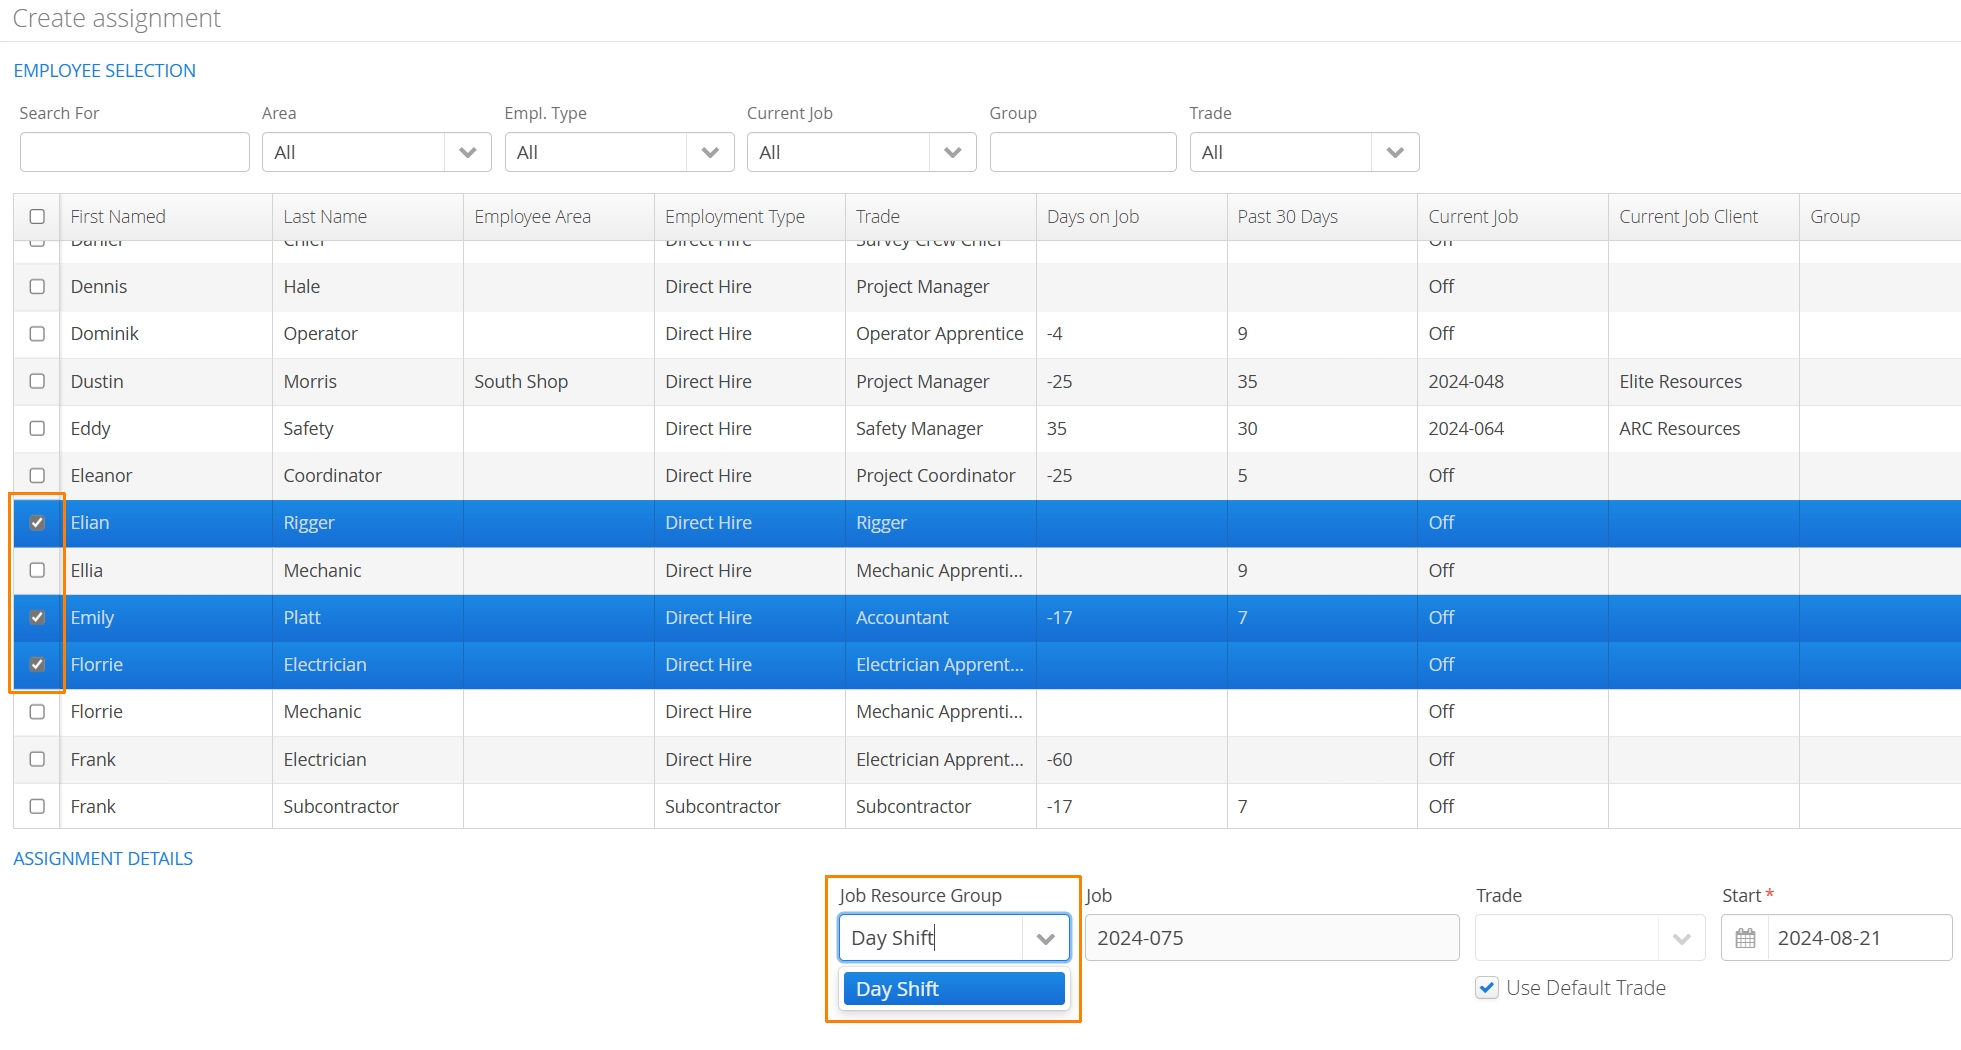
or scheduled into a group directly using the Job Timeline or Resource Timeline.
Once your resources have been scheduled into a group, users will be able to select the Resource Group field on a Ticket or Crew Timesheet before using the Pull Schedule Resources action.
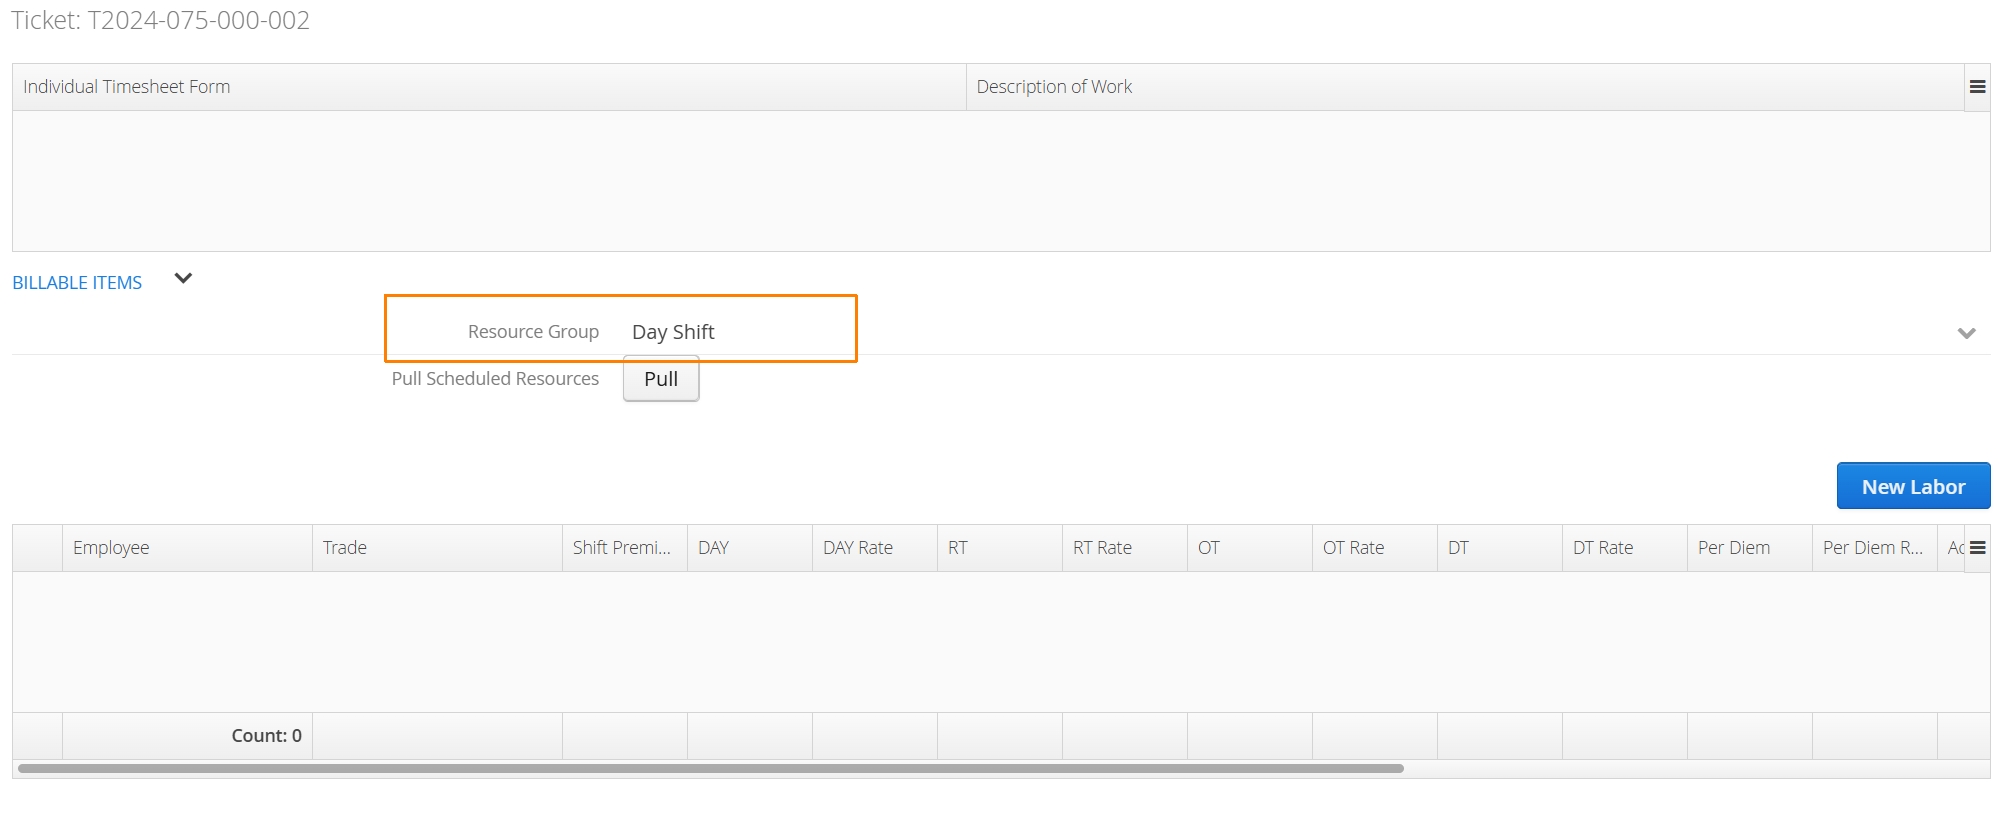
This will pull only the selected group that has been scheduled onto the form.
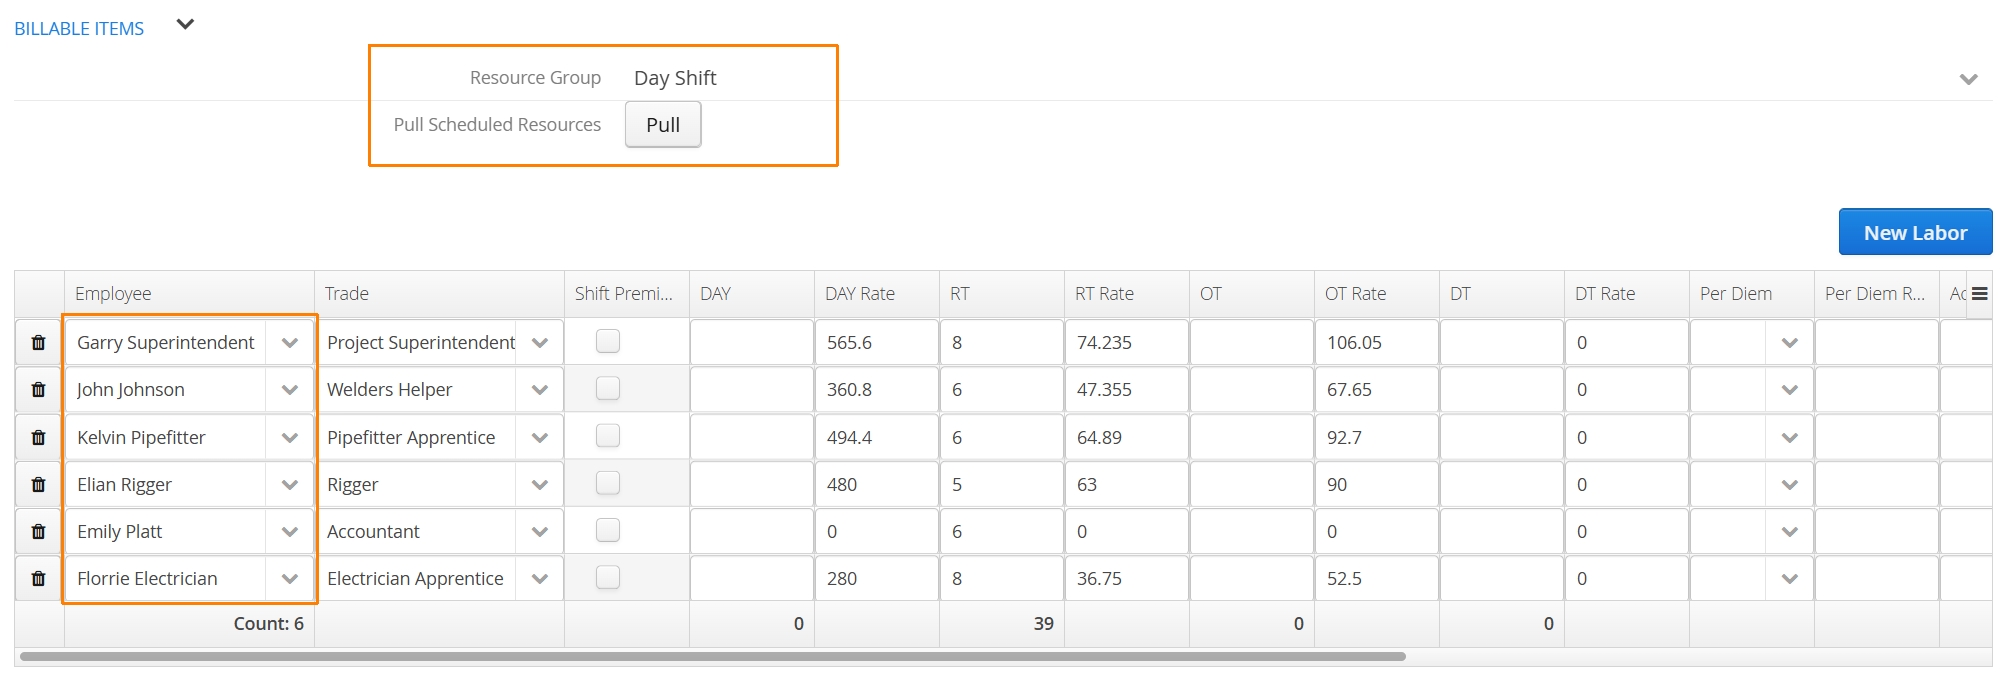
Accounts interested in this feature will need to get in touch with our support team for implementation.
Resource Templates
Resource Templates are useful for users that need to consistently dispatch groups of resources together. Resource Templates can only be used from the Dispatch Job Board.
Authorized users can create Resource Templates in Master Data. For more information on creating Resource Templates please see: How to Create a Resource Template.
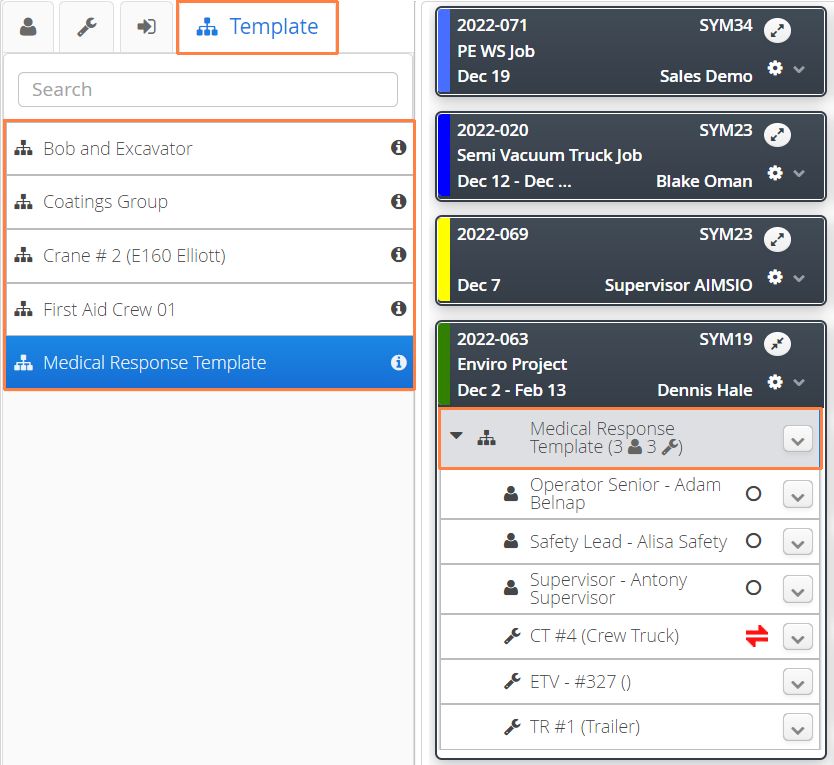
To assign a Resource Template to a Job, click on the Template tab using the left resource menu while viewing the Job Board. This will display a list of all premade groups. Drag and drop a group to a Job Card.
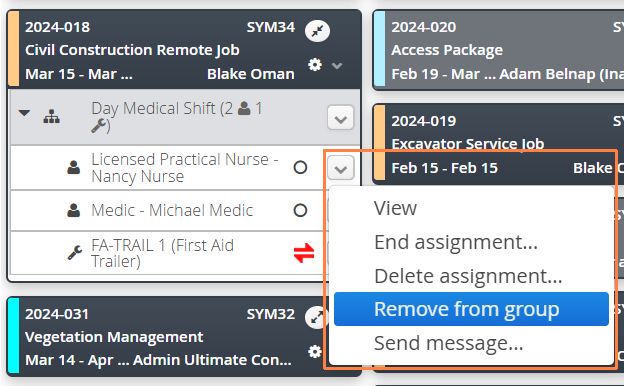
- To delete a Resource Template, all resources must be removed from the group first. Use the action menu located to the right of a Crew resource and select Remove from Group or Delete Assignment.
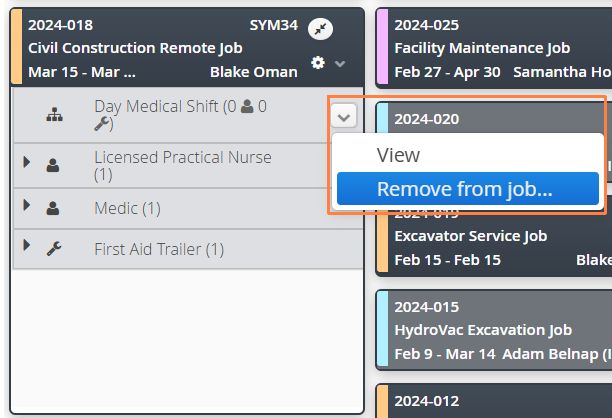
- Once the group is empty, use the action menu and select Remove from Job.
Placeholders
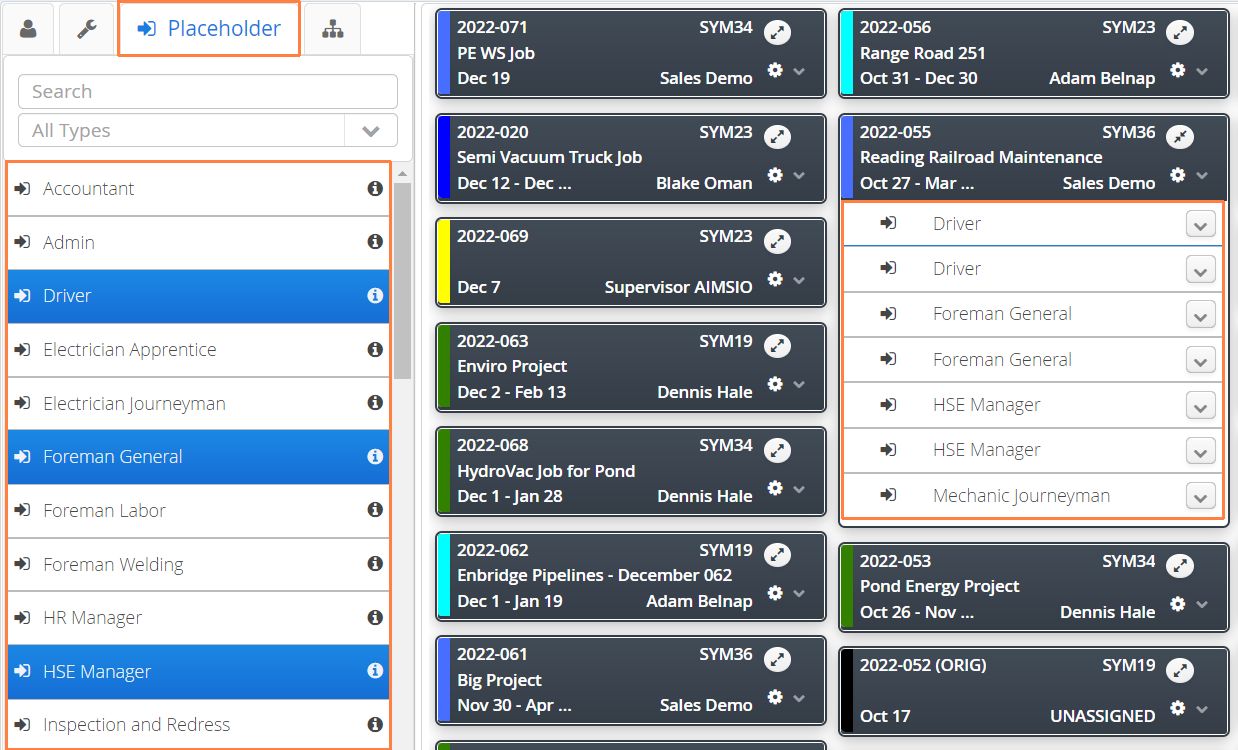
Placeholders are used to plan for an upcoming job, prior to knowing which resources are available. Placeholders allow your Employee Trades and Equipment Classes (both are defined in Master Data → Billable Items) to be assigned to a job.
Placeholders can be ‘filled’ by dragging and dropping employees over the Placeholder. Employees will inherit the Trade of the placeholder in circumstances where the Trade differs from their default Trade.
- Once you have the available resources, simply drag the crew or equipment overtop of the placeholder to fill the position.
Sending a SMS or Email message to Crew
Are there specific directions your crew needs in order to get to the job site? Do you need to notify your crew that they need to start earlier/later than you originally communicated?
You may send a notification to your crew assigned in the Job card. This allows you to communicate to all crew members at once with the click of a few buttons. Crew cannot reply to this message, but dispatchers can decide whether they want to send a SMS or Email notification.
This requires the Aimsio User to have their Phone Number entered in Master Data > Employees in order for the crew member to receive SMS notifications. Admins will have access to making these changes but your specific user permissions may not have access to Master Data, if this is the case please reach out to your Aimsio Admin to add the phone number for this specific crew member.
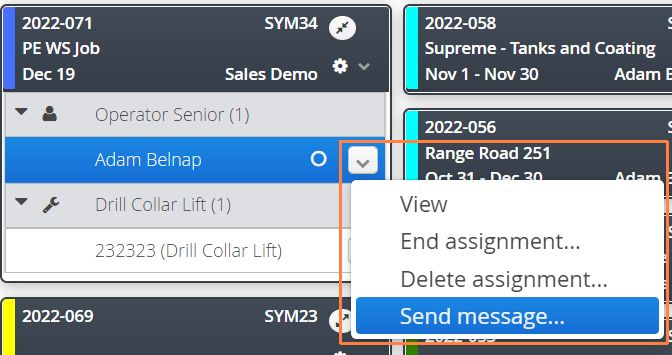
- Click on the Action button next to the crew member. Select Send message.
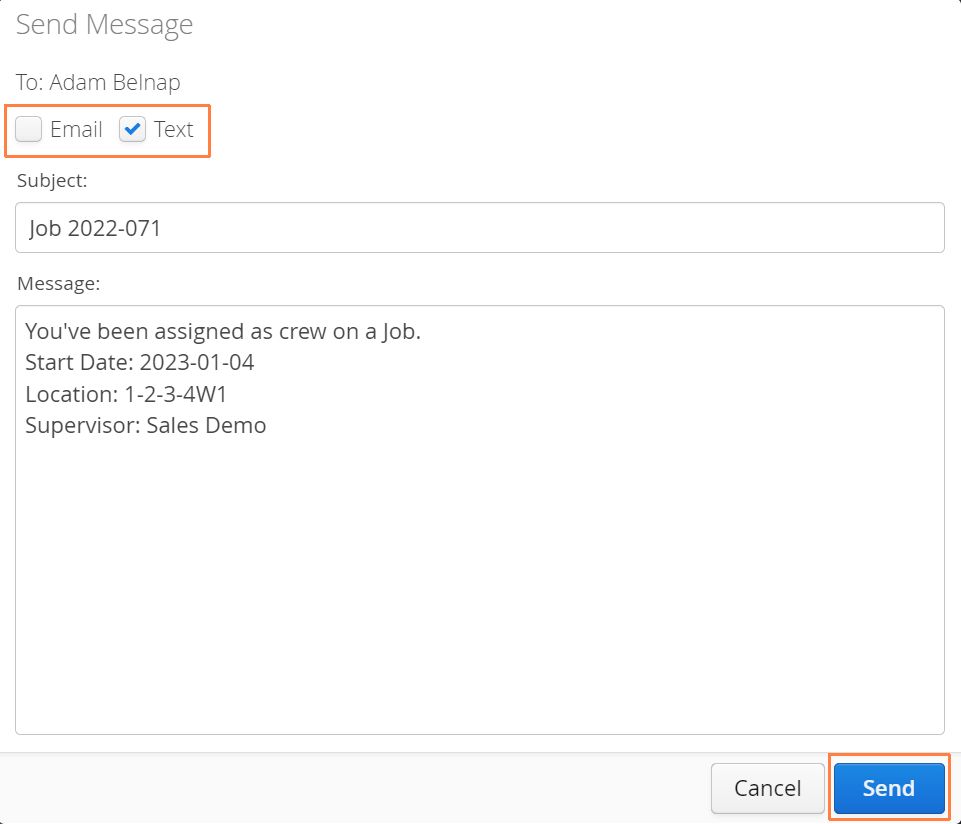
- Make any changes to the method of communication (Email or Text), Subject and Message. When finished, click Send.
Send a message notification to multiple crew members
- On the Job Card, hold down the CRTL key on your keyboard to select multiple crew members. Use the Gear icon and select Send message to > Selected Crew.
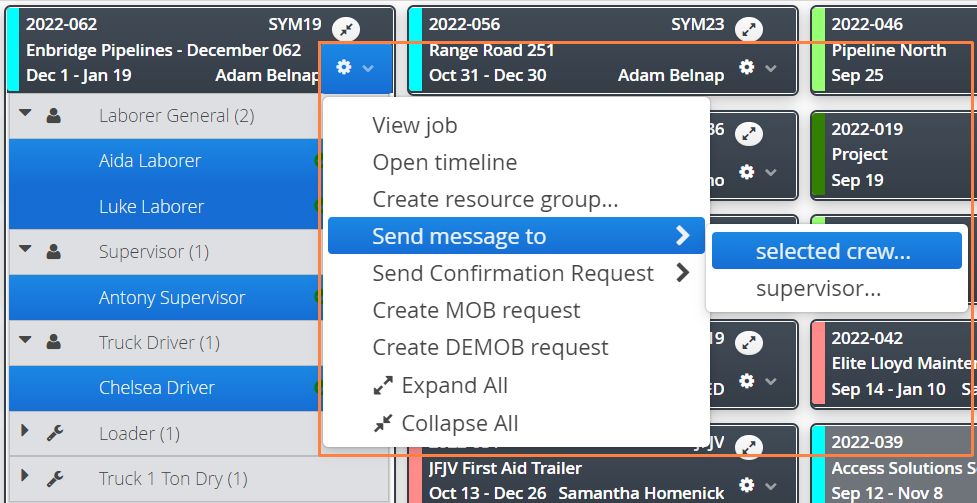
- Selecting Supervisor will send the message notification strictly to the Assigned to User of the Job.
Confirmation Requests
Selecting Send Confirmation Request, instead of Send Message, will help you get confirmation from your crew on whether or not they are going to be able to attend the job that day. This message cannot be edited and will send only as a SMS notification.
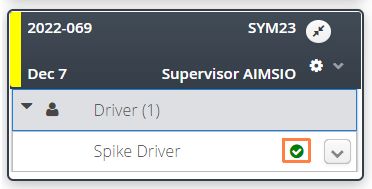
Selected Employees will receive a text message and confirm their assignment by texting back the Job Number (included in the initial message). Aimsio will update the users status on the Job Board once they confirm and Aimsio will indicate whether they’ve taken longer than 30 minutes to respond.
Aimsio Employees must have their Phone Number entered in Master Data > Employees in order to receive SMS notifications. Admins will have access to making these changes but your specific user permissions may not have access to Master Data, if this is the case please reach out to your Aimsio Admin to add the phone number for this specific crew member.
Job Card Timeline: How to Adjust Assignment Dates for Multiple Resources
It’s common for assigned crew to only be working for a set amount of days on a job. They may finish an assignment, then move to the next job. When you first assign crew to a job, their assignment End Date is set to TBD. If no value is set, Aimsio will assume the resource is working for the duration of the job.
Dispatchers may want a convenient way to adjust the start and end dates of assignments for multiple users. To do that, users can open the Job Timeline.
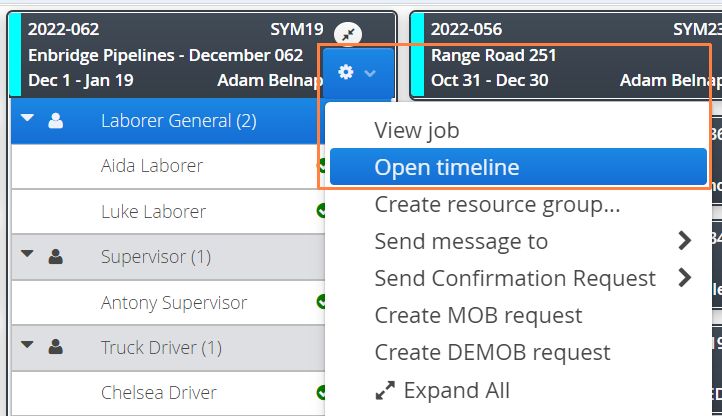
- Locate the Job Card action menu (the gear icon), select Open Timeline.
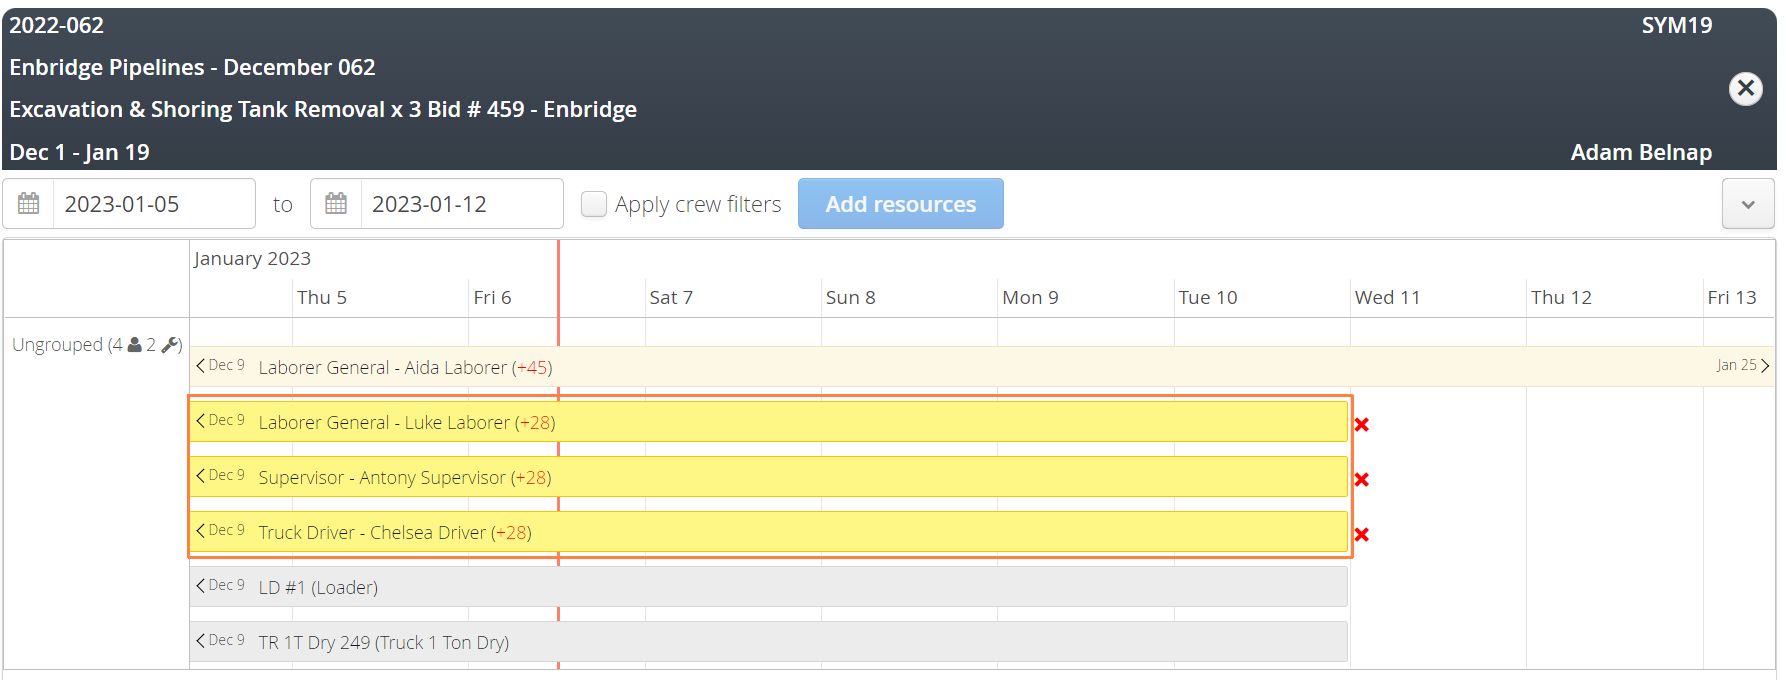
- All assigned resources (including equipment) will be displayed in a Gantt chart format. Holding the CRTL key down on your keyboard, select the resources you would like to adjust.
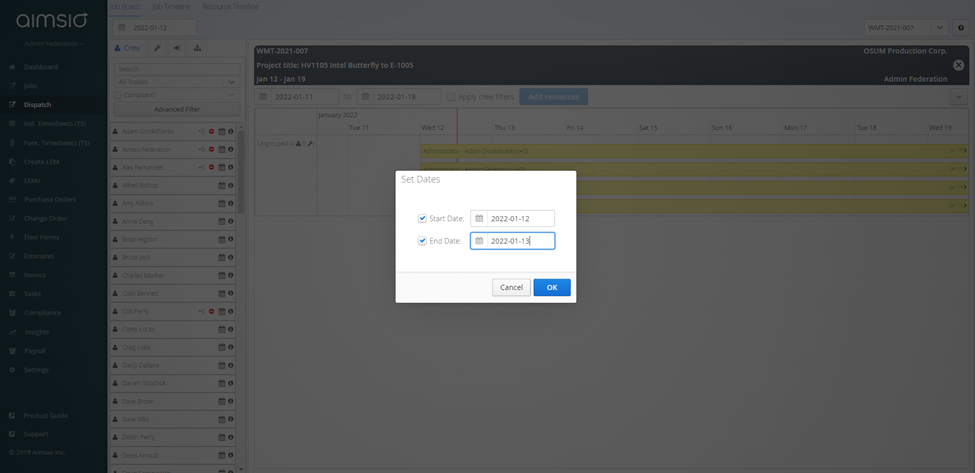
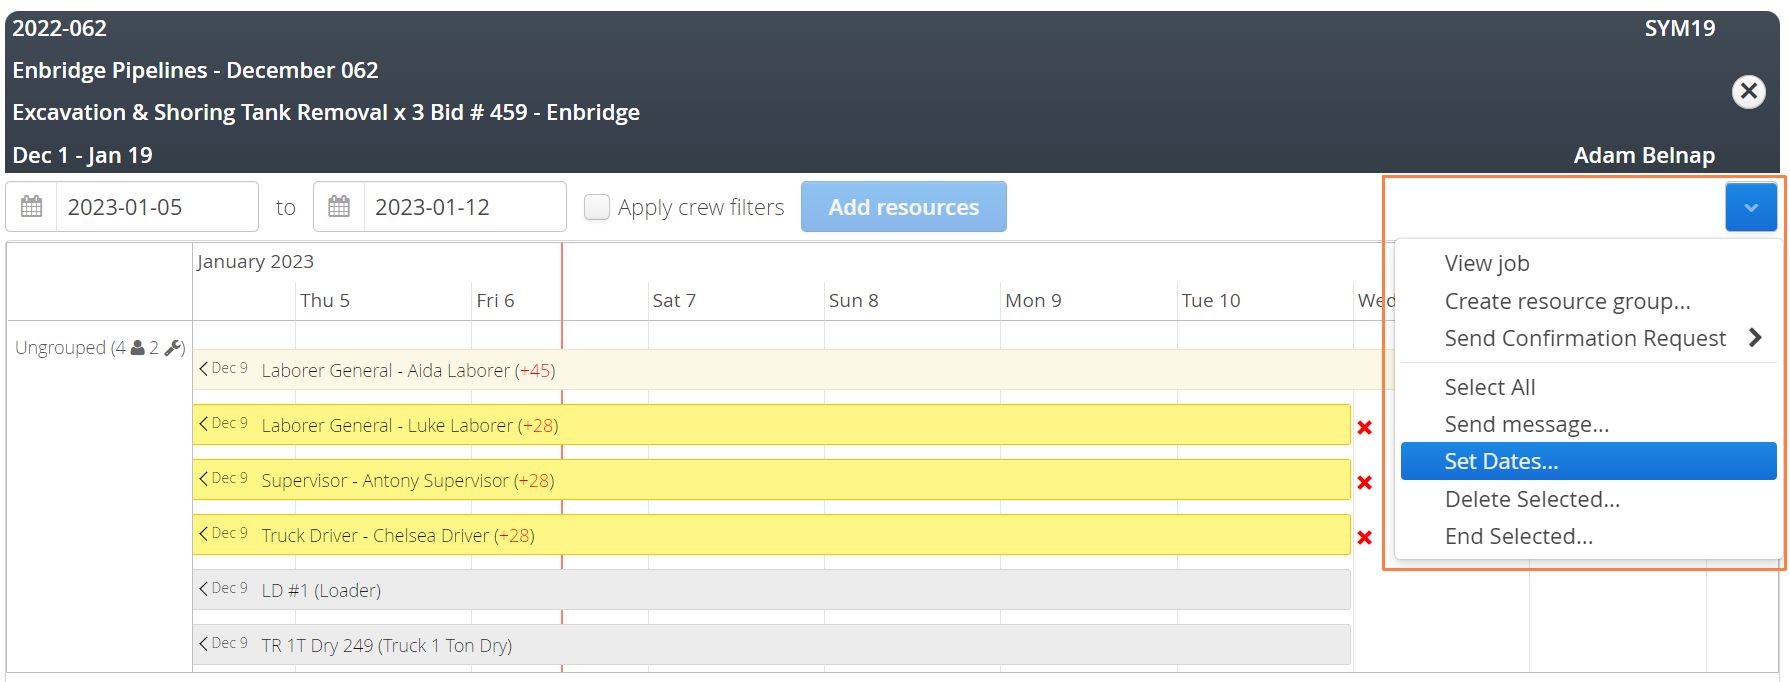
- Use the Action button located on the right and select Set Dates.
The Action button on the Job Card Timeline can also be used to send messages, confirmation requests or delete and end assignments.
- Set the desired dates for all resources and select OK.