After your Timecards have been configured, your account will be ready to extract Timecards. Hours can be sourced from Tickets, Timesheets, or a combination of both.
This guide walks users through a standard Payroll process, including running the initial search for hours, converting those hours to a Timecard, delivering a summary of hours to your Employees (optional), and closing your pay period.
Aimsio is not a payroll software, but it can help break down Employee hours and costs for export into another software using one of our supported integrations.
How to Fetch Hours and Extract Timecards
Once your team has entered hours, you’ll need fetch that information with a search. We call the results of that search Raw Data.
Raw Data refers to any raw quantities found on a source form (Ticket / Timesheet). They may be hours worked or recorded bonuses that have yet to be filtered by your Timecard pay rules.
When a Timecard is created, Aimsio processes the raw data using your account’s Timecard configuration to provide a more accurate breakdown of costs.
Navigate to the Timecards page using Aimsio’s left sidebar.
-
From the Raw Data tab, use the filters along the top of the page to ensure you’re presented with the correct search results. Ensure your Start and End dates are accurate to the pay period you’re processing and filter the search to only return results that do not have a Timecard.
-
Once your filters are set, click on the Get Results button.
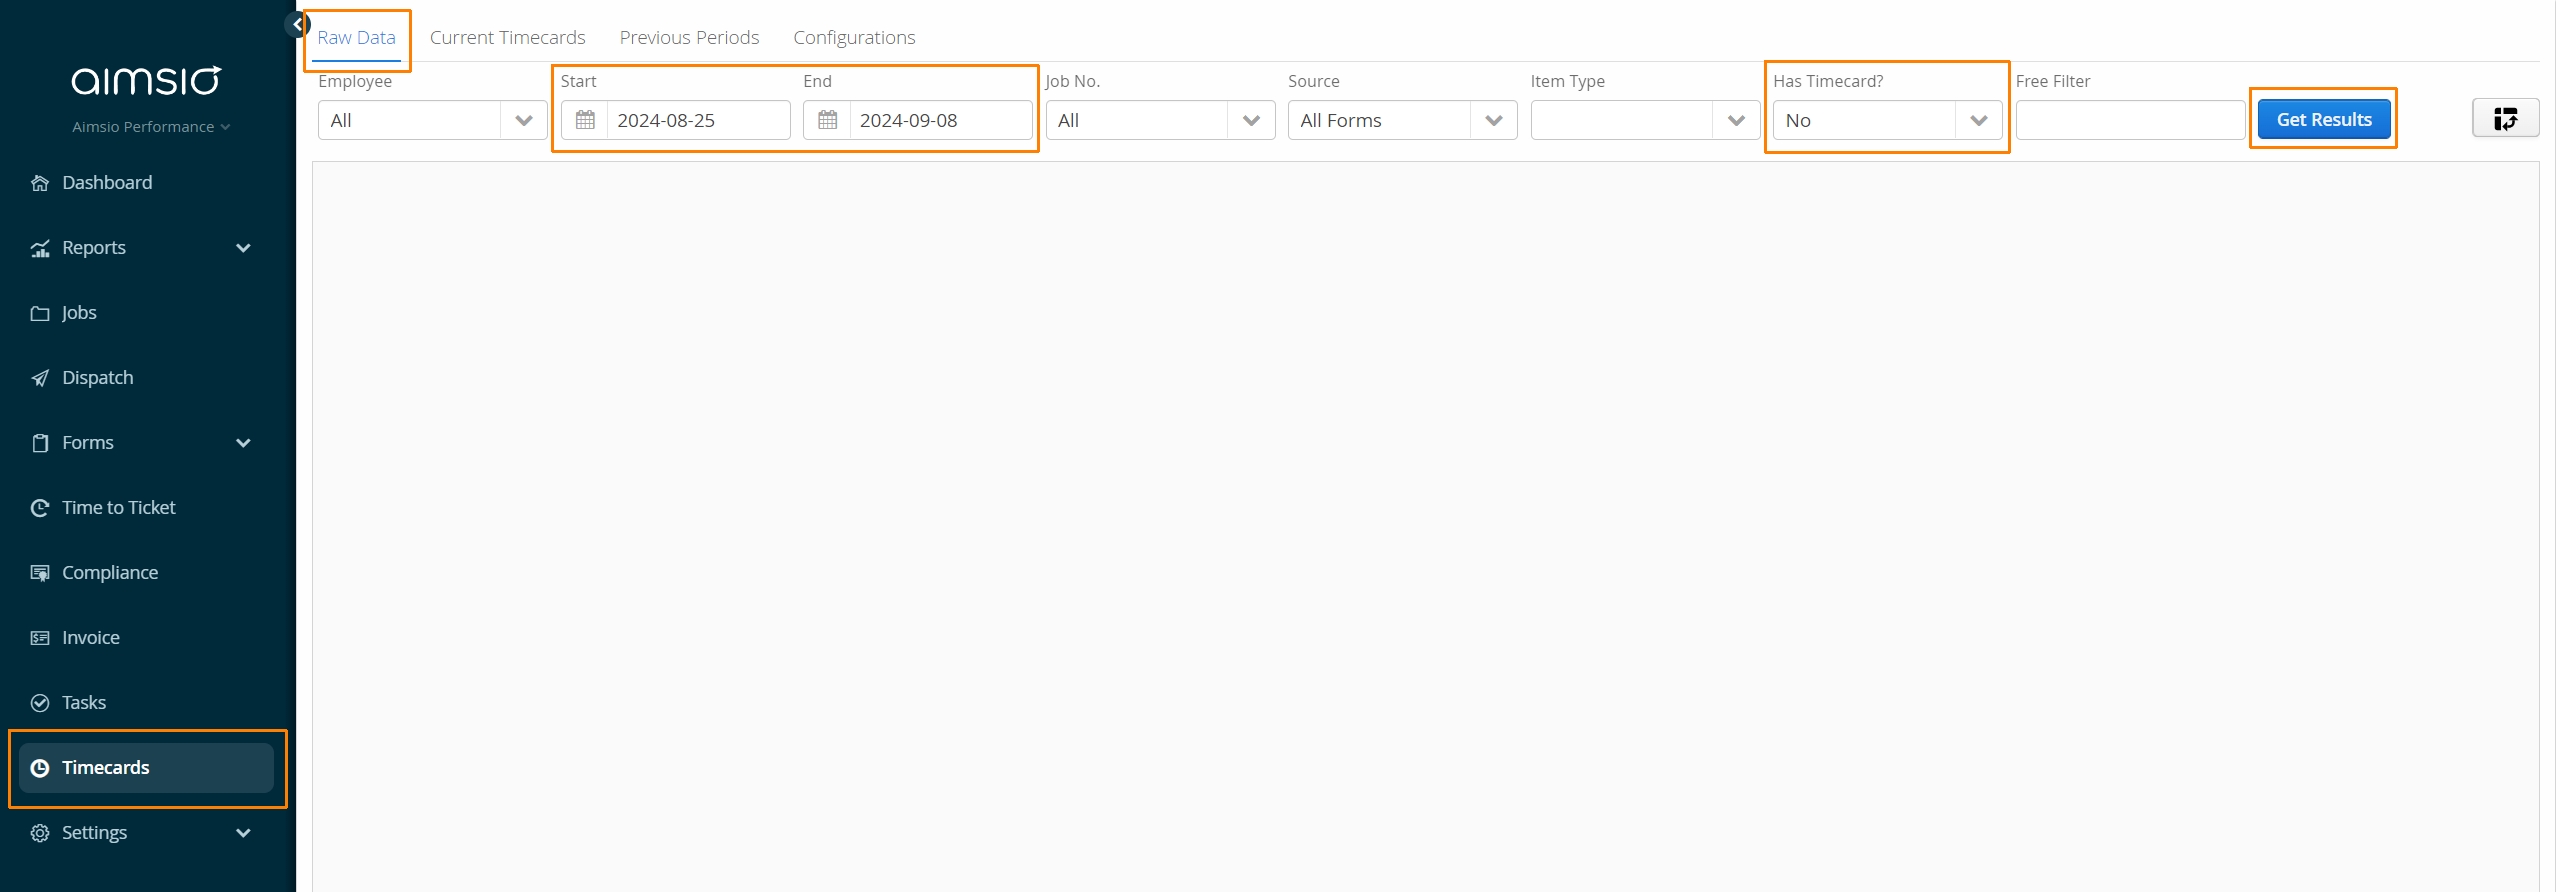
When the search is complete, the Get Results button will become disabled. This indicates that the results currently match the filters you’ve selected. Changing any of the conditions of your search will enable the Get Results button again.
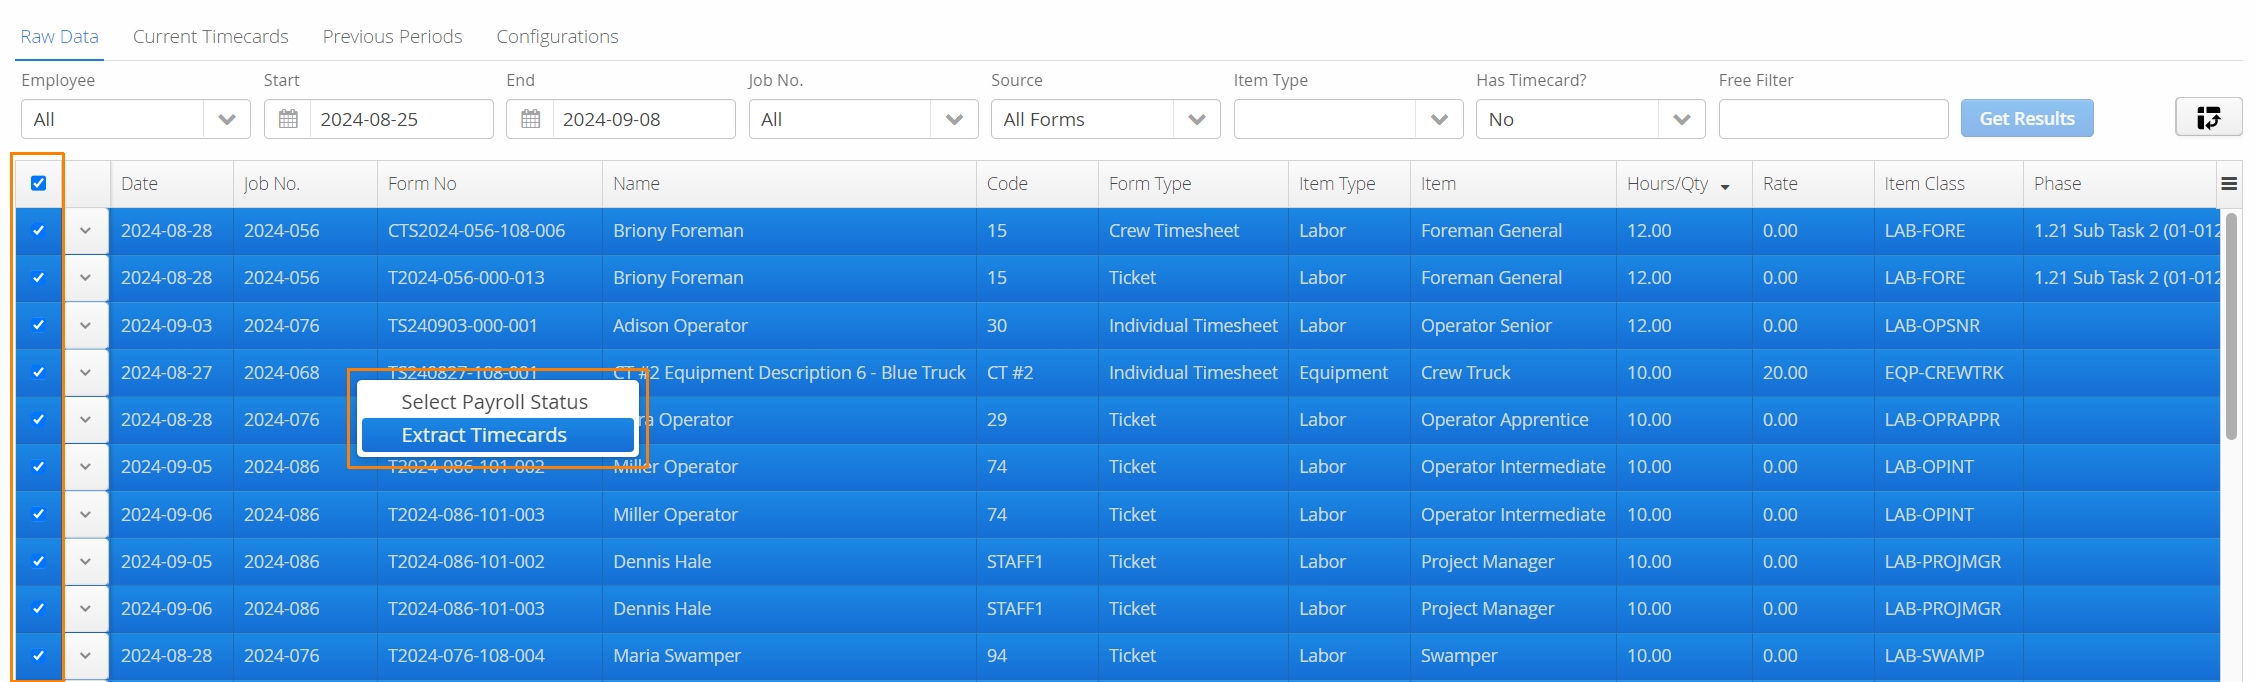
- Once the search is finished. Select any/all rows you’d like to convert to a timecard. Next, right-click anywhere on the report and select Extract Timecards.
After processing, a window summarizing the extracted Timecards will be presented. This window provides an opportunity to review/edit/remove a Timecard before posting it. Use the action button on the left to Edit or Remove.
Editing a Timecard will only adjust the hours on the Timecard itself, not the source form. For an accurate historical record, it’s a best practice to edit the original form before making any changes here. For more information see: How to Adjust Hours During a Pay Period
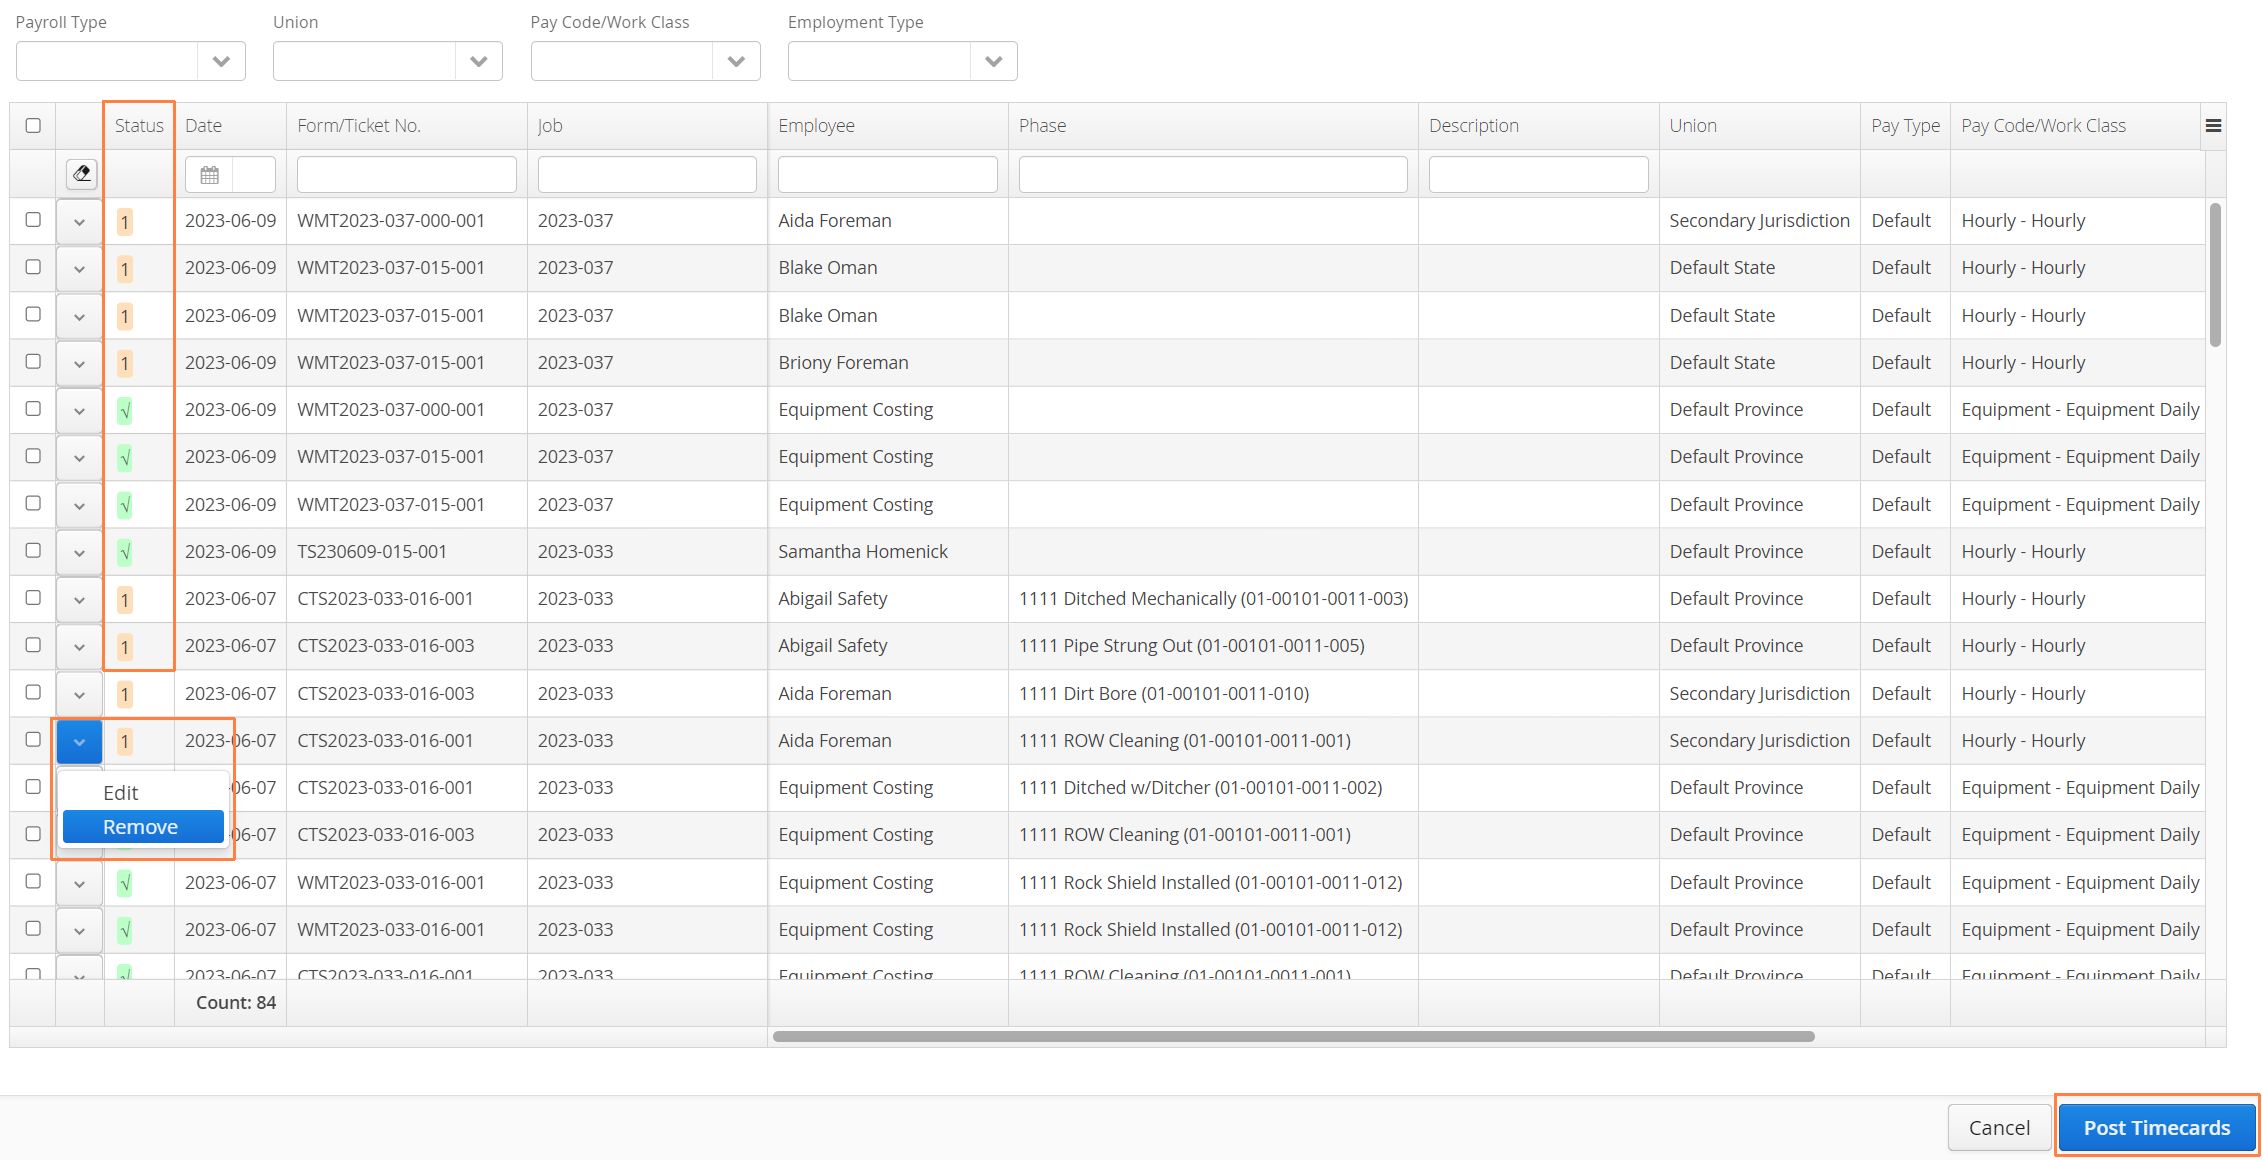
Under the Status column, a series of green checkmarks, or yellow warning messages / flags may appear in relation to the Raw Data you are extracting. Hover your mouse over a yellow or red icon to view the warning.
Once you are ready, click on the Post Timecards button located on the bottom right. The Timecards will be created and visible from the Current Timecards tab.
In some cases, a warning may simply state that a Timecard already exists. Other warnings may relate to your Payroll configuration. If a Timecard already exists, remove it from the list as Aimsio will not allow the same Timecard to be posted twice.
Some status warnings may prevent Timecard from being created. Please get in touch with our support team if you have any questions related to an error message you’re seeing.
Current Timecards Tab
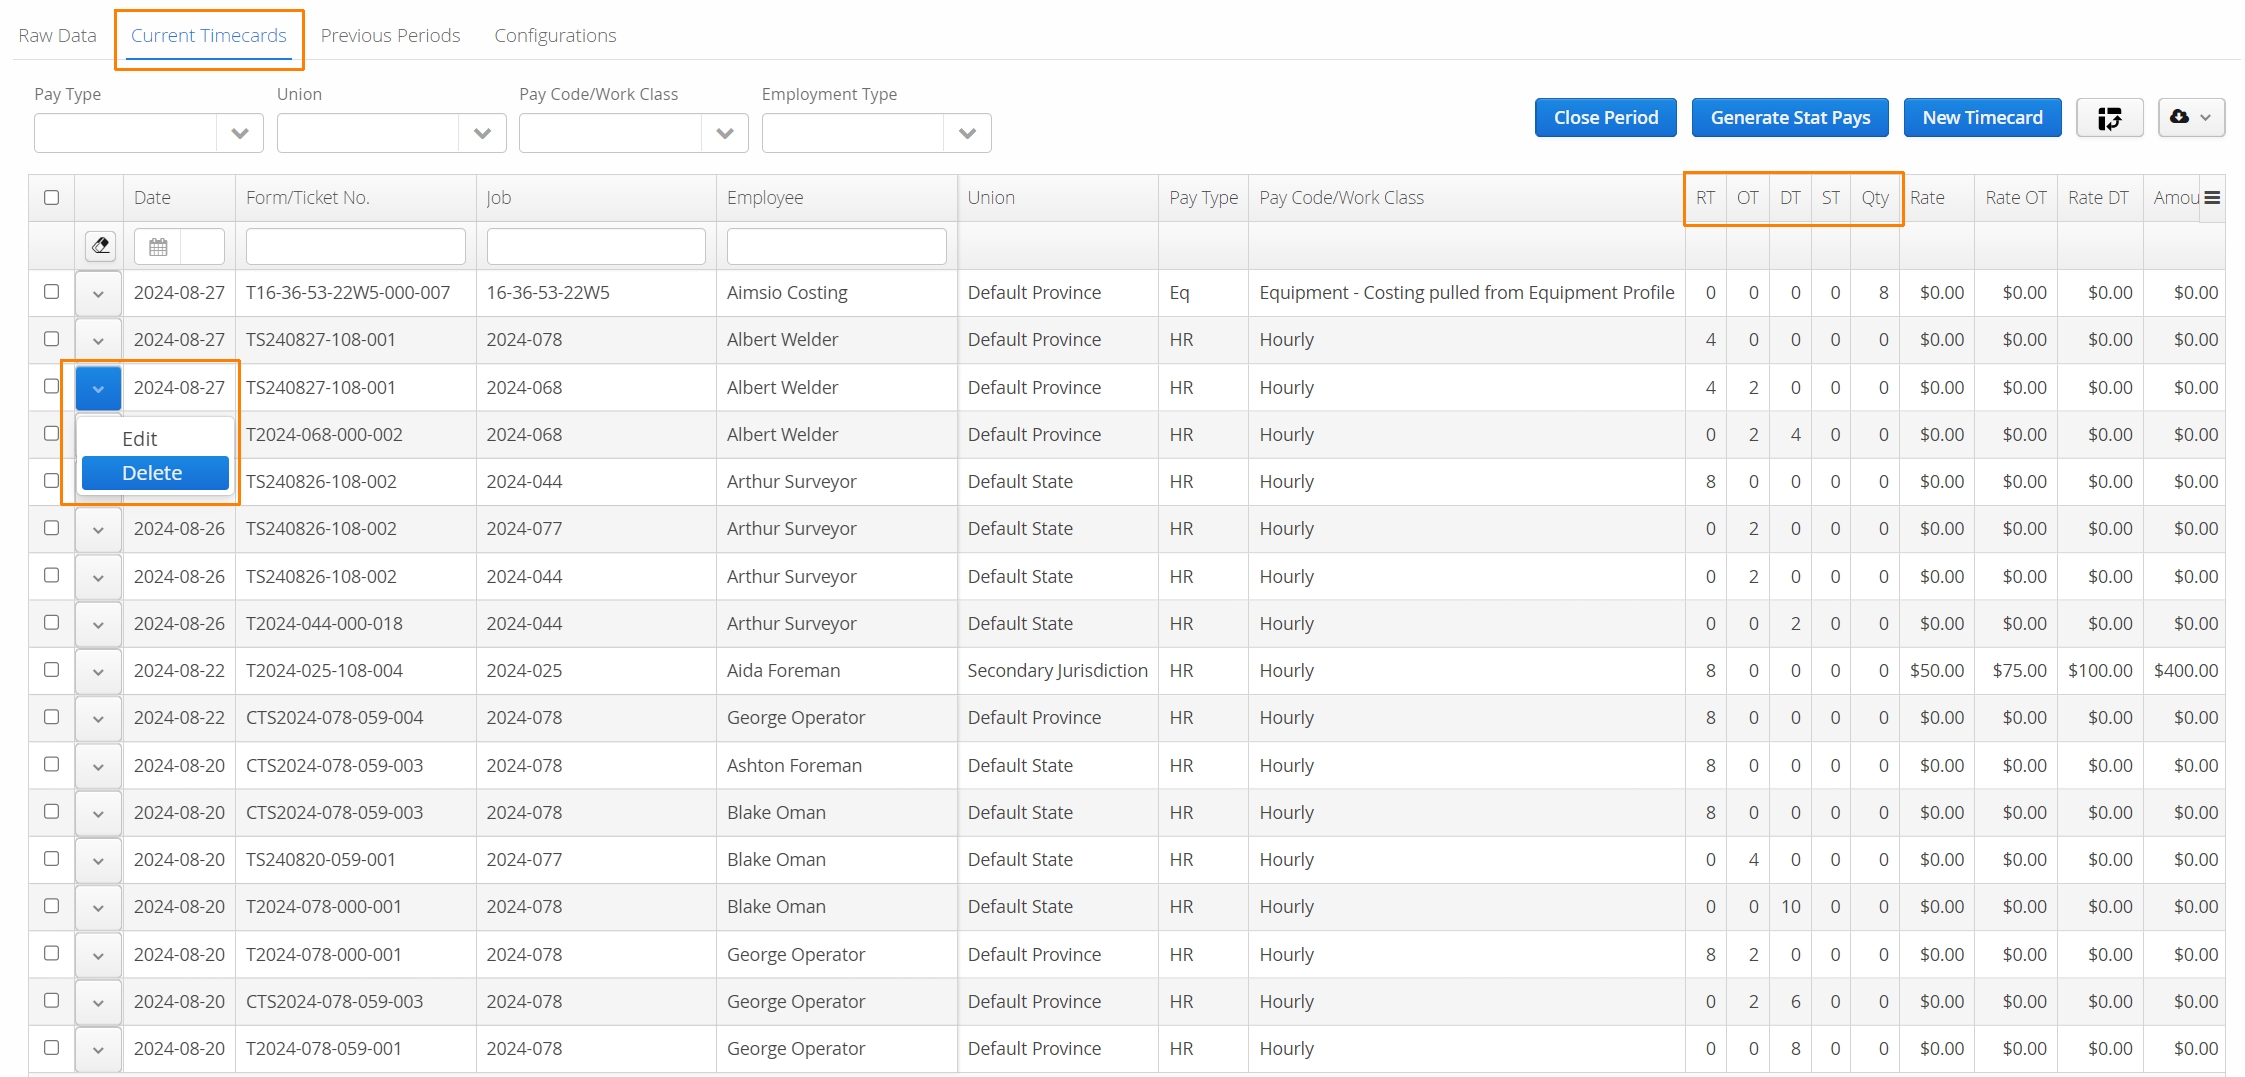
The Current Timecards tab will display your newly posted Timecards. You’ll see a summary of your RT, OT, DT and ST hours here.
- You still have the ability to make edits to a Timecard or ‘Delete’ it from this page by using the action button to the left of a Timecard.
A deleted Timecard can be extracted again by performing following the previous steps and performing another Raw Data search.
The Current Timecards report can also be viewed in a Pivot Table. For more information see our How to Customize Report Layouts guide.
If mistakes are identified when reviewing Timecards, there different approaches accounts can take to make corrections. Please see: How to Adjust Hours During a Payroll Period.
How to Email or Download Employee Hours for Review
From the Current Timecards tab or the Previous Periods tab, authorized users can download a PDF summary of employee timecards or email PDFs to employees (one per employee).
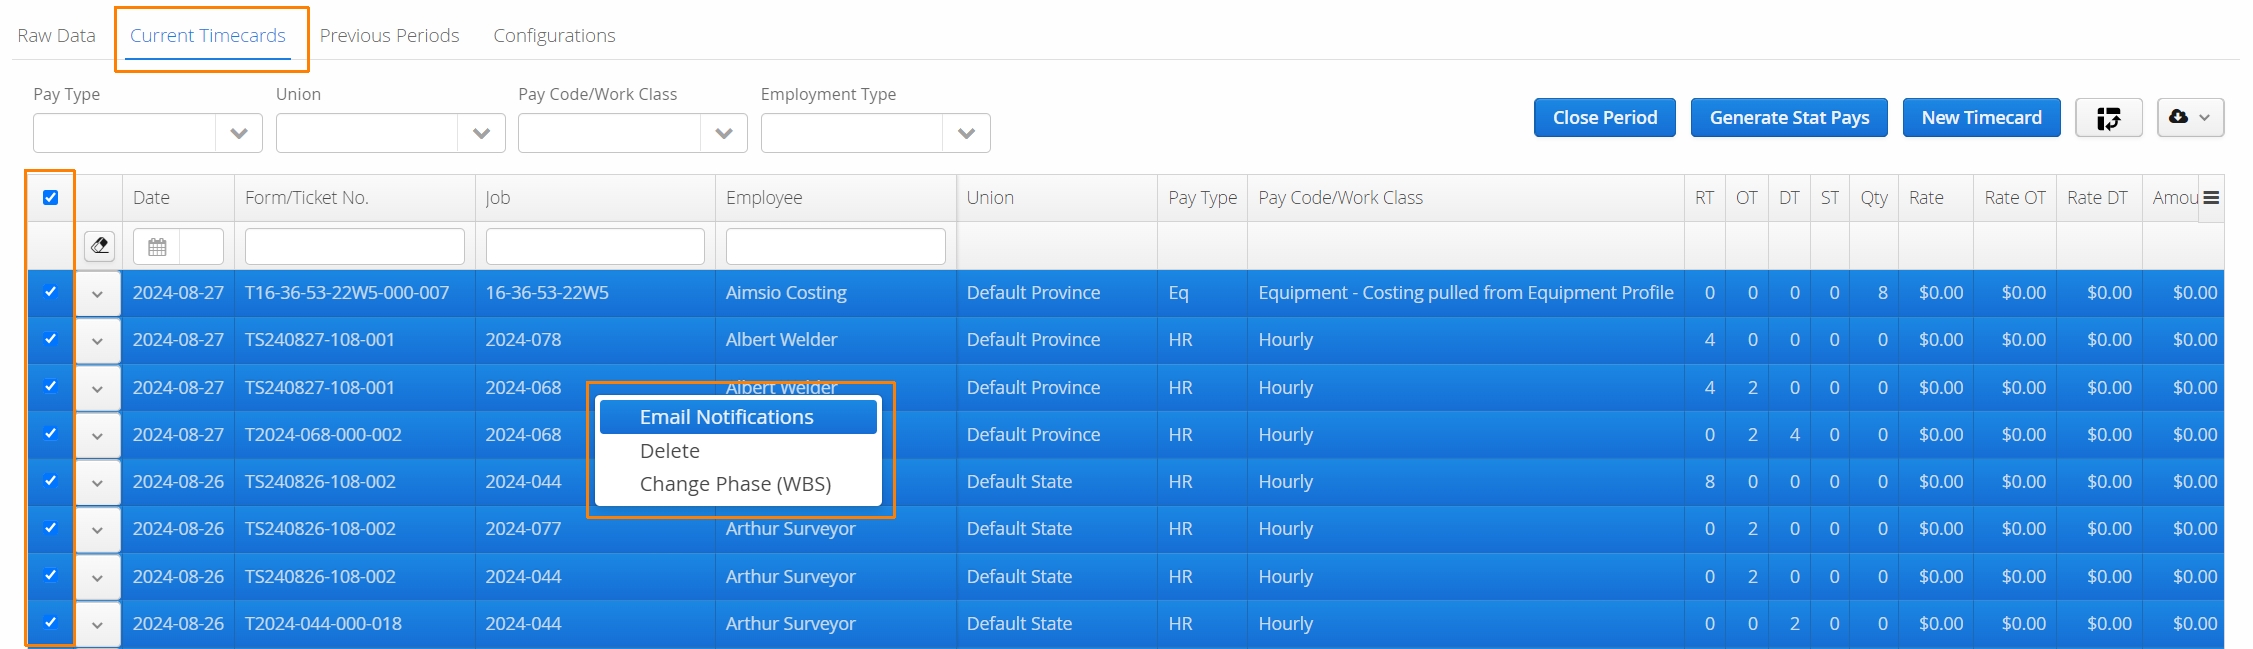
- From the Current Timecards tab, select any/all timecards you would like to create a summary for, right-click anywhere on the report and select Email Notifications.
-
You’ll be presented with a list of all employees whose Timecard hours were selected. As long as the Employees have a valid email address, select any/all employees you would like to notify and choose:
-
Send Email - Quantity & Amount
-
Send Email - Just Quantities
-
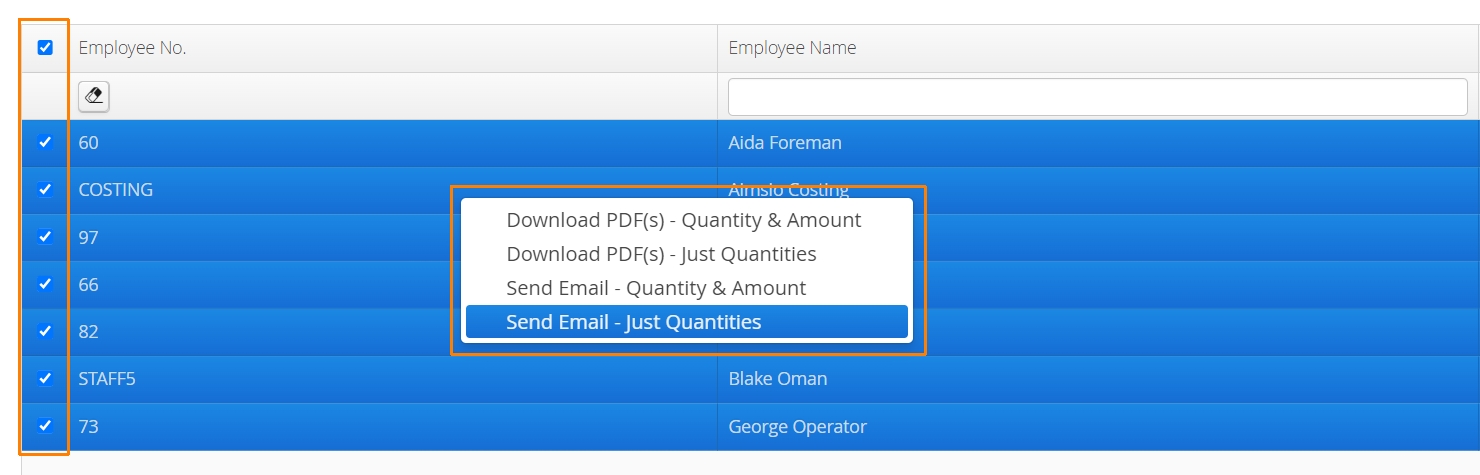
- Quantity & Amount - PDFs will contain a breakdown of hours in addition to the dollar amount totals.
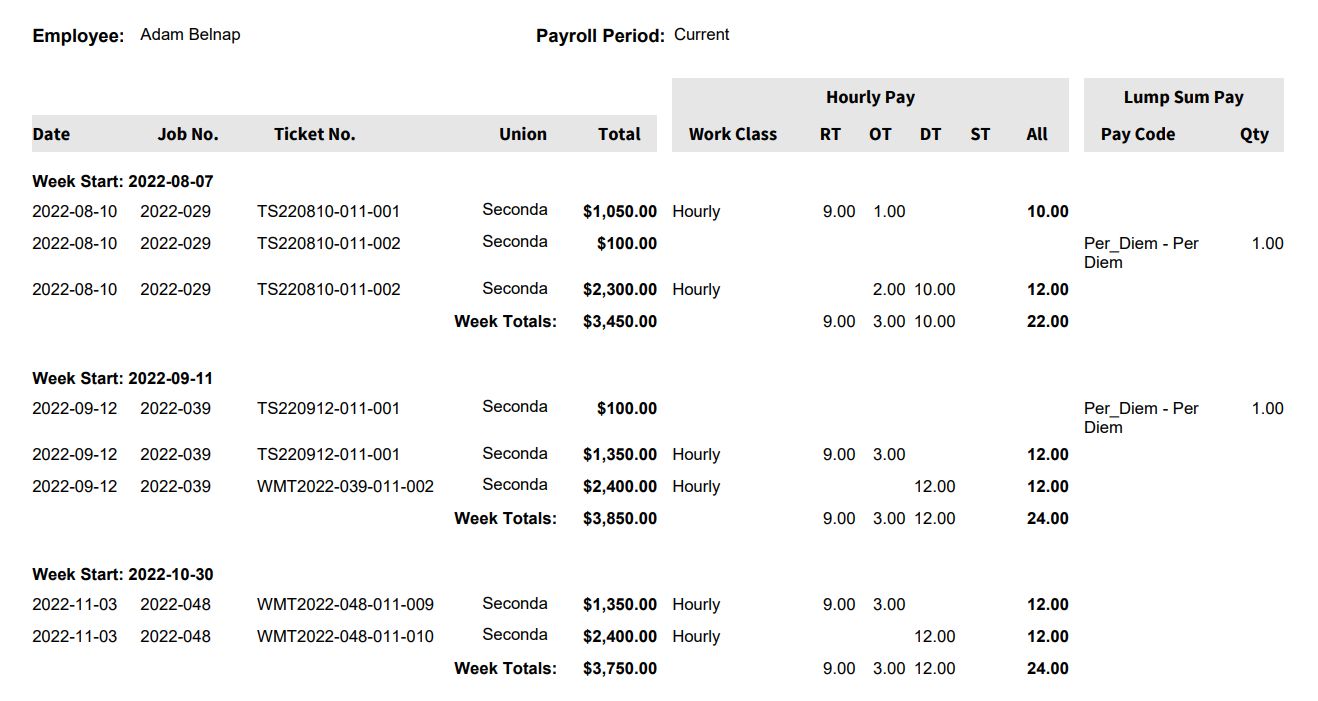
Just Quantities - PDFs will only include a breakdown of hours
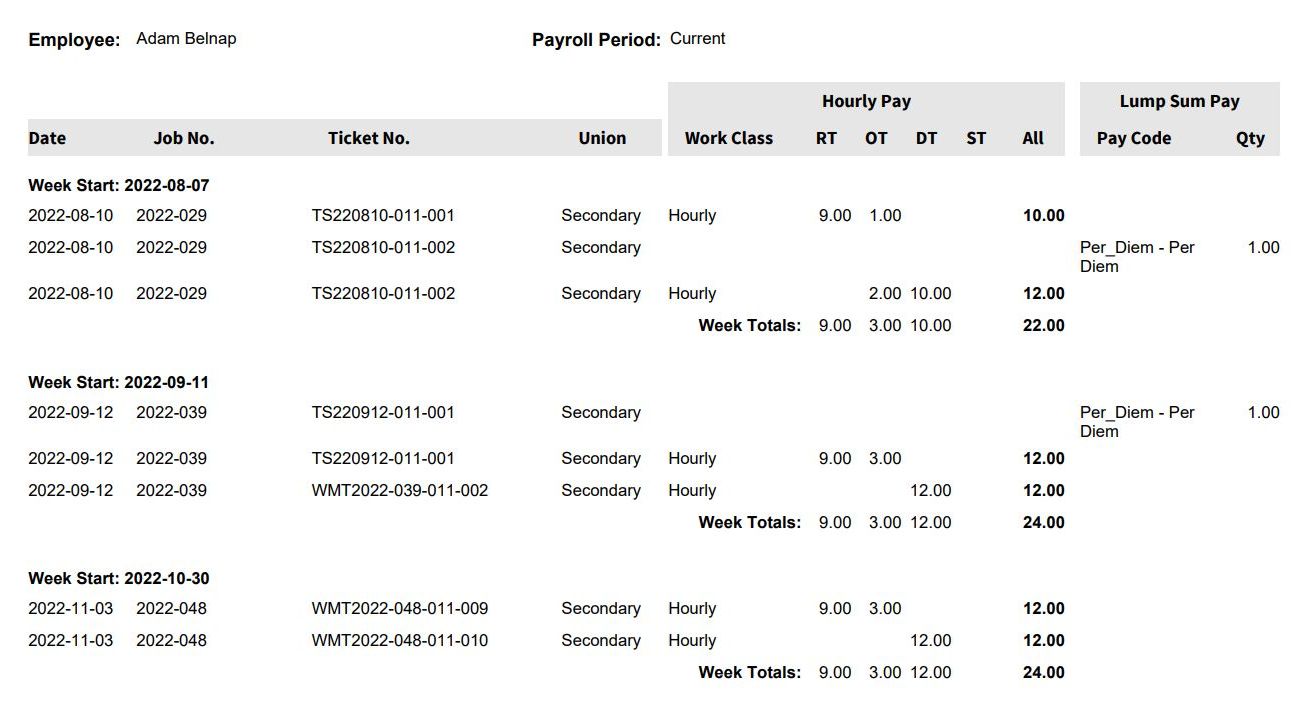
Employees will receive an email notification with an attached PDF that only includes their own hours.
How to Close a Pay Period
Before you can close a pay period, you’ll need to select the Pay Type from the Current Timecards tab. If you only have one Pay Type, select it before continuing.
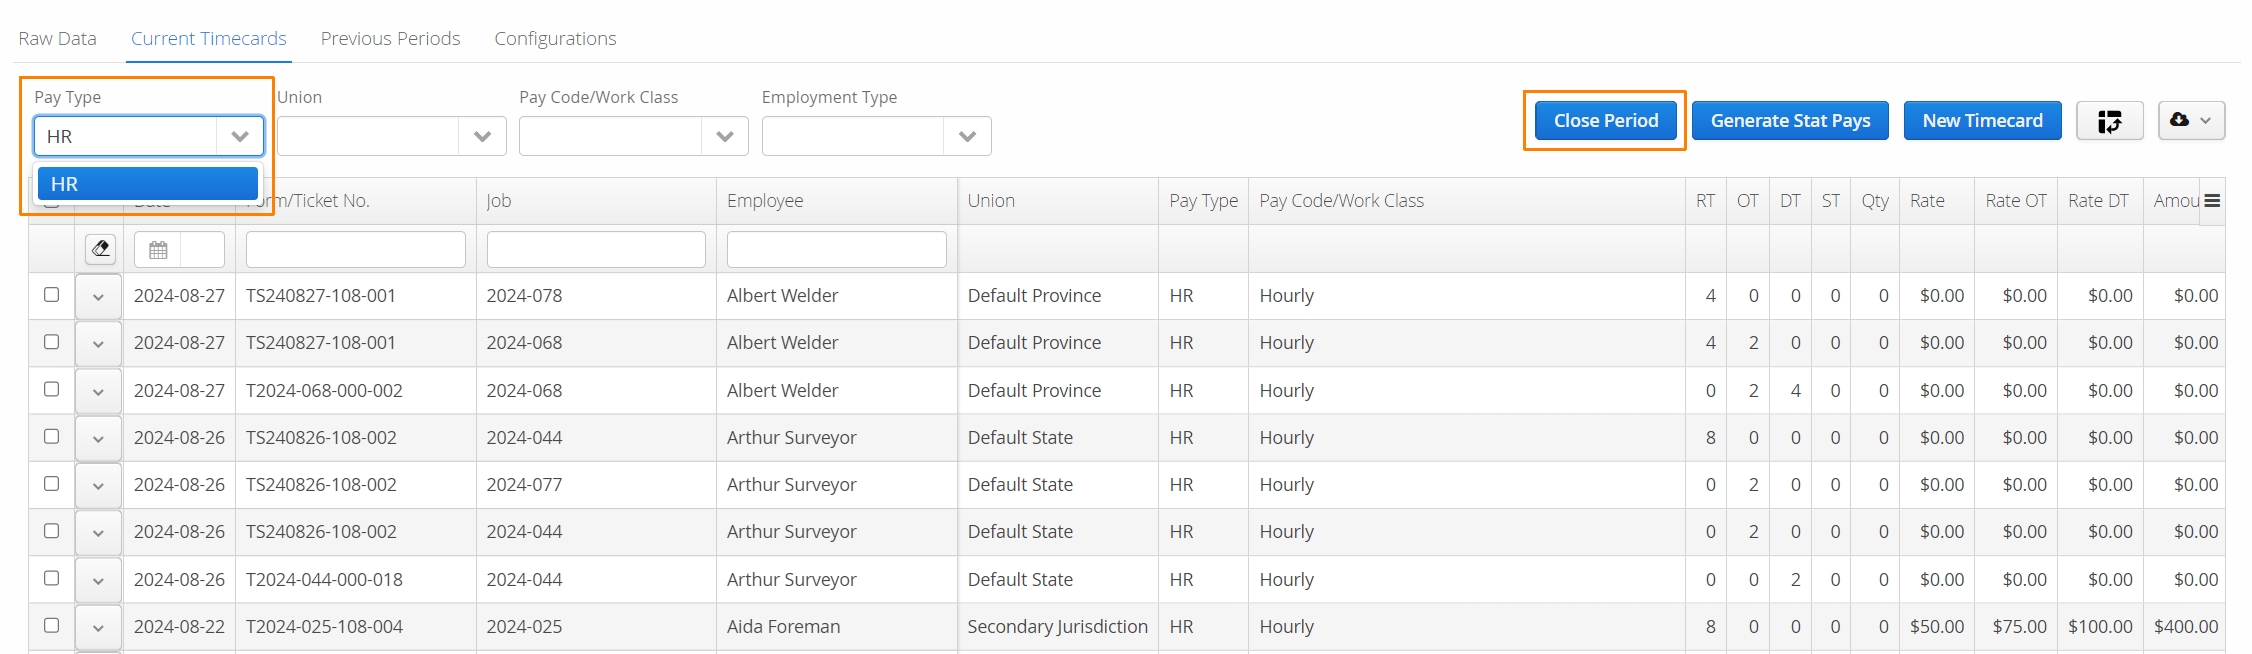
- Next, select the Close Period button on the right. A confirmation window will appear indicating which Pay Period will be closed.
Once a pay period is closed, Timecards in this period can no longer by modified. Timecards are stored and still accessible in the Previous Periods tab.

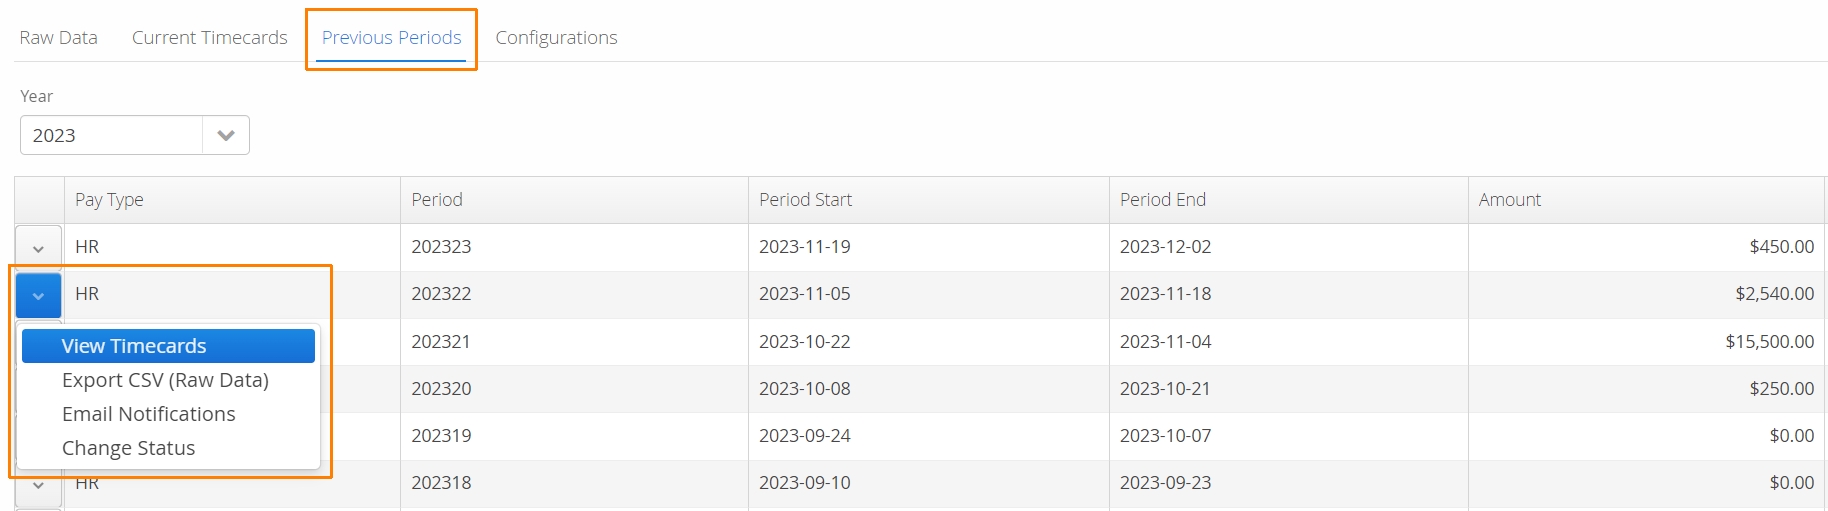
From the Previous Periods tab, use the action button to View Timecards, export a CSV file (excel), or email a summary of hours to your employees.