The Time-to-Ticket (T2T) page consolidates approved hours from Individual and Crew Timesheets into billable or non-billable tickets. As long as timesheets belong to the same Job and same Date, Aimsio lets you combine them into a single Ticket for your customer.
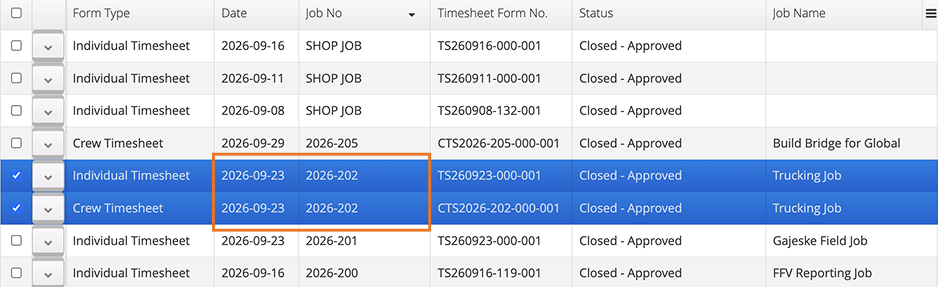
However, you may occasionally see Timesheet items remaining on the Time to Ticket page that you know have already been ticketed or processed.
This guide explains why this happens and provides step-by-step solutions to clear those items based on where your Ticket is in its approval lifecycle.
Why Do Items Stay on the Time-to-Ticket Page?
When a Ticket is saved and submitted, Aimsio adds a hidden tag to the original timesheet row (tagging it as “Billed in Ticket #XXXXX”). This tag tells the system to remove the item from the Time to Ticket queue.
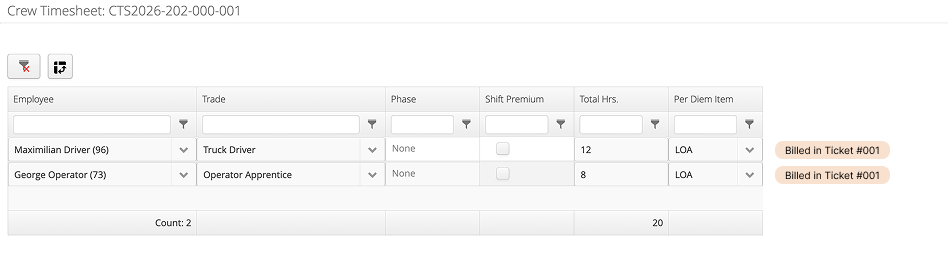
Items linger on the Time to Ticket page when a line item was deleted from the Ticket during or after creation. Because the row was completely removed rather than updated, the system never receives the signal that the time was processed
Actuals vs. Billables:
Editing quantities or rates on a ticket (e.g., capping 10 worked hours at 8 Regular Hours) will not leave items on Time to Ticket. Only deleting an entire line item causes it to remain on the Time to Ticket page.
How to Remove Items (Select Your Situation)
The Ticket was Created but not yet Reviewed or Approved Internally
If the ticket hasn’t been sent to your customer, you have two quick options:
Option 1: Delete and Re-Create the Ticket
-
Delete the affected ticket.
-
Return to the Time-to-Ticket page.
-
Re-select the timesheet entries and generate a fresh ticket.
Generating a fresh ticket will also delete any edits you may have made to the previous Ticket, so be sure you make a note of them so you can replicate them in the new ticket.
Option 2: Update the Existing Ticket
-
Re-open or edit the ticket (this depends on your permissions).
-
In the Billable Items section, click the Update button next to the Update From Timesheets field.
-
Save and Submit the ticket.
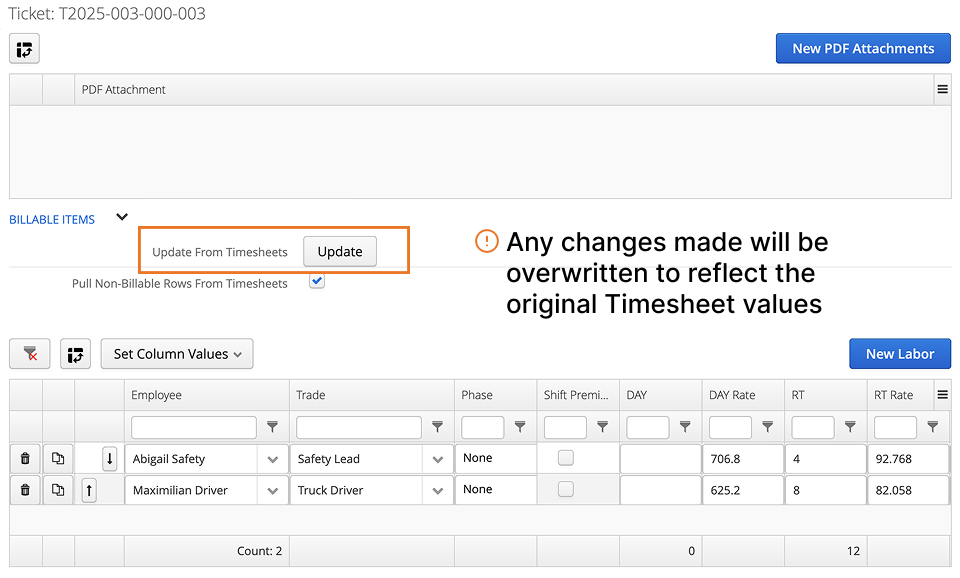
Warning: Updating tickets will overwrite all line items on the ticket with original timesheet values. Any modified quantities, custom rates, or added rows that were not on the Timesheet will be reset, similar to re-creating the Ticket from scratch.
The Ticket was Created and Items Were Charged For It
If the items were already charged (for example, perhaps the line item was deleted from the original ticket and was manually added back), and you don’t need to create a new ticket, you can clear them using a non-billable ticket.
-
Go to the Time-to-Ticket page and select the lingering items.
-
Create a new ticket.
-
On the ticket, change the Charge Type for those line items to Non-Billable.
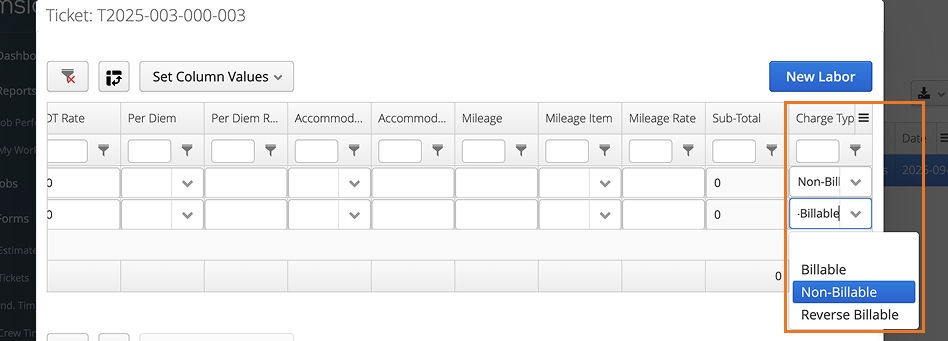
-
Add a note in the “description of work” box (e.g., “Corrective ticket to clear items already billed on Ticket #12345. Do NOT create an invoice for this ticket.”).
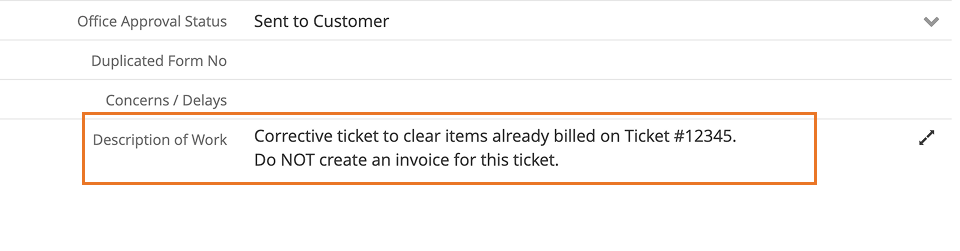
-
Save and Submit.
If this is a recurring problem, contact Support (support@aimsio.com) and they can confer with you about adding a field to your Ticket (and Ticket page), not visible to your customers, that you can designate for this purpose. For example, “corrective ticket: yes/no.”
Fields like this are not a replacement for good practices, but can be a useful addition if desired.
The Ticket Was Sent to the Client for Approval
If you already sent the ticket to your customer before realizing items were missing, you can either send a second ticket for missing items, or fix and resend the original Ticket.
-
Send a second, separate ticket: If you don’t need to change the original ticket, simply go to the Time-to-Ticket page, select those lingering items, create a new Ticket, and send it to your customer as a supplementary ticket.
-
Fix and resend the original ticket (Sent via Client Portal): If the Client Portal status is “pending” or “approved,” open the portal approval request and select Void. Add a note informing your customer that a corrected Ticket is being issued, then follow the steps above to update and resend the ticket.
-
Fix and resend the original ticket (Sent any other way): Reach out to your customer directly to let them know a correction is needed. Once you’ve notified them, follow the steps above to issue an updated ticket.
The Ticket was Approved and an Invoice Was Created
If the Ticket has already been signed and an invoice has been created but not yet sent to the customer:
-
Locate and delete the invoice first (provided it has not been issued/exported to your accounting system).
-
Re-open and update the underlying ticket using the steps above.
-
Regenerate the Invoice once the ticket has been corrected.
Tip: Catching Unbilled Time Across Date Ranges
Items on the Time to Ticket page are filtered by a default date range. If unbilled items fall outside that window, they may temporarily disappear from view.
To perform a complete audit of all timesheet data:
-
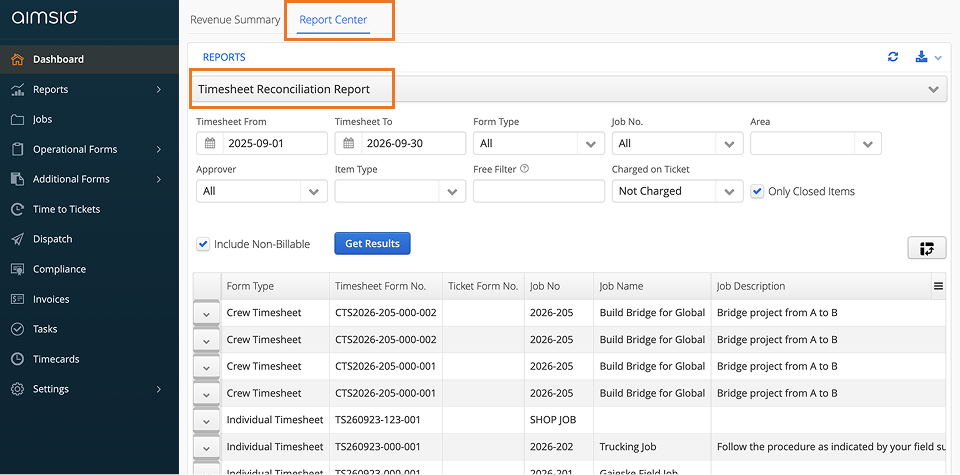
Navigate to Dashboard > Report Center.
-
Open the Timesheet Reconciliation Report.
-
Select your date range and filter by Charged on Ticket. Any item missing a Ticket Form No. has not been converted to a Ticket.