Tickets are Aimsio’s standard format for tracking billable work. In other words, it’s what you might already call a LEM, or Field Ticket. Tickets are used to track Labor, Material and Equipment usage. They can also be used to bill lump sum amounts, Services or miscellaneous charges.
- Tickets will pull data from other parts of Aimsio, like Dispatch, Timesheets and Purchase Orders. Completing Tickets is required for accounts to track Job Performance (WBS).
This article covers working with Tickets via Aimsio’s web portal. For information on creating tickets on mobile, please see the following:
How to Create Tickets
Tickets can either be created from within a Job, or from the Tickets page. A Job must exist before a Ticket can be created.
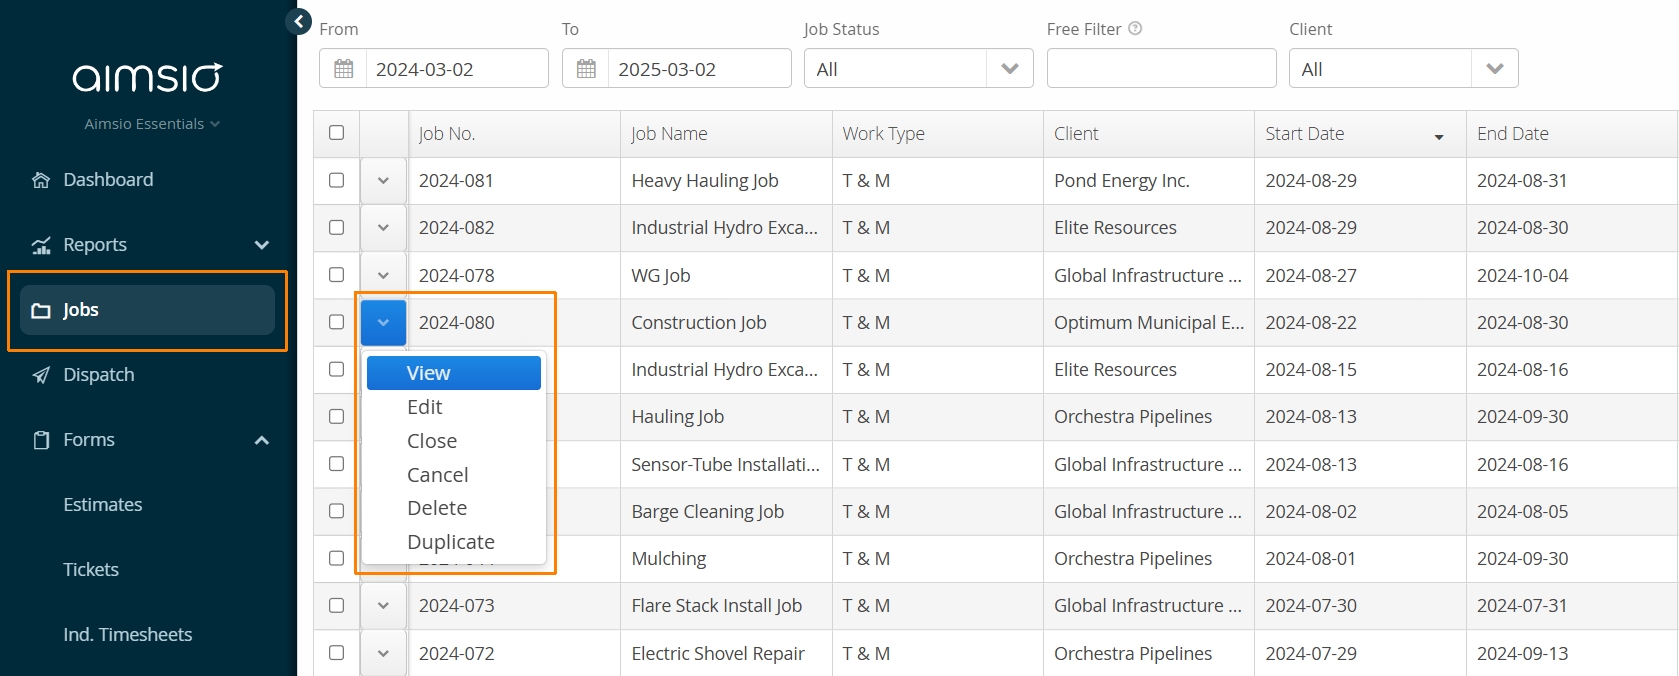
- To create a Ticket from the Jobs page, select the Action button beside the a Job and select either View or Edit.
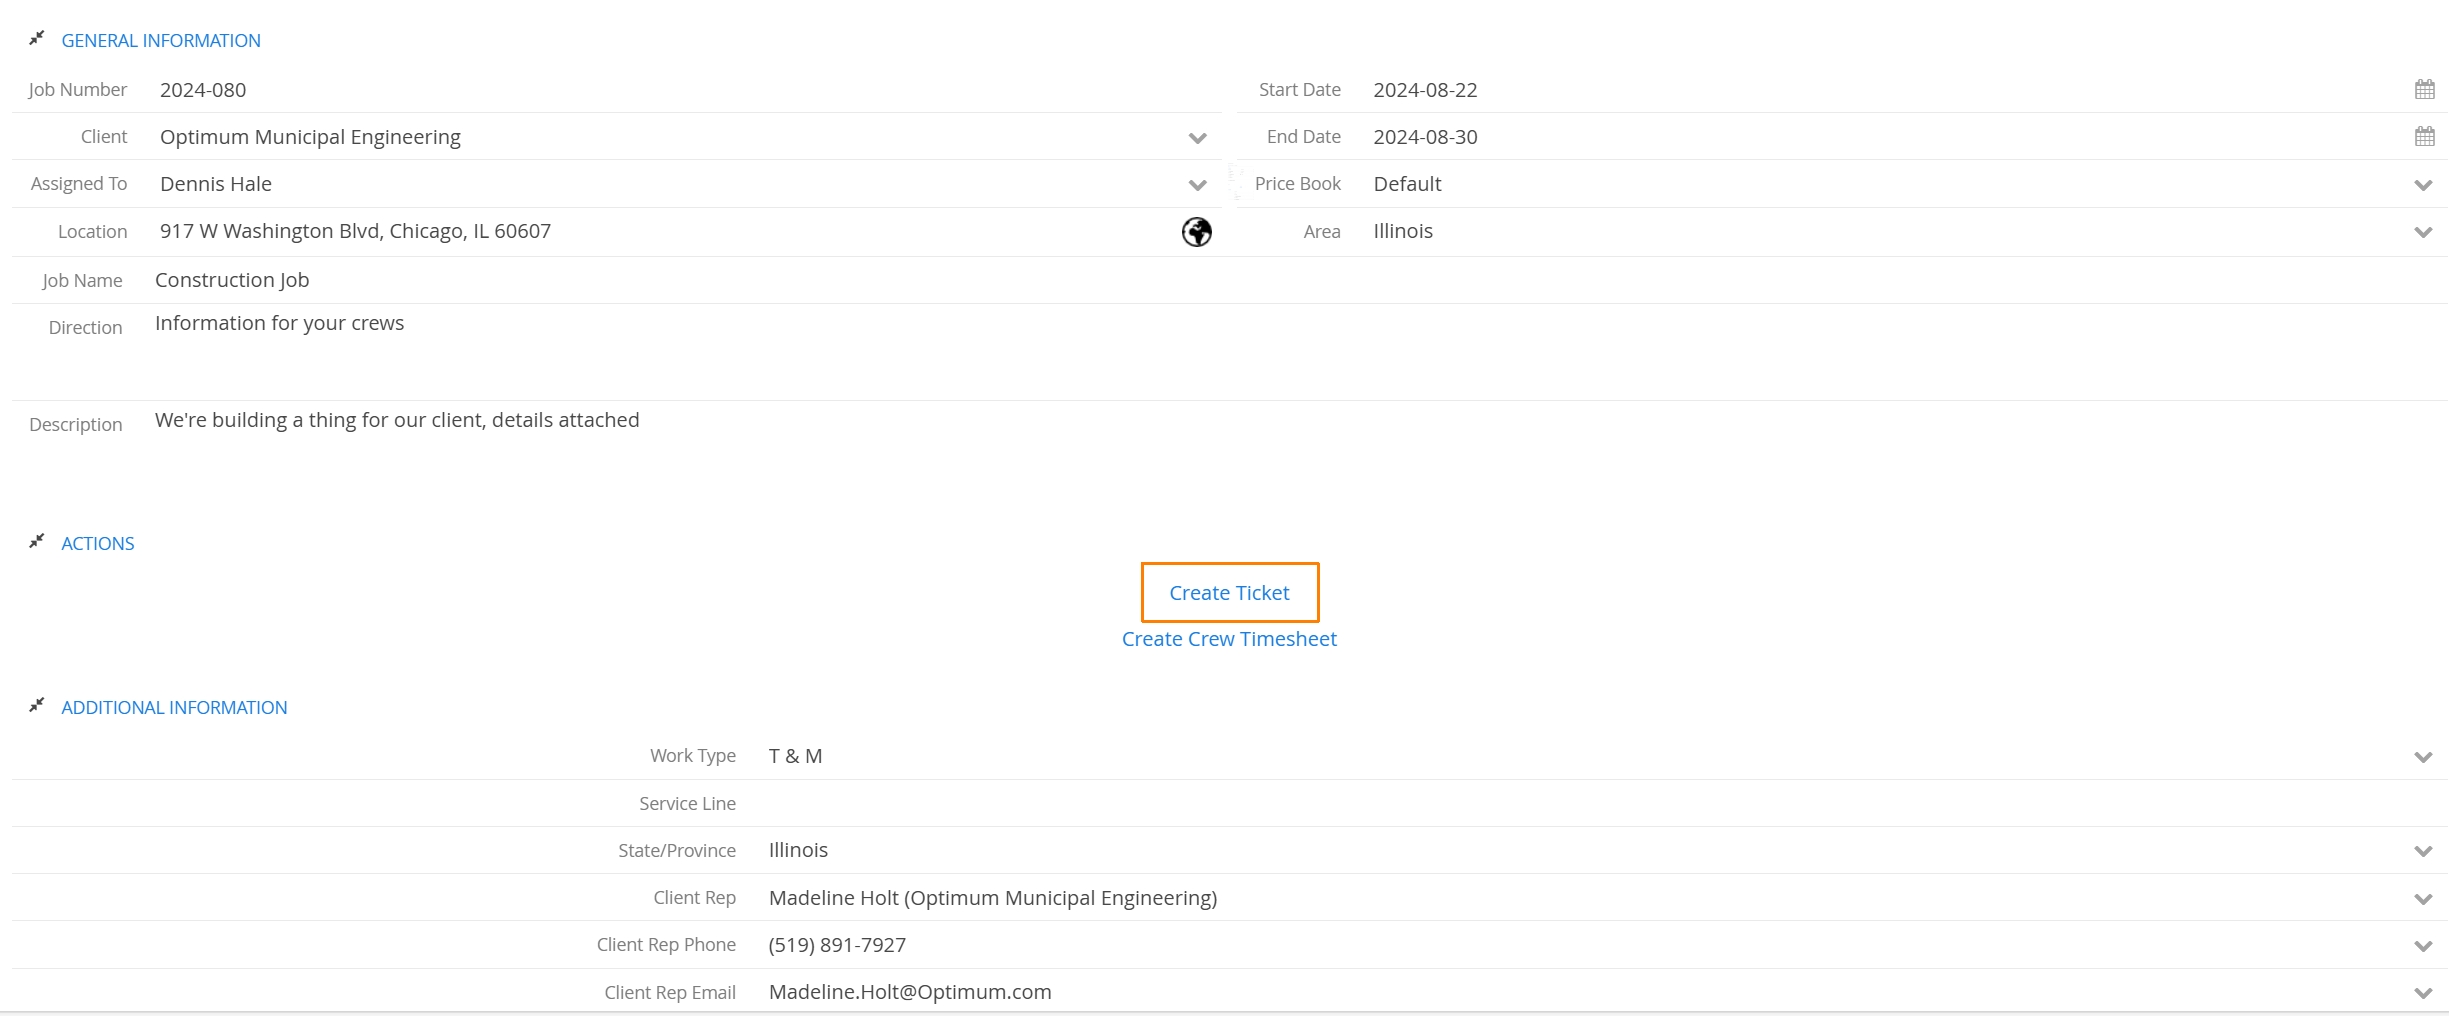
- A window will popup and display information related to the Job. From the Actions table, select the Create Ticket option.
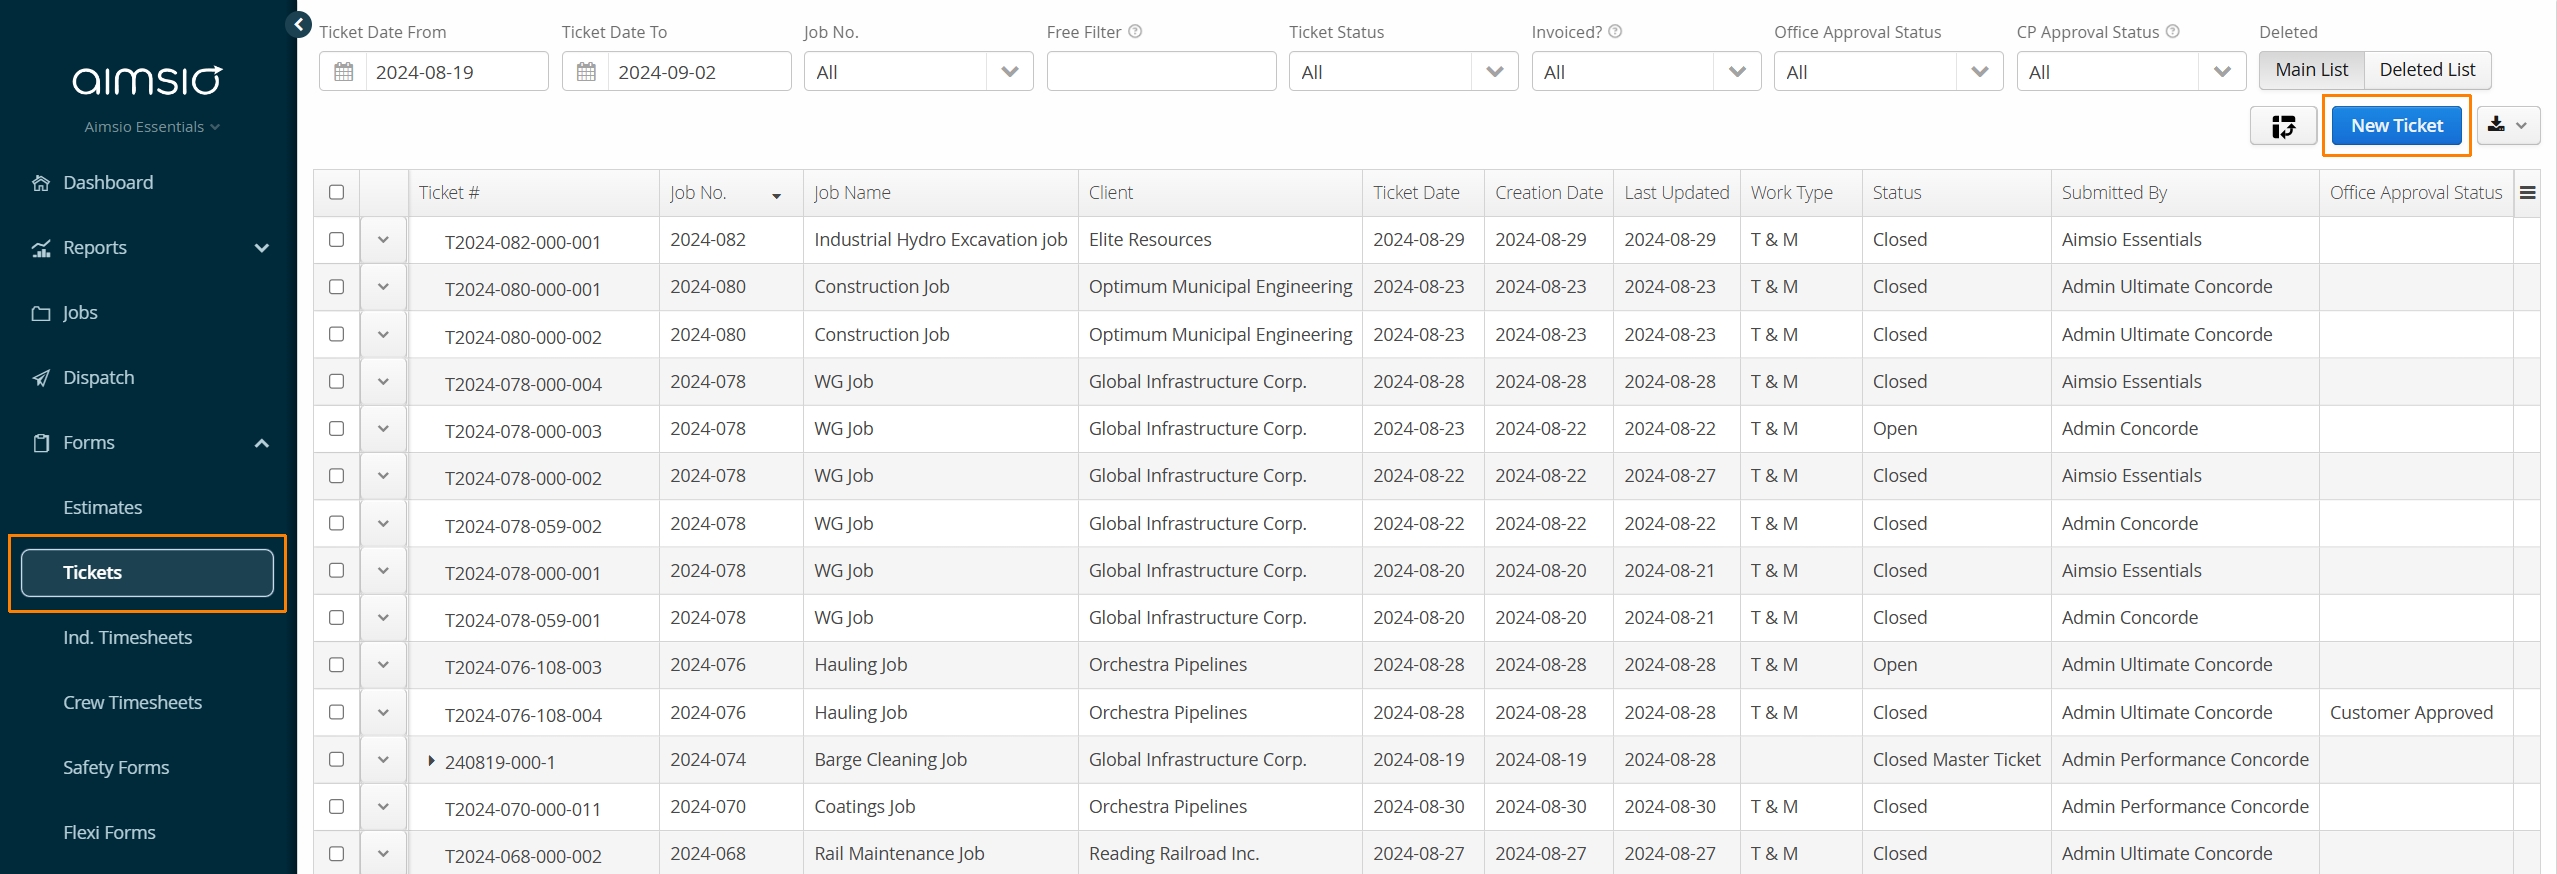
- Alternatively, navigate to the Tickets page using Aimsio’s left sidebar and select New Ticket.
Completing a Ticket
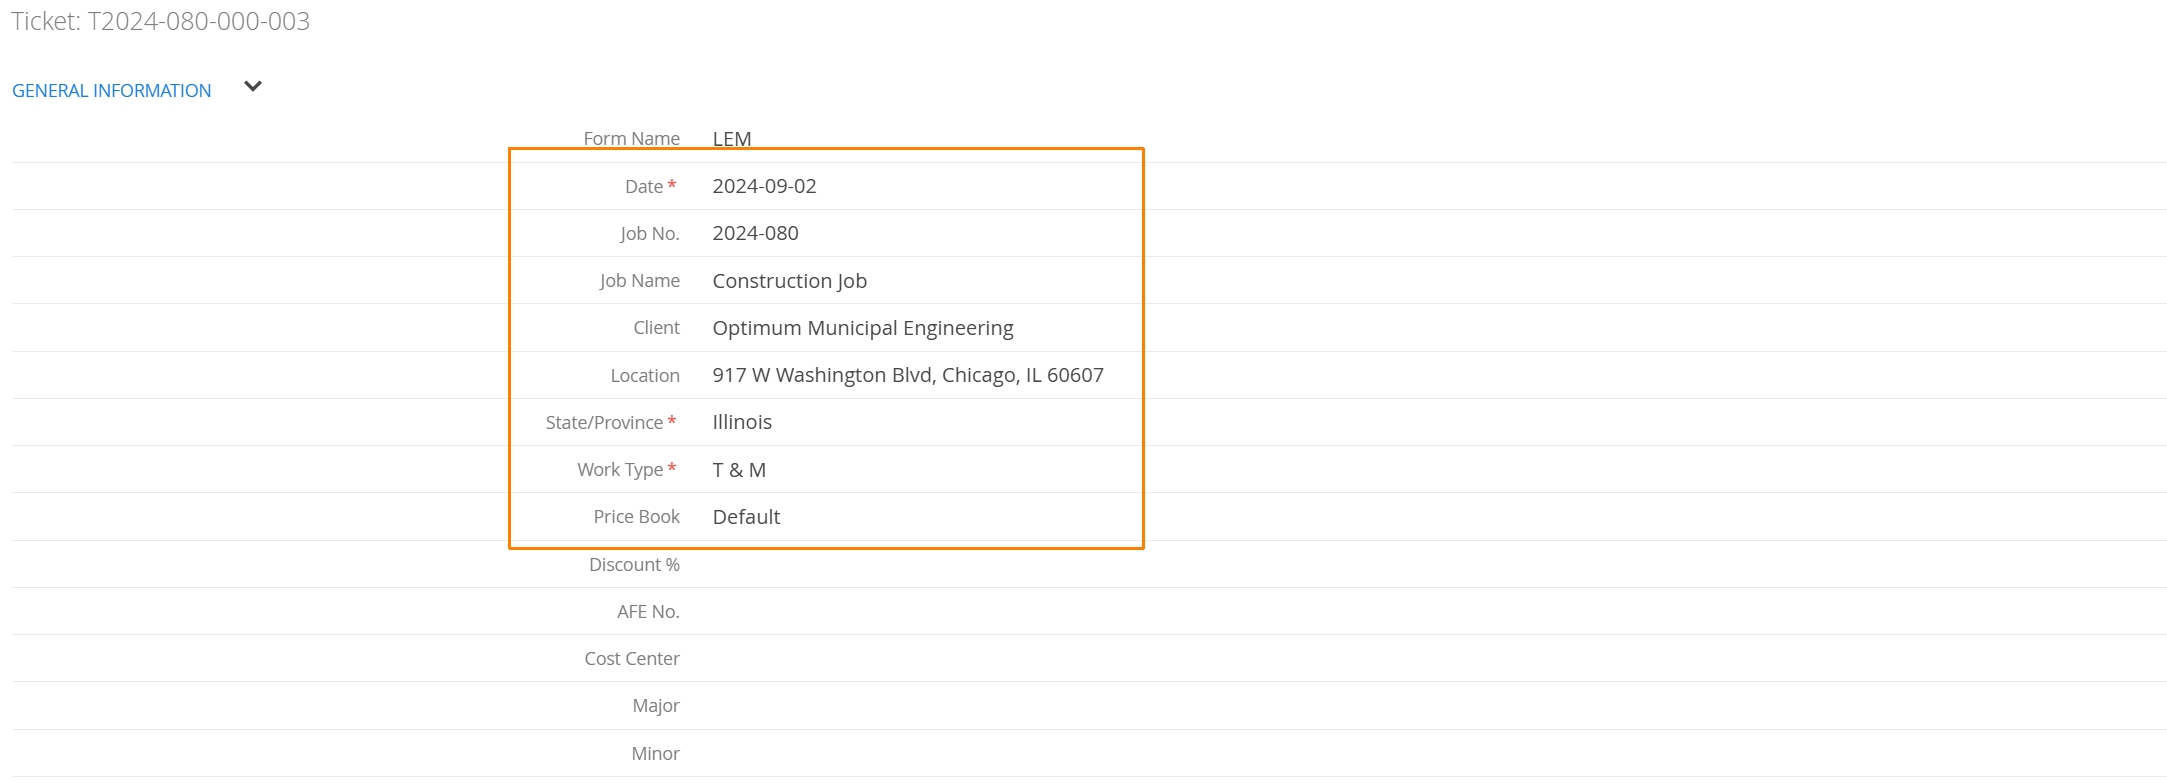
When users create a Ticket, Aimsio will automatically date the Ticket and pull information in from the Job.
Aimsio will automatically create a unique number for each Ticket. Currently, this number cannot be changed. Aimsio uses this number to identify the form for other processes, including the creation of a Master Ticket or Invoice.
Aimsio only supports the creation of a daily Ticket. Tickets that include work spanning multiple days can only have one date. It is possible to create more than one Ticket for the same day. Tickets can a grouped in a Master Ticket.
- To add line items to a Ticket, scroll down to the Billable Items section. Use the New Item buttons to record the work that was done for the day. Input the hours or quantities to populate the billing rates for the resources that worked.
Use the Charge Type table to record whether the work was Billable or Non-Billable. Use the trash icon to the left of a line-item to remove it.
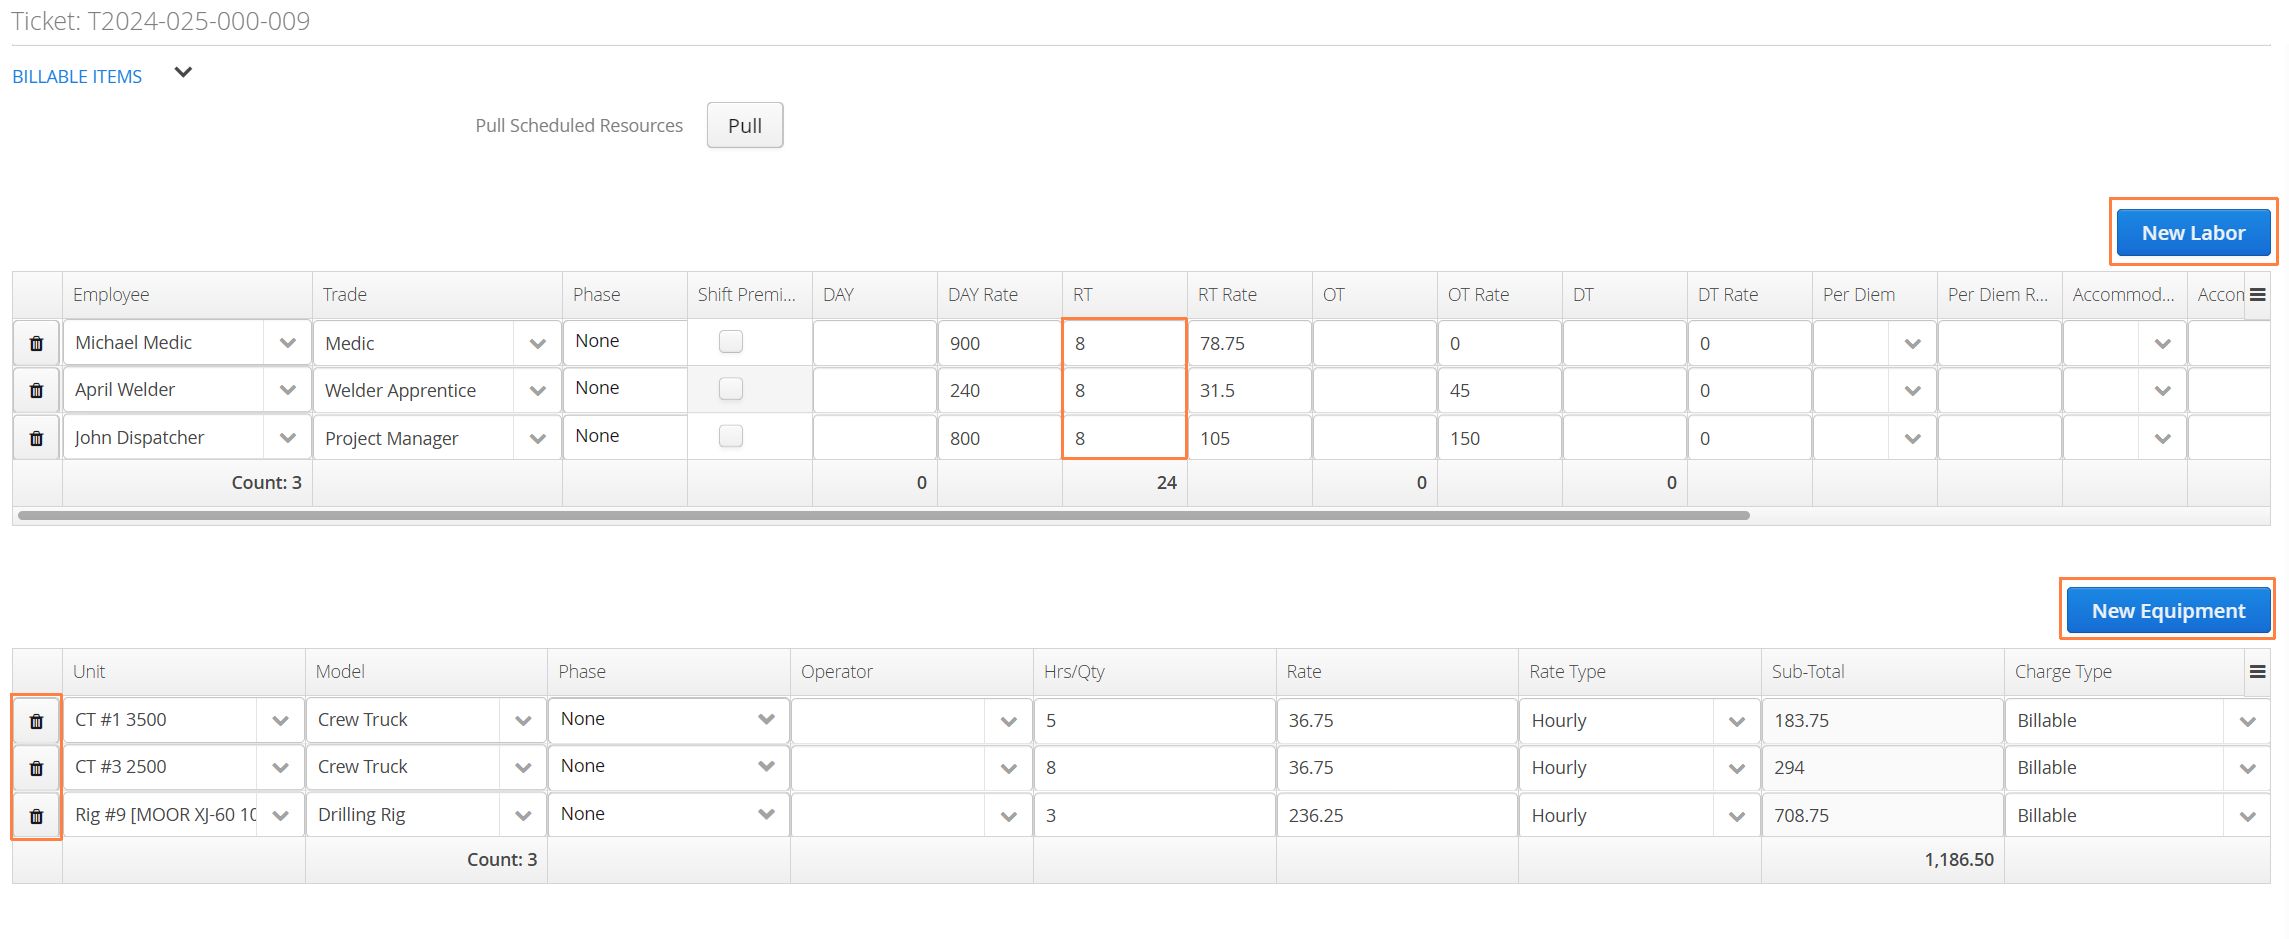
Any new line items will leverage the Job’s Price Book when determining what Trades, Materials or Equipment Models can be recorded.
Reverse Billable
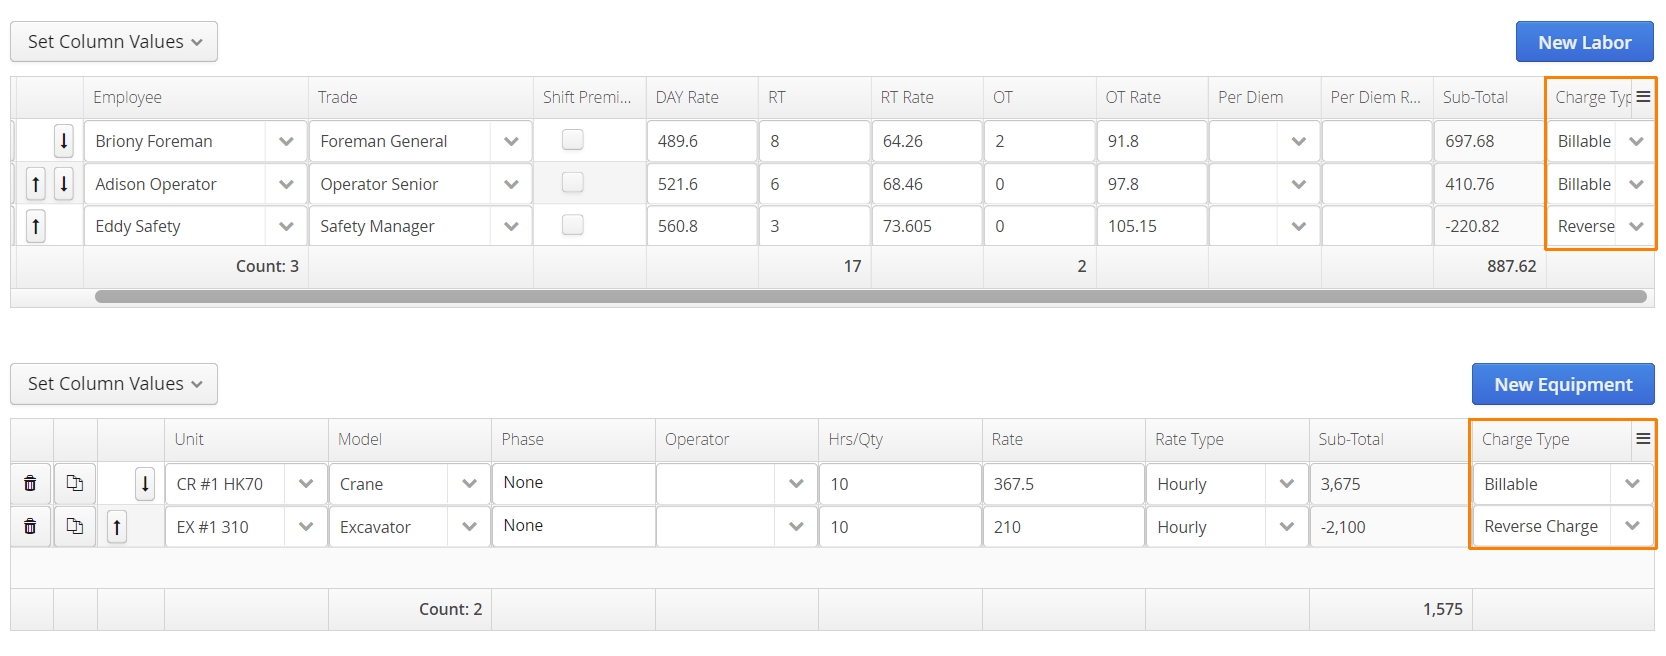
To reverse an amount that has been previously charged on a form, Aimsio provides the Reverse Billable or Reverse Charge type. This would be used in situations where a client has already been charged an incorrect amount and Aimsio accounts need to present the correction or credit on a future Ticket.
Accounts are encouraged to use this approach, instead of including negative values on a second form. Simply add a new line item on a future form, for the exact same charge, and use the Reverse charge type.
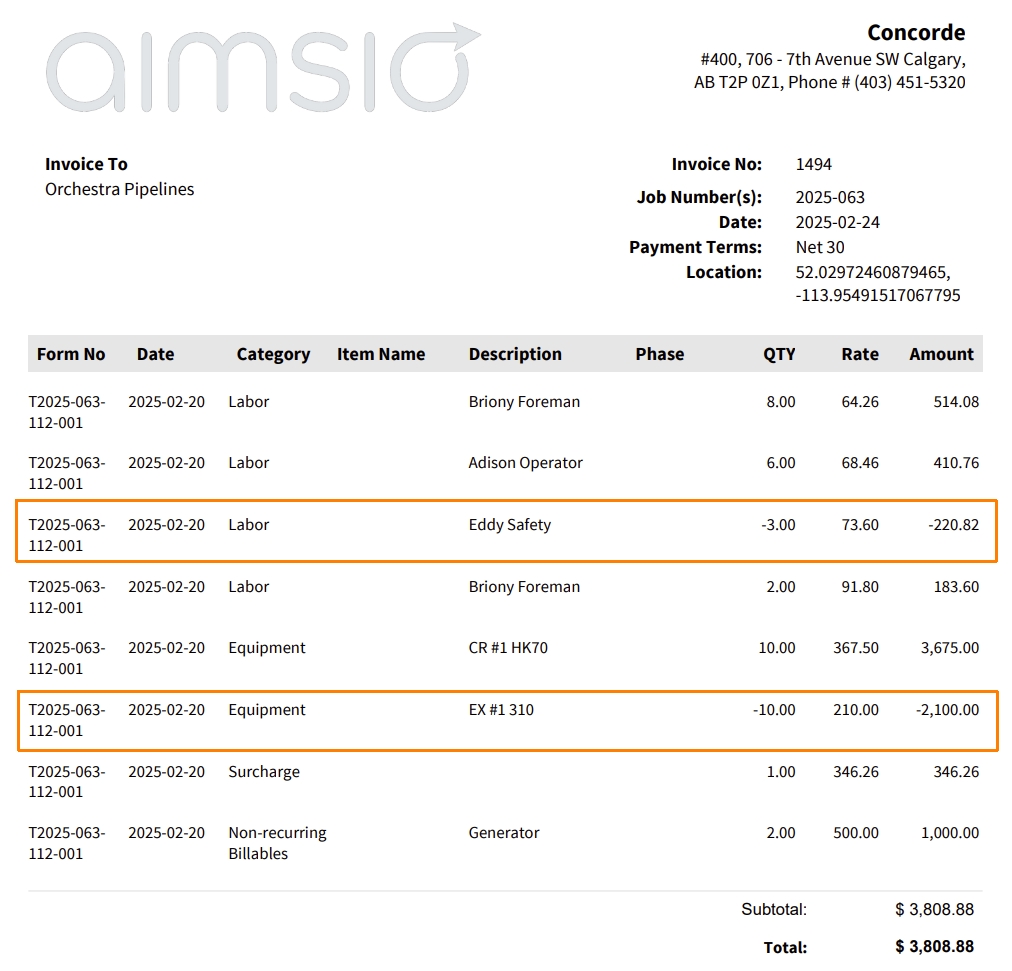
When the Ticket is invoiced, the reversed billable amount will appear as a negative number.
How to Pull Scheduled Resources
Ticket creators can pull in scheduled Employees and Equipment directly from our Dispatch tool. Resources need to be scheduled to a Job first. This can provide teams with a clear indication of the expected billable work to be recorded that day.
The date of a ticket is crucial in ensuring the correct Dispatched resources are pulled onto the Ticket. Keep this in mind if any member of your team are creating Tickets for a previous day.
If your teams are using Individual Timesheets to record hours, then this automation is not supported. We do support this feature with Crew Timesheets.
- When completing a Ticket, scroll down until you see the Pull Scheduled Resources button. Clicking it will fetch any available information from our Dispatch tool that day and bring it on to the ticket.
If Resource Groups have been used to schedule resources, they can be selected from the Resource Group dropdown menu. Only the selected Resource Group will be pulled onto the Ticket.
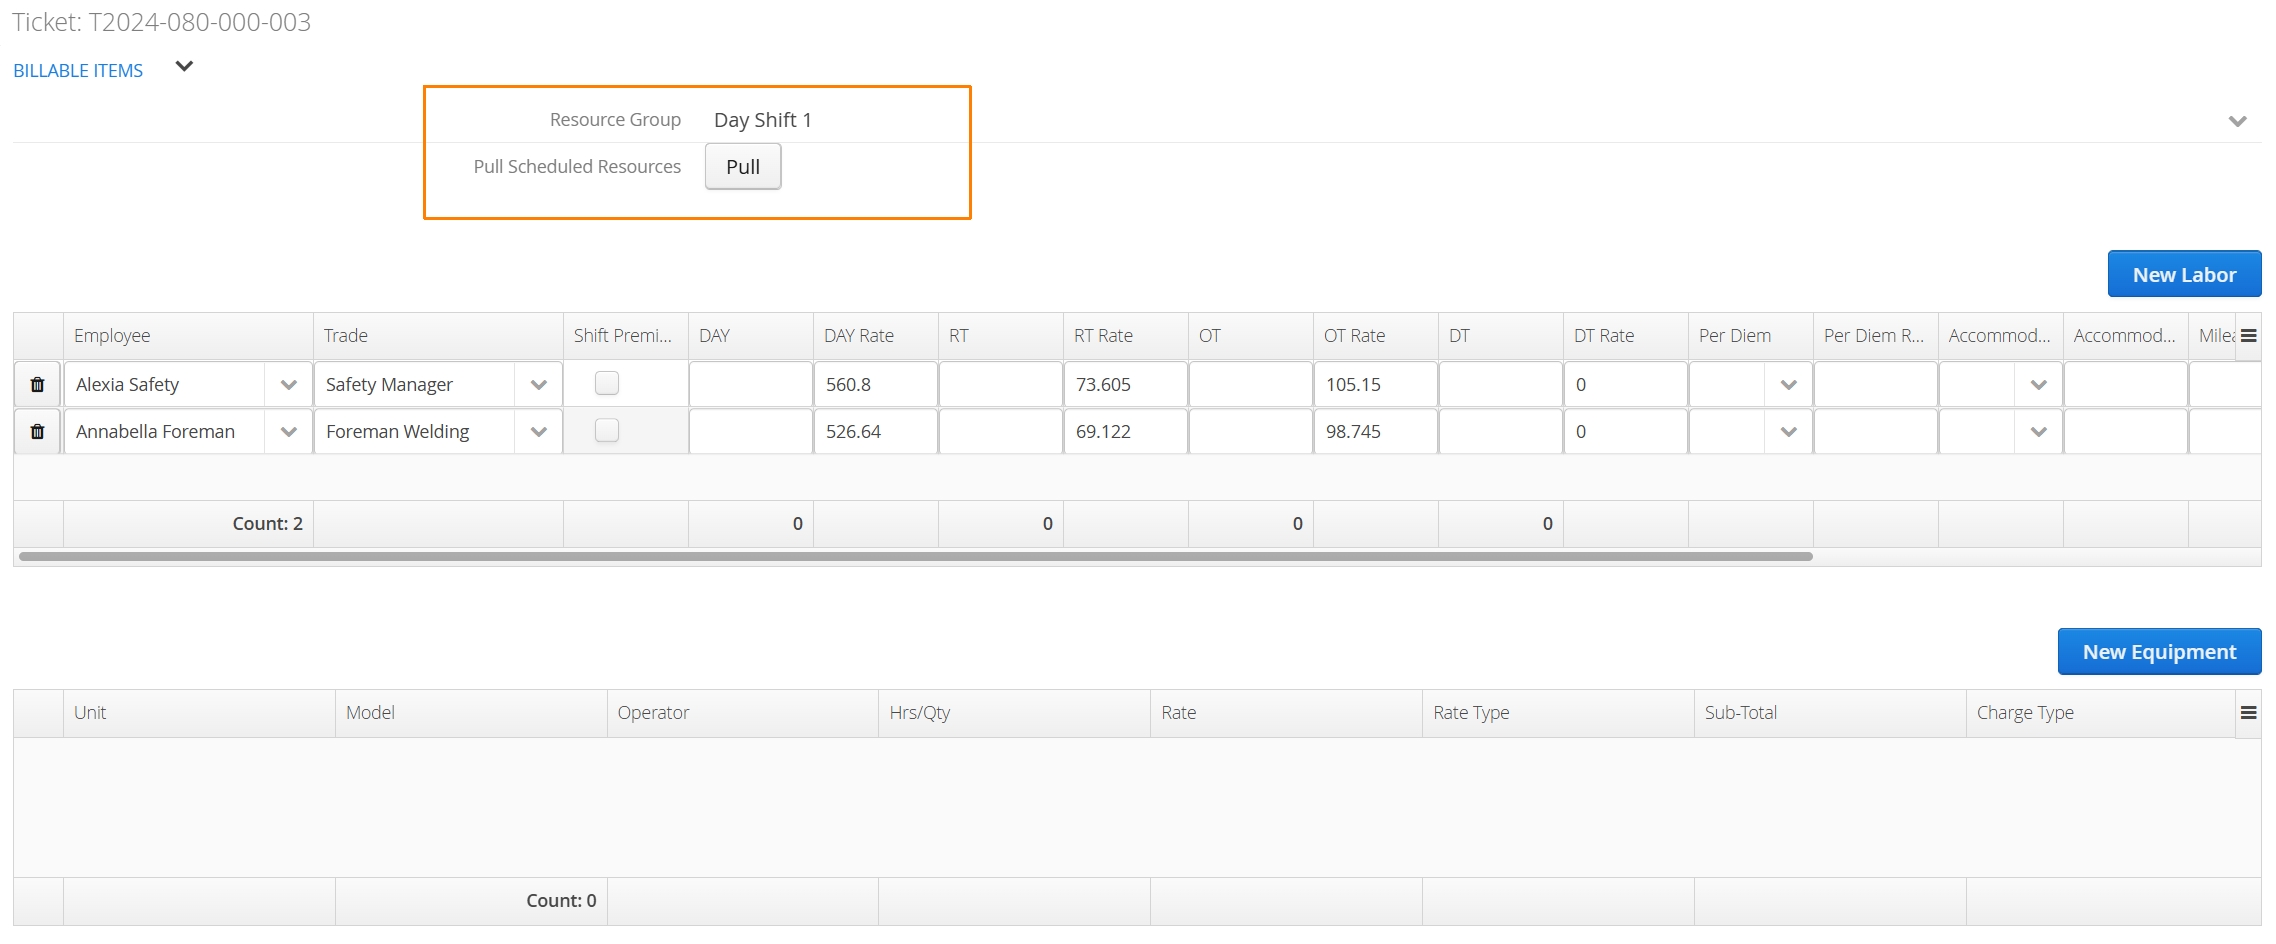
It’s possible to make changes or add new Labor and Equipment line items after pulling resources. If Pull Scheduled Resources button is clicked, after making changes to the form, Aimsio will override all information and replace it with the scheduled resources.
How to Charge Non-recurring Billables Item
If there have been Purchase Orders or NRBs recorded for the Job, Aimsio may present the option to bill these charges under the Non-Recurring Billables table. If a NRB has been marked as Internal, it will not show up in this table.
- Use the action button to the left of the NRB and select Charge to include it on the current ticket. Once a NRB has been charged, it will no longer show up as available to bill on future tickets.

How to Associate Line Items with WBS Activities
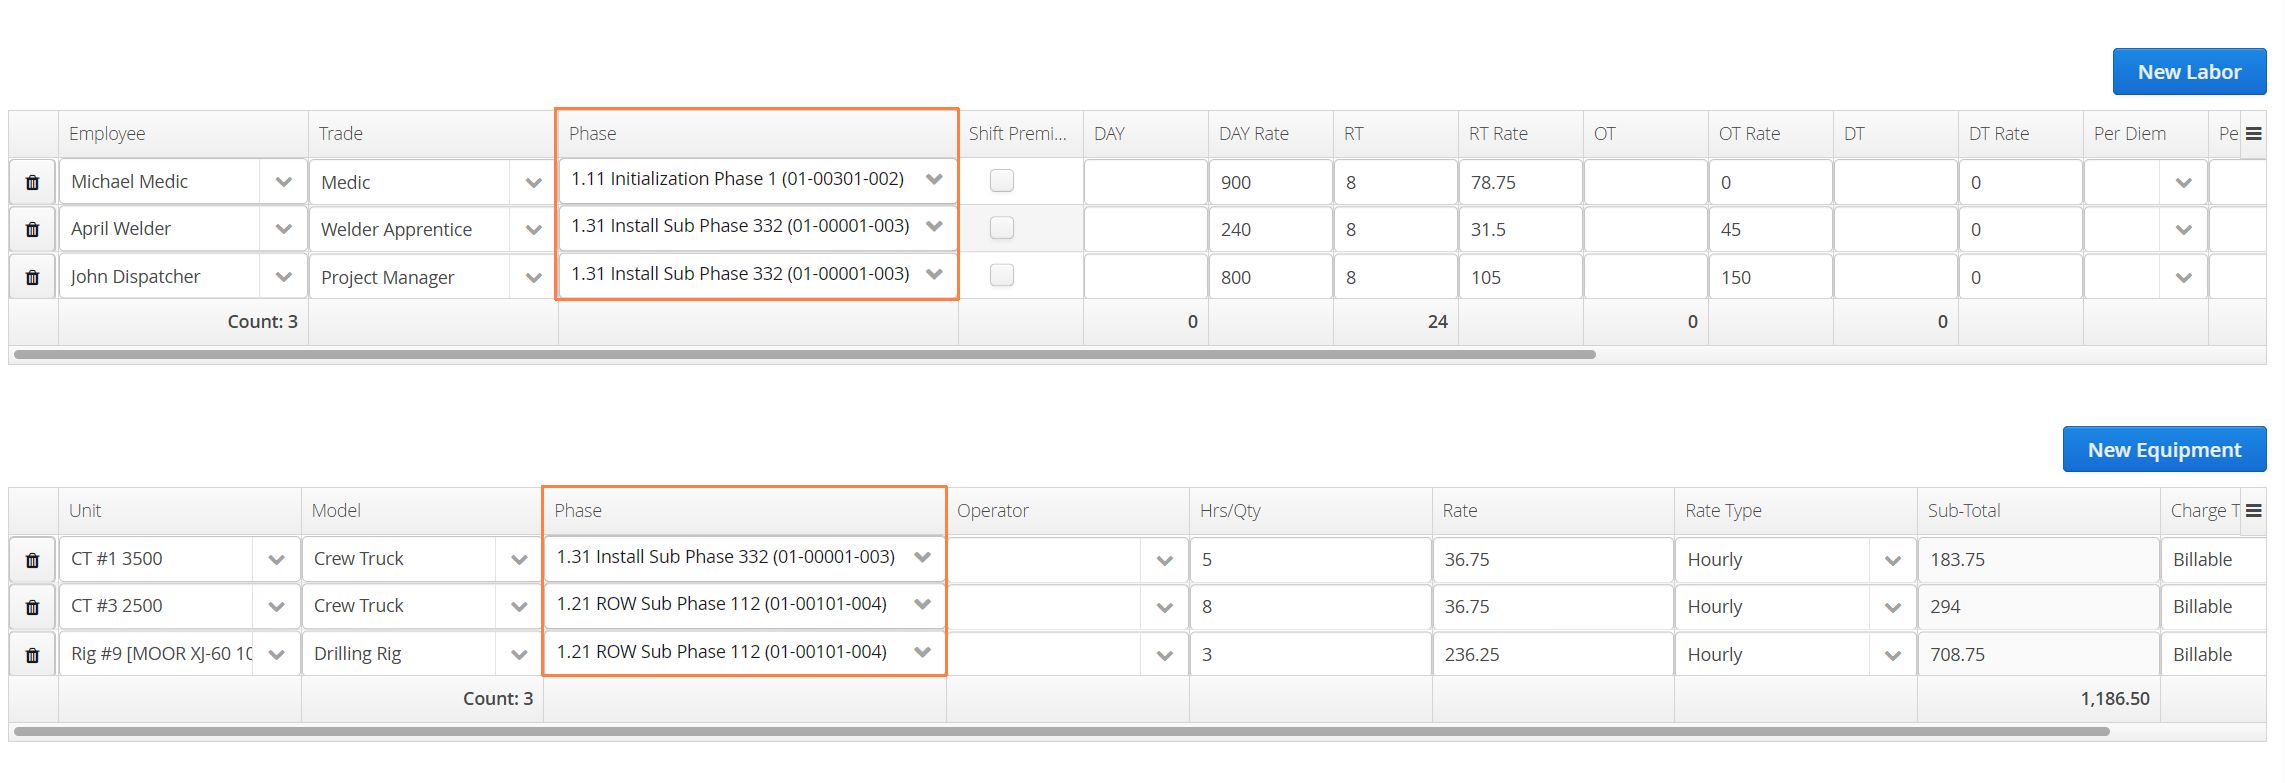
If a WBS Schedule is enabled for the Job, it will possible to record every line item against a WBS Activity (Phase). Recording this activity on Tickets is how Job Performance is tracked_._
- Each line item can be tracked by selecting the corresponding WBS Activity under the Phase column. Any Billable Item tables (ie: Labor, Equipment, Materials) can be tracked against a Phase.
To streamline the process of recording Physical Progress, Aimsio provides an Pull WBS button that will auto-populate any previously entered WBS Activities on the Ticket. This is located in a dedicated section called Production (WBS) Values. Users can then input updated quantities under the New Value column.
- Alternatively, you can manually input progress information by clicking New Progress Information in this section.

How to Save a Ticket
Generate a PDF of your Ticket by selecting Save and Submit on the bottom right.
Save and Close will keep your Ticket’s ‘Form Status’ Open. Save will save all changes and keep the form window open.
For more information on saving forms please read our Form Fundamentals guide.

Ticket Statuses
Accounts can track a number of statuses related to tickets. These statuses could be relevant to different departments including Office Administration, Payroll or Accounting. It is possible to actively filter the Ticket page by status in order to quickly execute reviews or complete bulk actions (e.g. downloading or updating ‘Approval Status’).
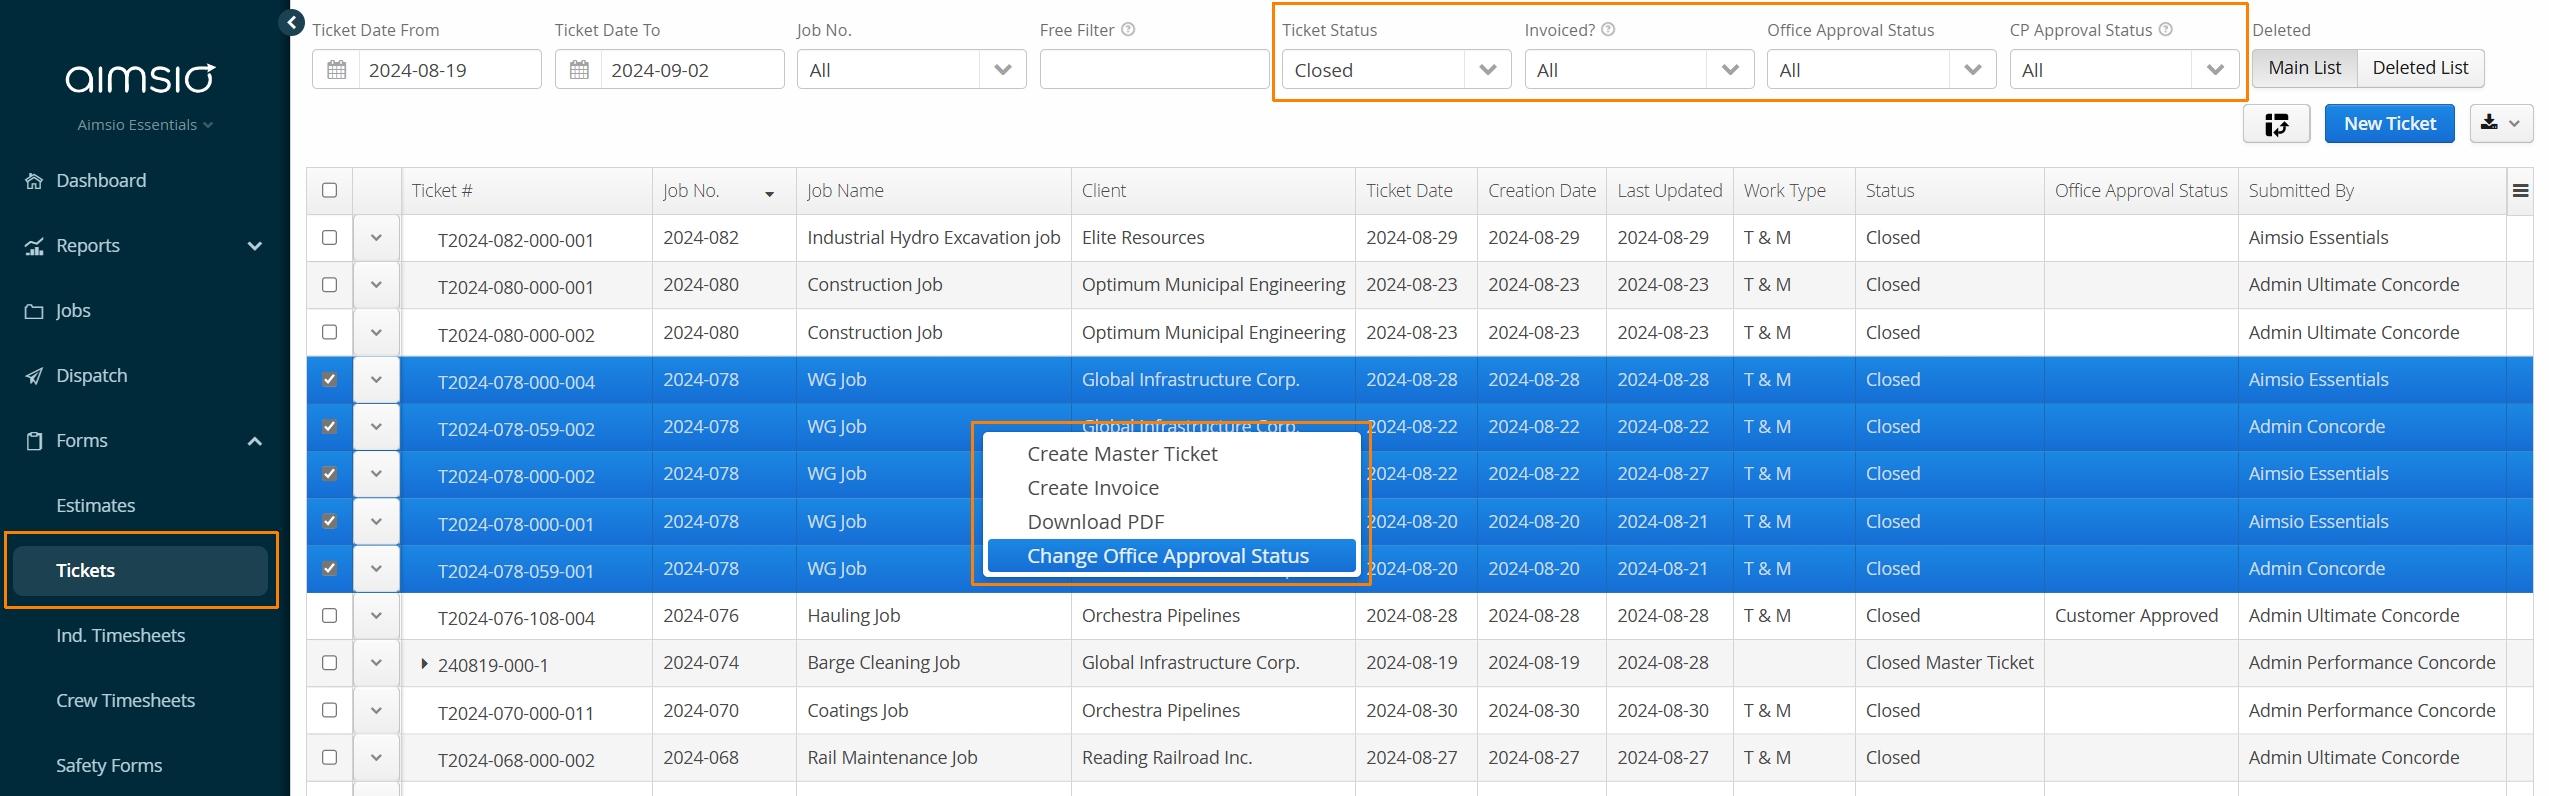
The process in which a status change should occur is up to each account. The majority of status changes in Aimsio are a manual process. Ultimately, the size of your team will likely influence how many of statuses are relevant to your process.
The most important status to note is whether a Ticket is Open or Closed. A Closed status is required for the creation of an Invoice. A ‘Closed’ Ticket requires the user to click the Submit (or Save and Submit) button on the form.
Filtering by status from any form page can help identify completed forms.
As many Tickets are created using Aimsio’s mobile app, an Open form will indicate that it has been started, but not submitted (a user has not used the Submit button on the form). This can happen frequently in the field, for example, when a foreman starts a form early in the day and hasn’t finished or forgets to submit the form.
If form responsibilities are shared, an individual might create a Ticket, while another one finishes it on a second device. This can create challenges, as the originally opened Ticket will remain on a user’s device and potentially create a conflict with the same ticket that was first to close. Users should sync their device as often as possible to prevent this.
It’s worth monitoring to ensure users are not leaving open tickets on their device to avoid any complications. Have users delete open Tickets if another user has finished submitting it.
How to Edit, Approve or Download a Ticket
The process of editing, approving or downloading a Ticket is similar to other forms in Aimsio.
If you haven’t yet, review our Form Fundamentals guide for more information.
How to Delete a Ticket
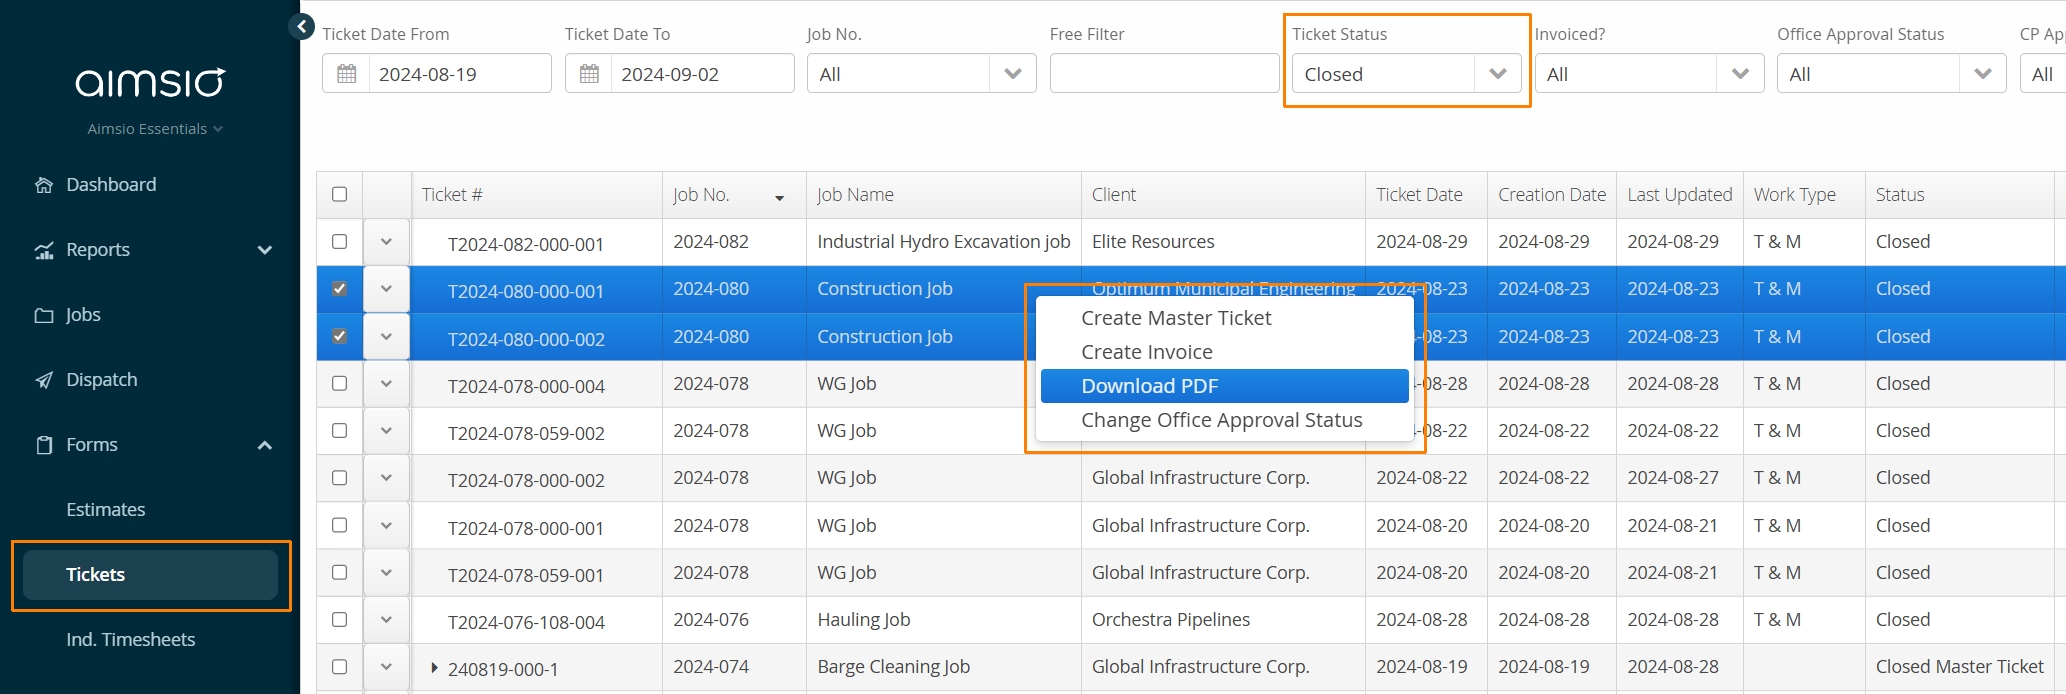
Locate the action button to the left of the Ticket and select Delete.
Only creators of the Ticket can use the Delete action when the status of the form is ‘Open’. If the Ticket’s form status is Closed, only authorized users will have the ability to delete the Ticket.
Tickets that have been invoiced cannot be deleted.
Either remove the line items on the invoice associated with the Ticket or delete the entire invoice in order to make changes to the original Ticket. Click here to read more about invoicing
How to Send a Ticket to a Client for Approval
Aimsio provides a dedicated portal for your clients to approve tickets digitally. Once a document has been signed, its status and document are automatically updated. This makes it extremely convenient for keeping track of which tickets are ready for invoicing.
For more information read our Client Portal guide.
How to Manually Replace an Aimsio PDF
If the copy of your Ticket has been signed outside of Aimsio, users can use the Replace PDF action to upload and replace the copy inside your account. This action is available to authorized users by clicking the action menu beside any form on a form page.
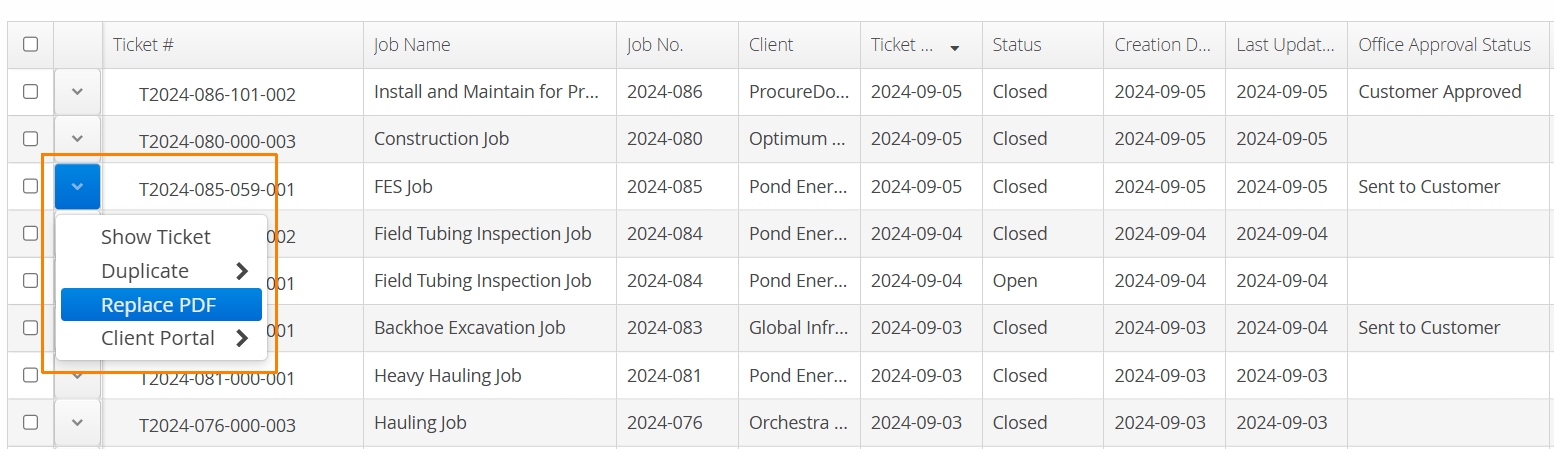
If users regenerate a PDF in Aimsio, after the Replace PDF action is used, accounts will lose access to the last uploaded copy of the PDF.
How to Create a Master Ticket
In cases where you may want to consolidate more than one Ticket together, you can create a Master Ticket. Master Tickets can only be created for a single client.
For more information, read our Master Tickets guide.
How to Invoice Tickets
Once a Ticket has been submitted, it’s able to be brought onto an invoice. Aimsio can invoice multiple tickets at once (either for the same job or client) or a Master Ticket.
For more information please our Invoices guide.