Aimsio’s WBS Package lets you turn your internal Work Breakdown Structure (WBS) into a clean, professional PDF for your clients or your own teams.
Instead of showing your entire raw operations grid, you can use a WBS Package to choose exactly which columns to show, rename headers to match your client’s wording, hide internal costs, and add progress notes before exporting.
Tier Availability: The WBS Package is an advanced feature available only to customers on the Ultimate tier. If you don’t see this feature and want to discuss adding it to your account, please reach out to your Client Success Manager.
Table of Contents
What are WBS Packages used for?
While the WBS Package can be customized and named to suit any reporting requirement, most companies use this feature for these use cases:
-
Bid Proposals (Pre-Project): Used during the bidding phase of projects. It pulls your high-level budget and contract values to create a clean proposal focused on final contract rates, rather than day-to-day crew hours.
-
WBS Progress Reports (Active Project): Used after work has started. You select a specific date range, and Aimsio pulls the progress made during that time such as quantities completed, billable amounts, and total invoiced so far.
-
Custom Reports: Build your own custom report types and internal snapshots based entirely on any preferred combination of your WBS Metrics (e.g. Internal Financial Report).
Accessing the Module & Creating a Package
Navigate to Operations Forms > WBS Package and click on the New WBS Package button.
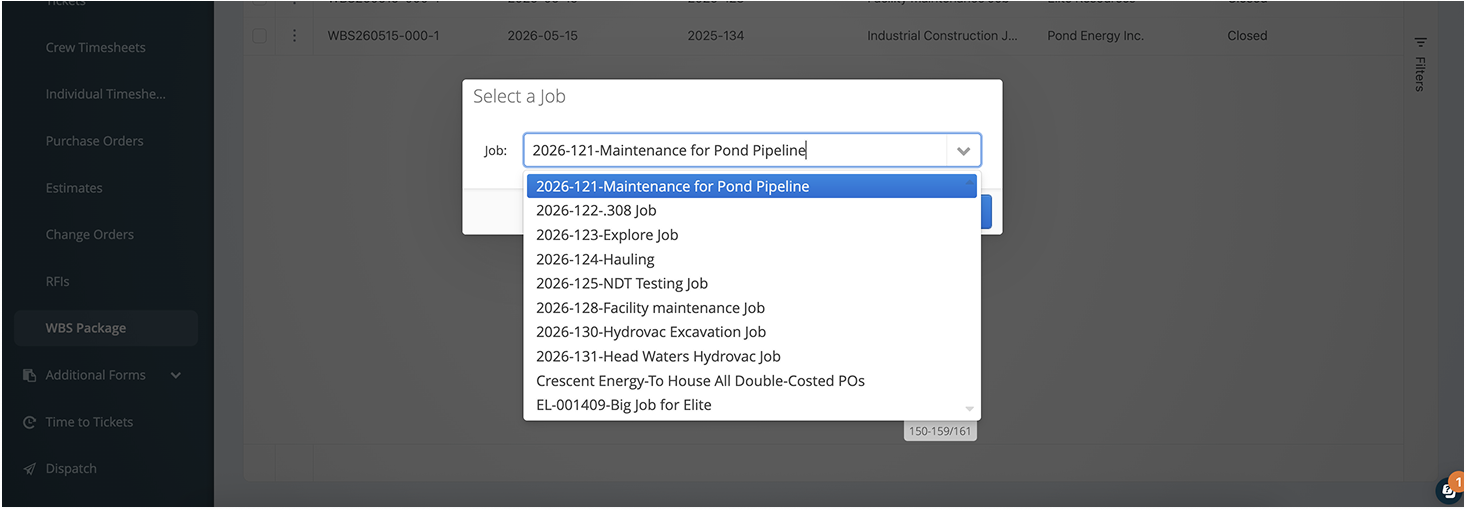
Select a job from the dropdown menu. Information from that chosen Job will automatically pull directly into the form fields.
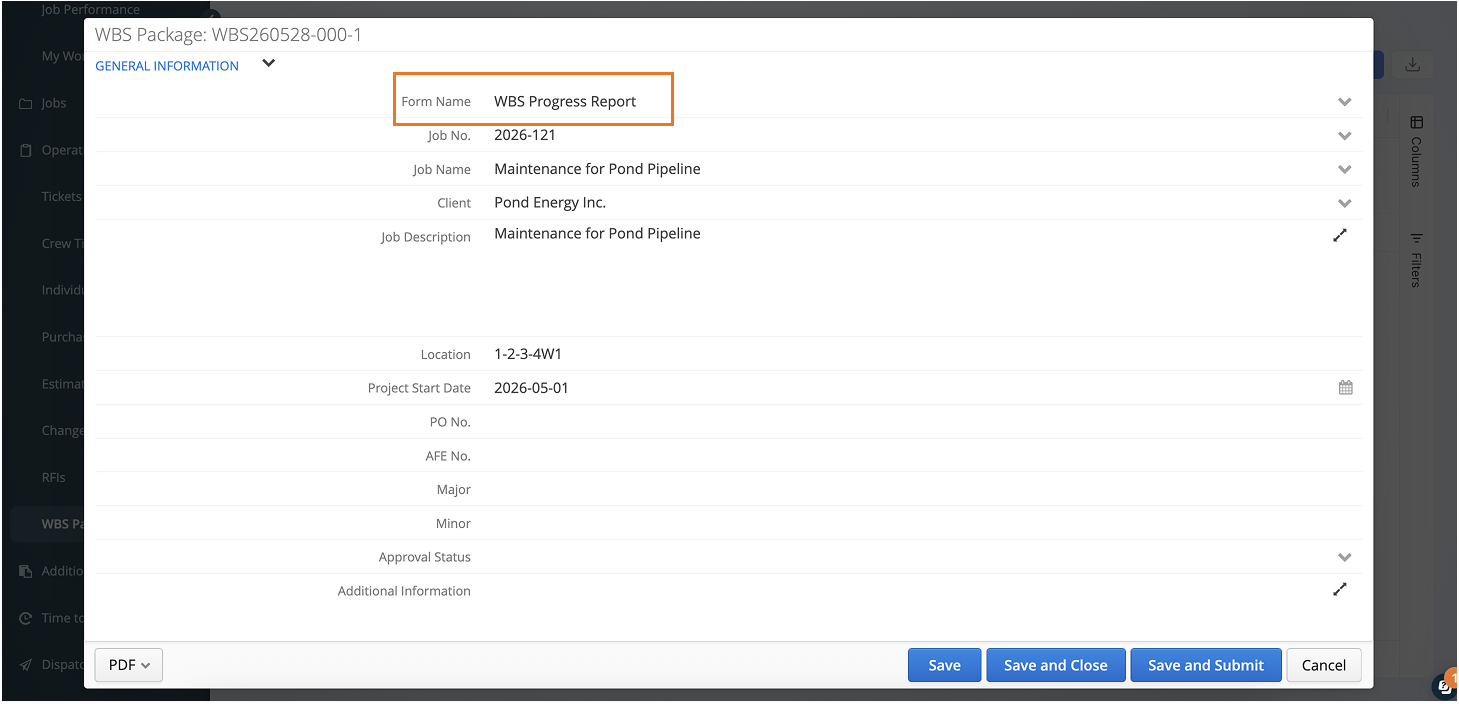
Locate the Form Name field. You can either select an existing form name from the dropdown or type your own custom title.
Attaching PDFs and Images
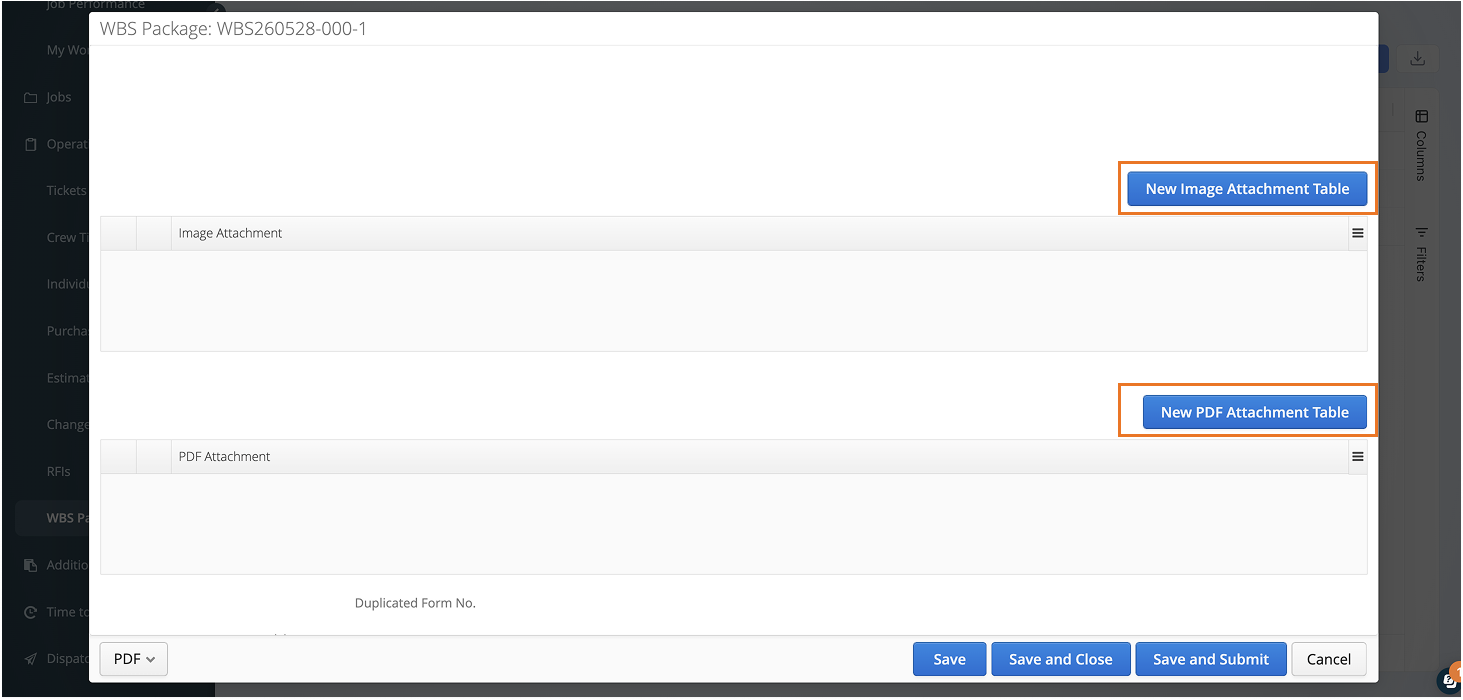
There is a dedicated section on the form where you can upload PDF and Image Attachments. Use this area to bundle supporting project files such as engineering designs, blueprints, or site floor plan directly into the package record.
Configuring the Report
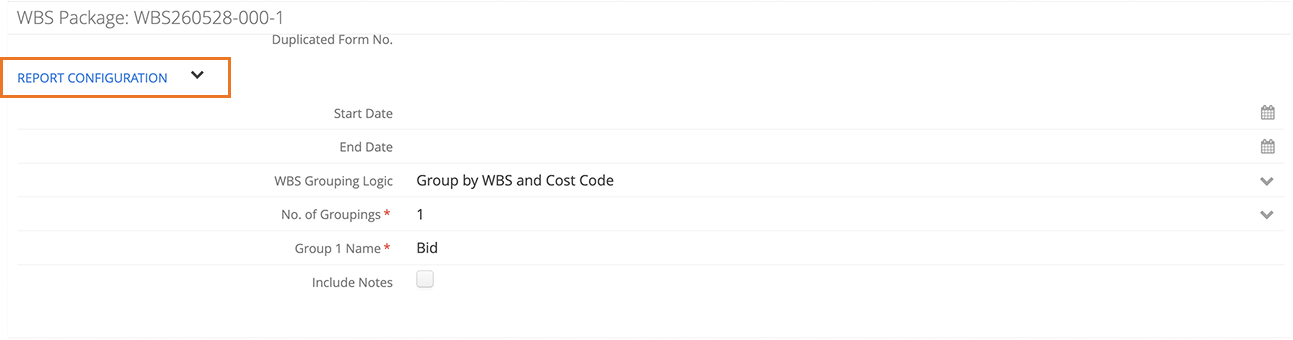
The Report Configuration section controls the layout, date parameters, and how data gets pulled from your WBS.
Set your Filters and Logic
-
Date Filters: If you enter a Start Date and End Date, Aimsio will restrict the data snapshot to only pull operational and financial information that falls within that specific date range.
-
WBS Grouping Logic: Choose how you want the rows organized on your final document using the dropdown:
-
Group by WBS: Organizes rows by your internal project phase names (e.g., Setup, Training, Demolition). This represents how your field teams naturally structure their work.
-
Group by Cost Codes: Groups and collapses your data entirely by your client’s accounting cost codes. If your internal team uses multiple micro-tasks that all bill back to a single major client code, Aimsio will automatically sum their dollar amounts together so your client sees a single, clean line item that matches their purchase order.
-
Group by WBS and Cost Codes: Organizes rows by your internal phase names alongside the client’s cost codes in brackets.
-
-
Select Groupings: Choose the number of tables (No. of Groupings) you want to feature in this package from the dropdown menu (up to 3).
Mapping Columns (Group Metrics Table)
When you have filled out your high-level parameters, look to the tables generated below. If you selected 2 or 3 groups under No. of Groupings, a corresponding section for Group 1, Group 2, and Group 3 will display further down the form.
For each table group, create a name and decide whether or not you want to include notes:
-
Group Name: Give each table a distinct title that describes its data focus (e.g. Bid or Progress Report)
-
Include Notes: Check this box if you want the table to show any pre-existing notes from your master WBS onto PDF for this Group.
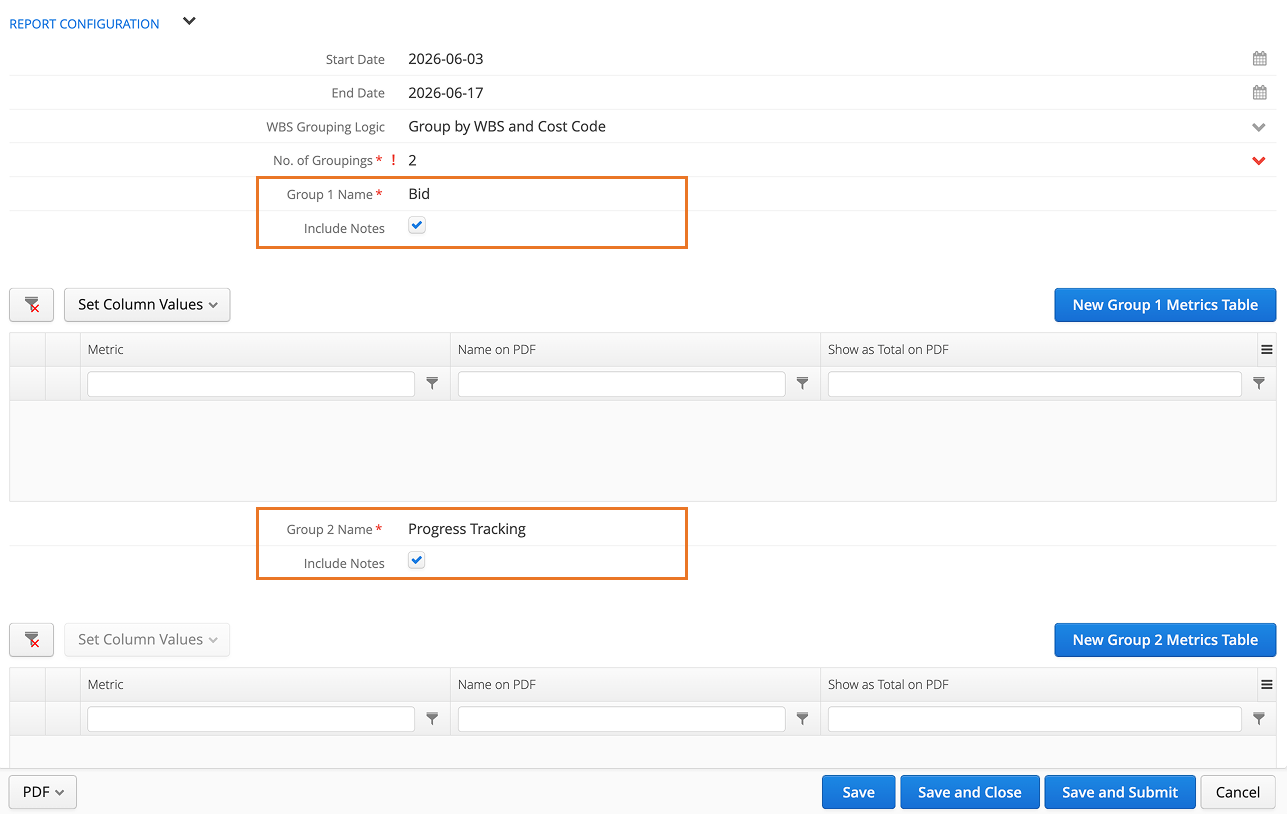
Next, click the New Group Metrics Table button to start adding data to each report.
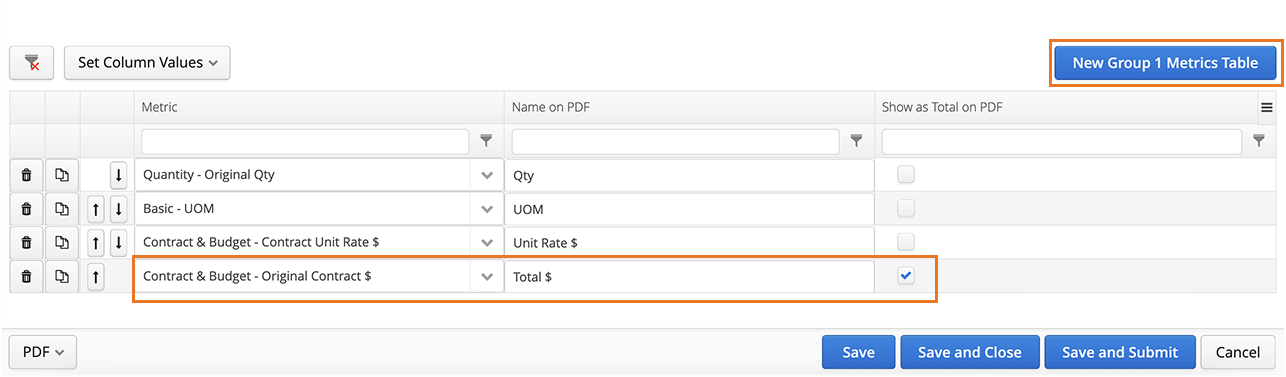
-
Metric: Select the data you want to pull from your WBS (e.g., Quantity, Contract Unit Rate $, Plan Start Date).
-
Name on PDF: Type exactly what you want the column header to say on the final document (e.g., you can rename Contract Unit Rate $ to just Unit Rate).
-
Show Total: Check this box if you want a total summary row at the bottom of this column on the PDF. Note: Only check this for numeric columns (e.g. dollars, quantities). Leave it unchecked for text columns like UOM.
To make sure the PDF looks clean and fits on a standard page, you can add a maximum of 7 columns (metrics) per table.
Refreshing Your Data (Pull WBS Activities)
Because field data and project financials change constantly, WBS Packages do not update automatically. Instead, they take a deliberate snapshot of your data when you tell them to.
Pulling WBS Activities
After you set up your columns, you must click the Pull WBS Activities button to bring the data into the report.
When you click this, Aimsio adds a Generated At timestamp to the report. This acts as an audit trail, proving exactly what day and time the project data was pulled. You can refresh the data at any point by clicking the Pull WBS Activities button again.
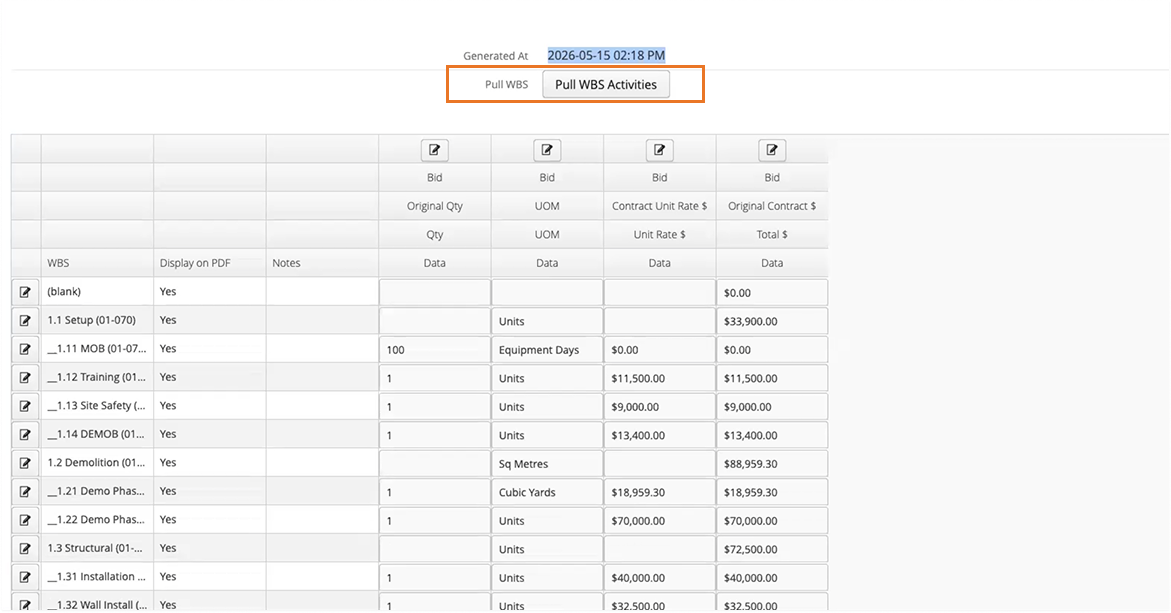
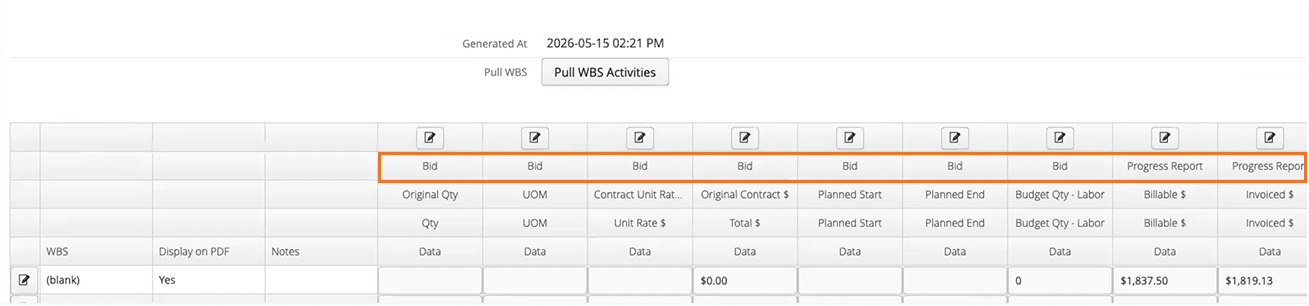
If you configured more than one table, you can identify which data belongs to which section directly within the pivot table because you named each table.
-
In the Pivot Table: The data for all groups will display combined within one single table on your screen, broken down by your designated table names.
-
On the PDF Document: When you generate the PDF, Aimsio will automatically separate this data into completely distinct, individual tables matching their respective themes.
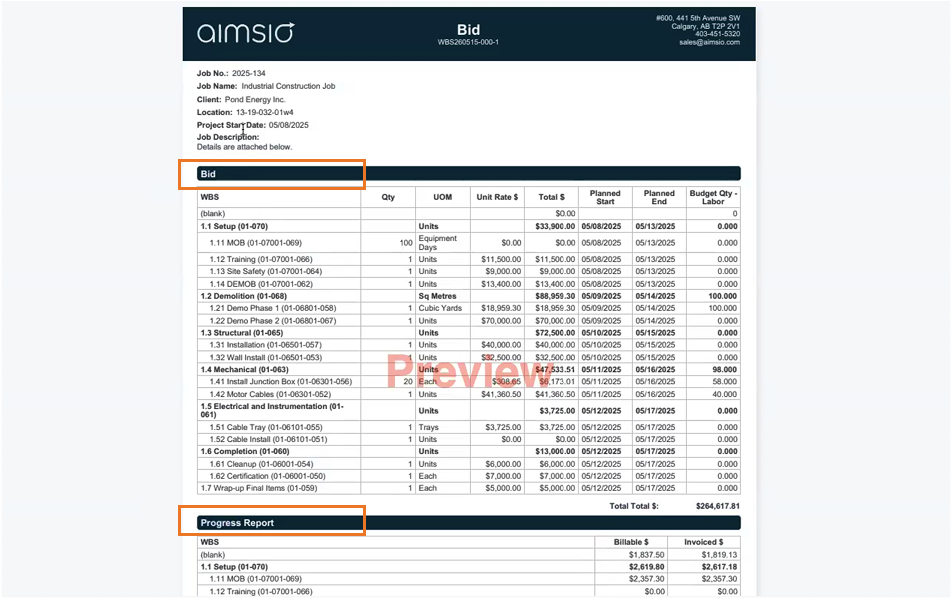
If you look at the pivot table and want to adjust your columns, simply go back up to the Groupings Metrics Table, add or remove your metric rows, and click Pull WBS Activities again. The data view and the Generated At time will both update to reflect your changes. This allows you to safely play around with your configurations until the layout is perfect.
If you make a change to your groupings without clicking Pull WBS Activities, the system will trigger a reminder message prompting you to regenerate the report before closing in order to successfully save your changes.
Editing Rows in the Pivot Table
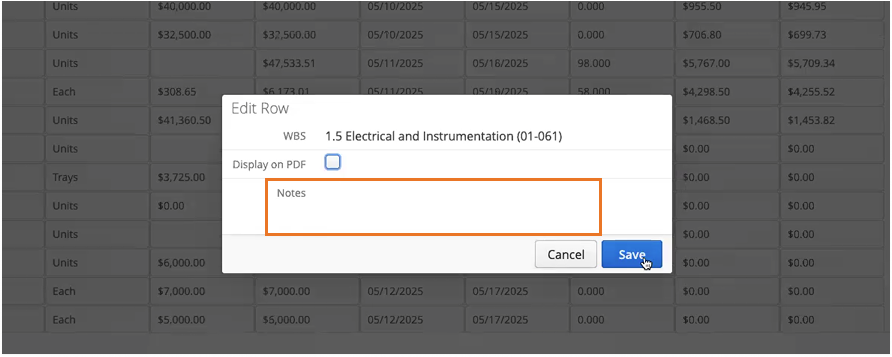
Once you pull your data, your main WBS tree structure will display in the pivot table. To keep your financial records accurate, the numbers themselves cannot be edited here (they must be changed on the master WBS or Budgeting tabs). However, you have full control over what your client sees.
If you have internal cost codes, shop hours, or safety meetings that your client doesn’t need to see, you can hide them:
-
Click the Pencil Icon located on the far left of the row you want to hide.
-
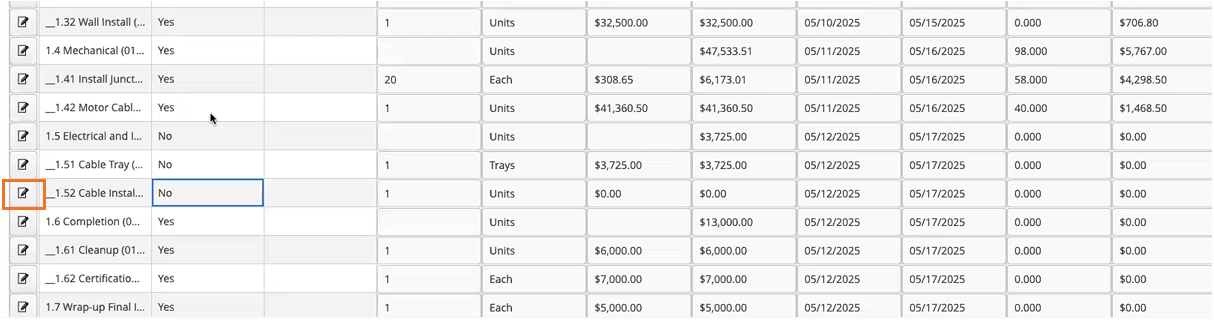
Uncheck the Display on PDF checkbox.
-
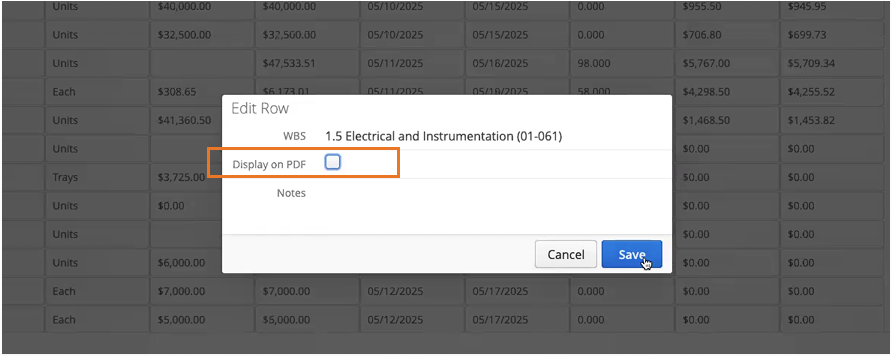
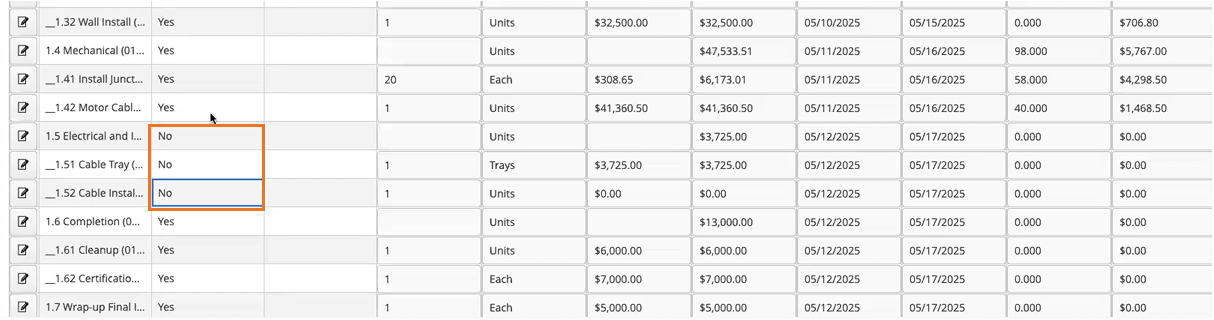
Parent-Child Rule: If you uncheck a “Parent” Phase/WBS, Aimsio automatically unchecks all “Child” sub-items nested underneath it.
-
Once completed, you will see that all modified rows now display No under the Display on PDF column, meaning they will be completely skipped when printing.
The Notes column automatically pulls text already written in the Additional Information fields of your master WBS.
If you want to customize it for the report, click the Pencil Icon. You can clear the default text, type brand-new notes, or edit existing sentences (e.g. “Demolition delayed 2 days due to weather” or logging specific monthly milestones).
Terms & Conditions and PDF Attachments
You can manage legal fine print or technical documents at the bottom of the form:

-
Standard Text: If you have short, standard boilerplate legal text, our team can build it into your system during onboarding so it prints automatically at the bottom of every package.
-
Multi-Page PDF Attachments: If your terms and conditions are pages long, upload them to the Terms & Conditions PDF Attachment field. When you hit Save & Submit, Aimsio will automatically append those full PDF pages to the very end of your final report.
Copying Existing Packages (Duplication)
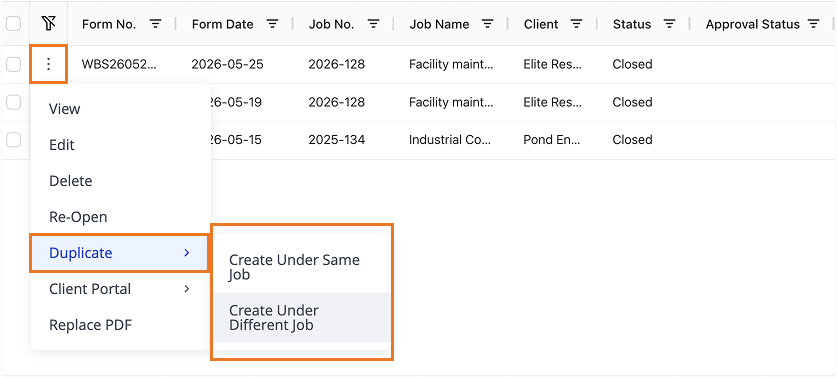
You don’t have to rebuild your column layouts every time you need to make a report. You can use the Duplicate button to save time:
-
Duplicate under the same Job: This copies the exact layout, column names, and the WBS visibility structure from a previous report (like using April’s layout to start May’s report). If you previously hid specific rows or phases, those selections stay hidden. To complete your new report, just change your Start and End Date filters (if using) and click Pull WBS Activities to load the new month’s numbers.
-
Duplicate under a different Job: This lets you take a column layout and copy it over to a brand-new project. Because a different job will have a unique WBS structure, hidden selections do not carry over using this option. Once the template is copied to the new job, simply click Pull WBS Activities to fill it with that job’s unique structure.