Accounts can quickly create invoices from Tickets, with support for multiple grouping options and both Canadian and US tax rates. Standalone invoices are also supported.
How to Create an Invoice from Tickets
Once one or more Tickets have been submitted, they can be brought onto an invoice. Multiple Tickets can be invoiced at the same time. Accounts can also invoice a Master Ticket.
Only ‘Closed’ Tickets for the same Job can be invoiced together. Tickets cannot be invoiced more than once. For more information on ‘Form Status’ see our Form Fundamentals guide.
- To create an invoice, navigate to the Tickets page and select the Tickets you’d like to invoice. Once the Tickets have been selected, right click on the selection and choose Create Invoice.
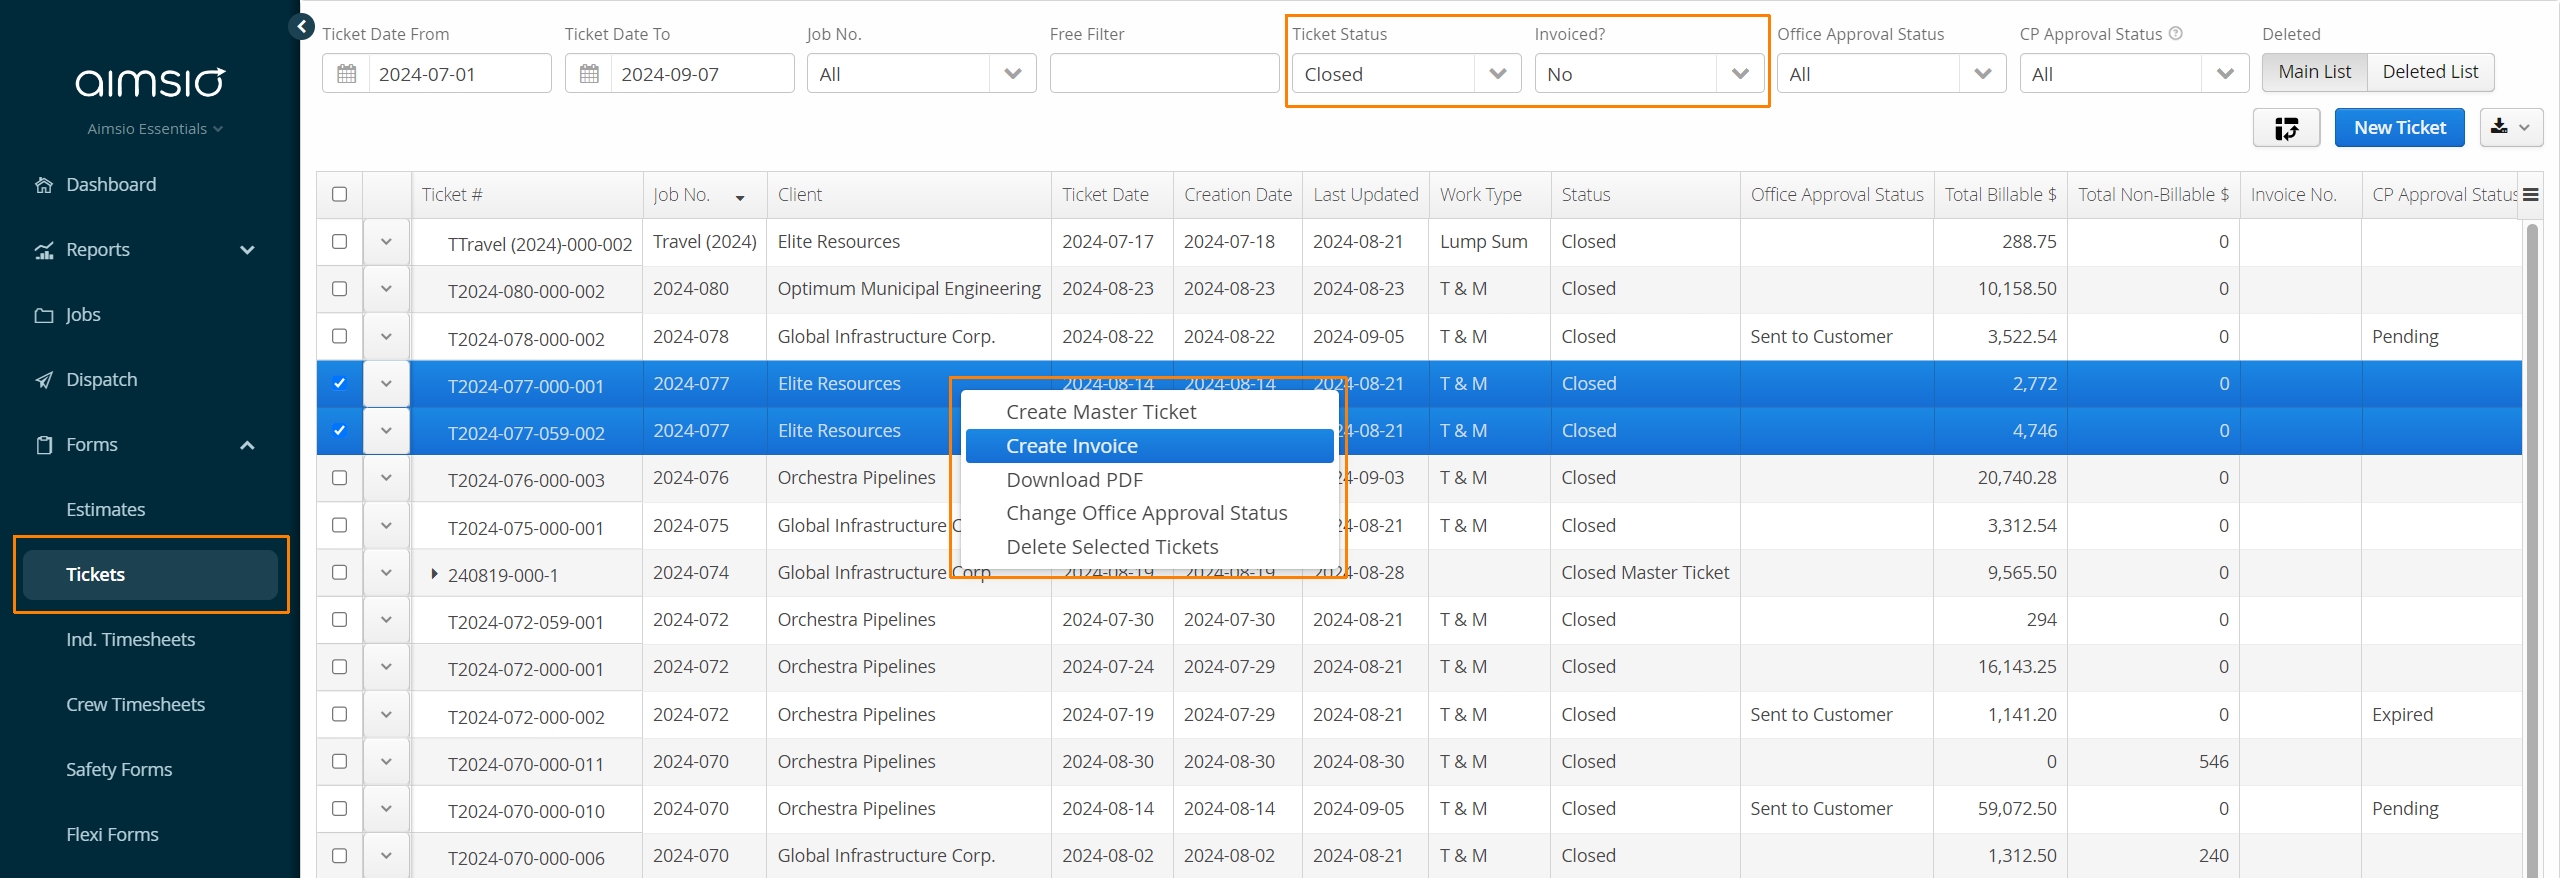
Use filters along the top of the Ticket page to isolate Tickets that have a Form Status of ‘Closed’ and do not have an ‘Invoice Number’.
- Once an invoice has been created, Aimsio will display the invoice window. Information from the Client and Job will be automatically pulled onto the invoice.
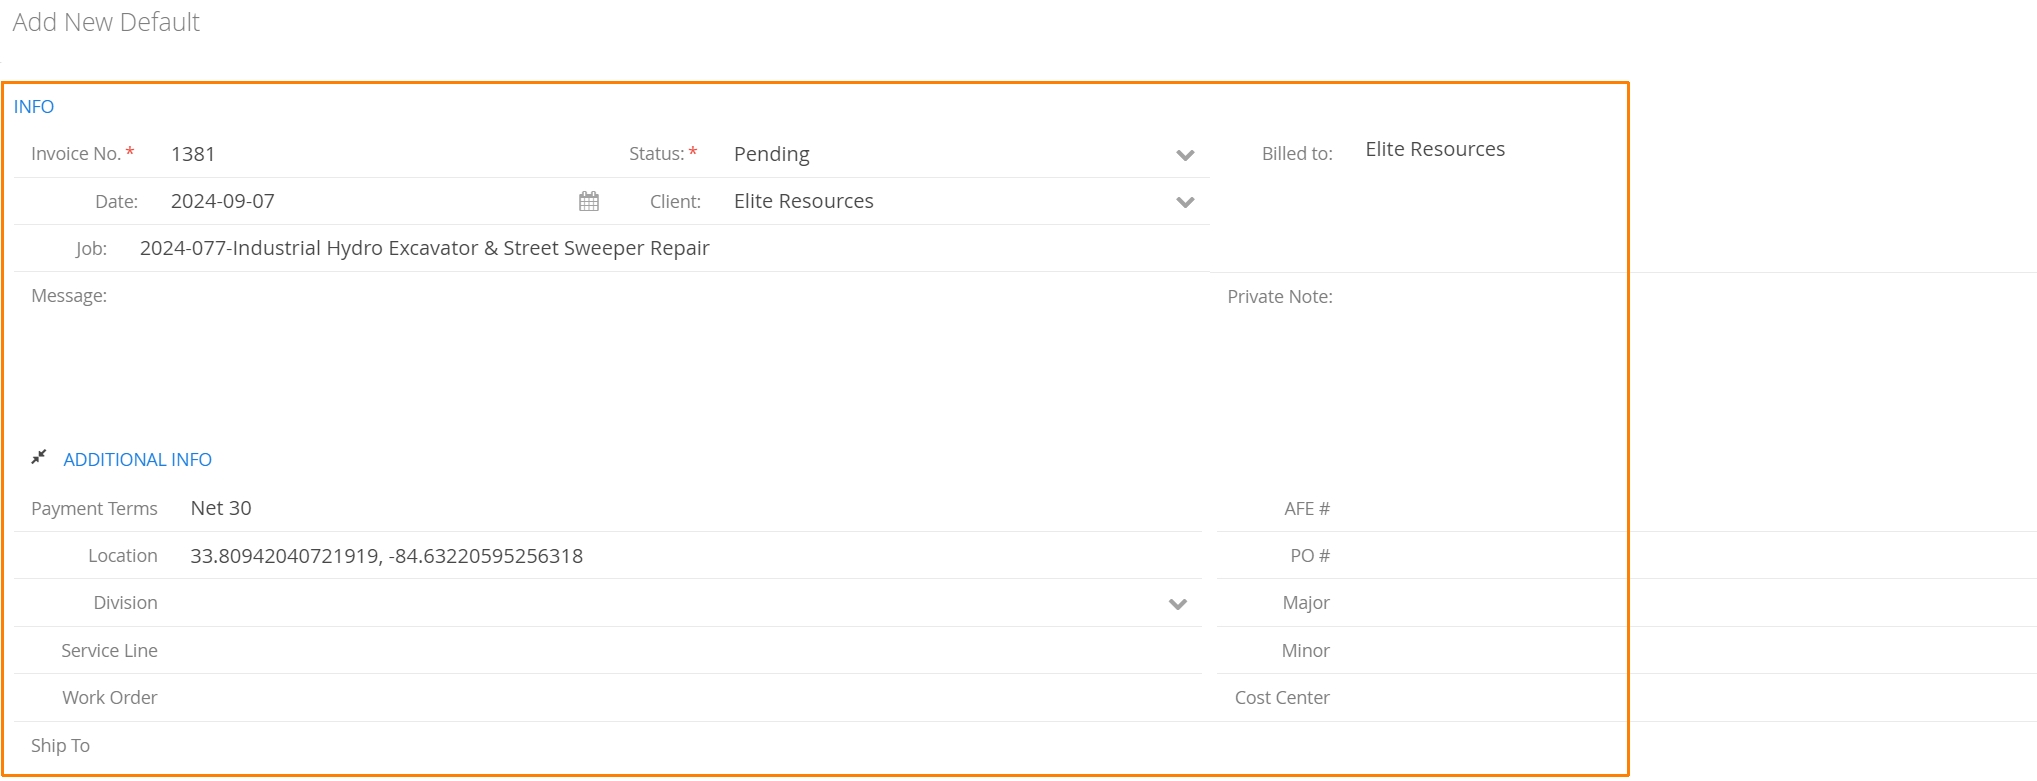
When an invoice is created, it’s possible for users to generate a PDF copy before the invoice is saved. If users forget to save the invoice, accounts will have a PDF invoice without a matching invoice record on their invoice page.
Do not forget to save a record of the invoice by clicking the Save button on the lower right.
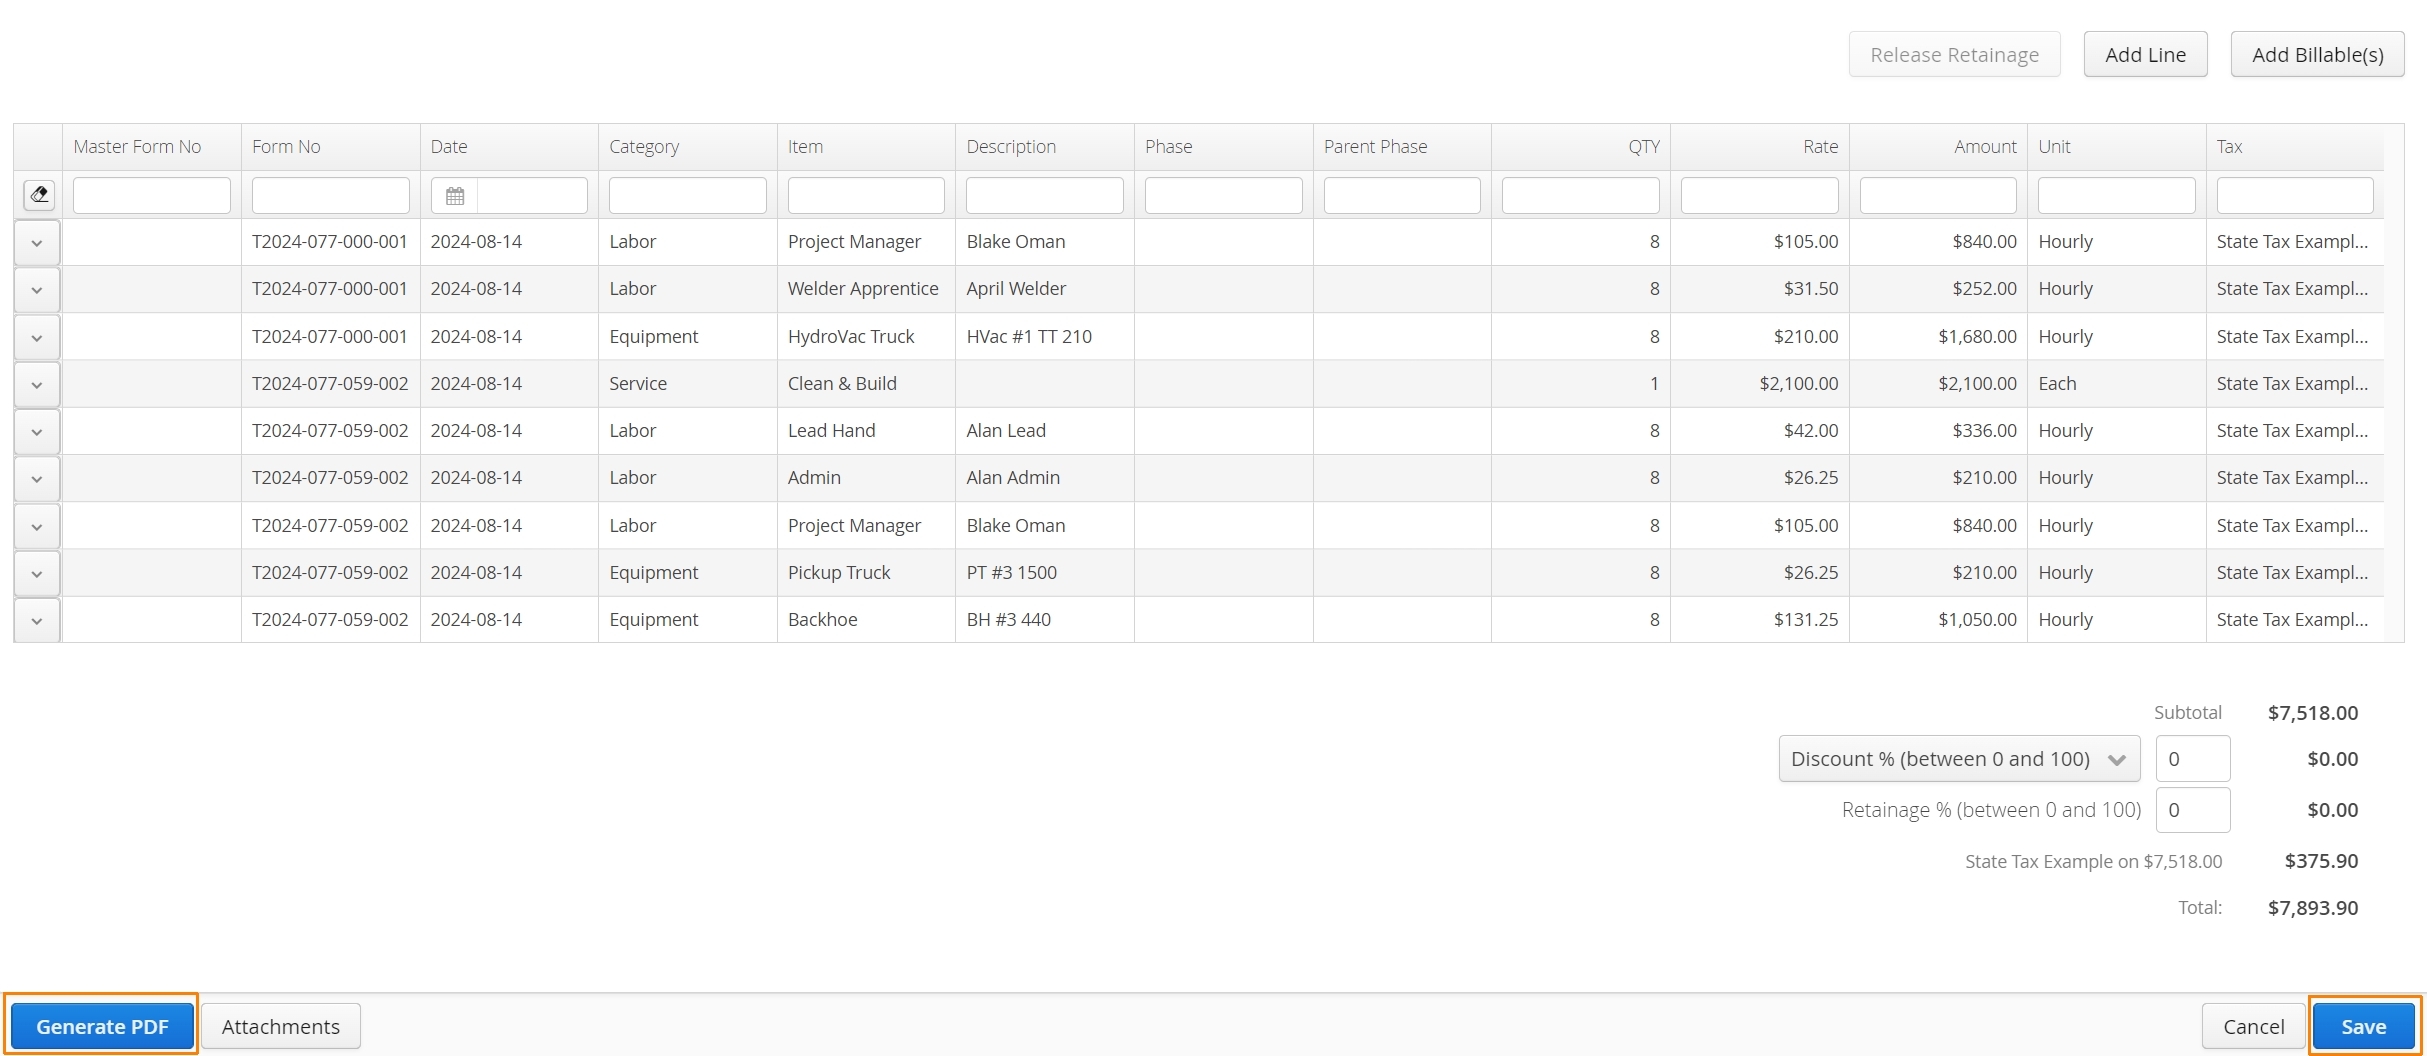
Invoice Line Items
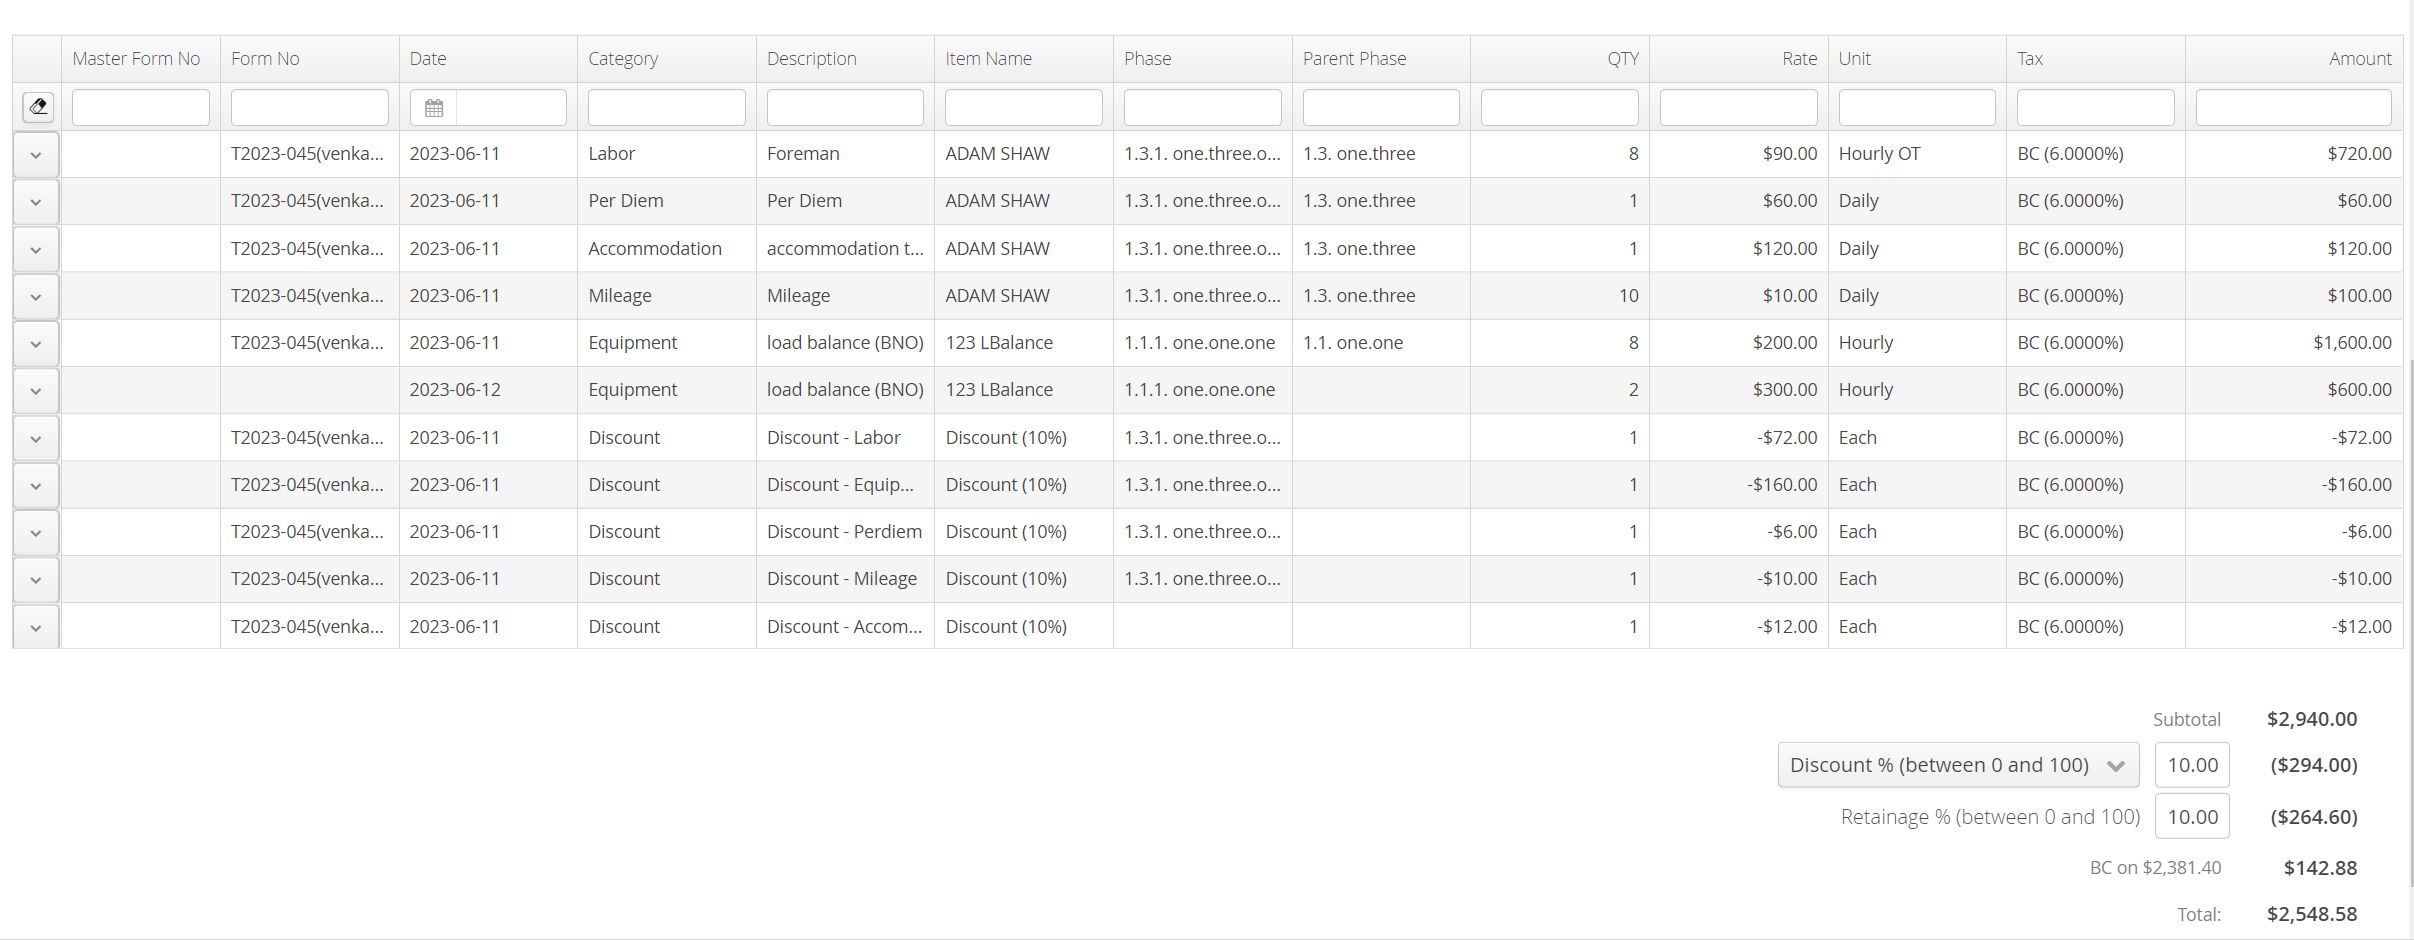
Invoices display all Billable Items, NRBs and miscellaneous charges relating to every line item found on each Ticket. Line items can only be grouped when a PDF copy is created by using our Invoice PDF Templates.
How to Create an Invoice PDF
To generate an invoice PDF, click on the Generate PDF on the bottom left of the invoice window.
When generating an invoice PDF, users will have the option to include all Attachments, along with an Invoice Cover Page and the Backup Tickets.
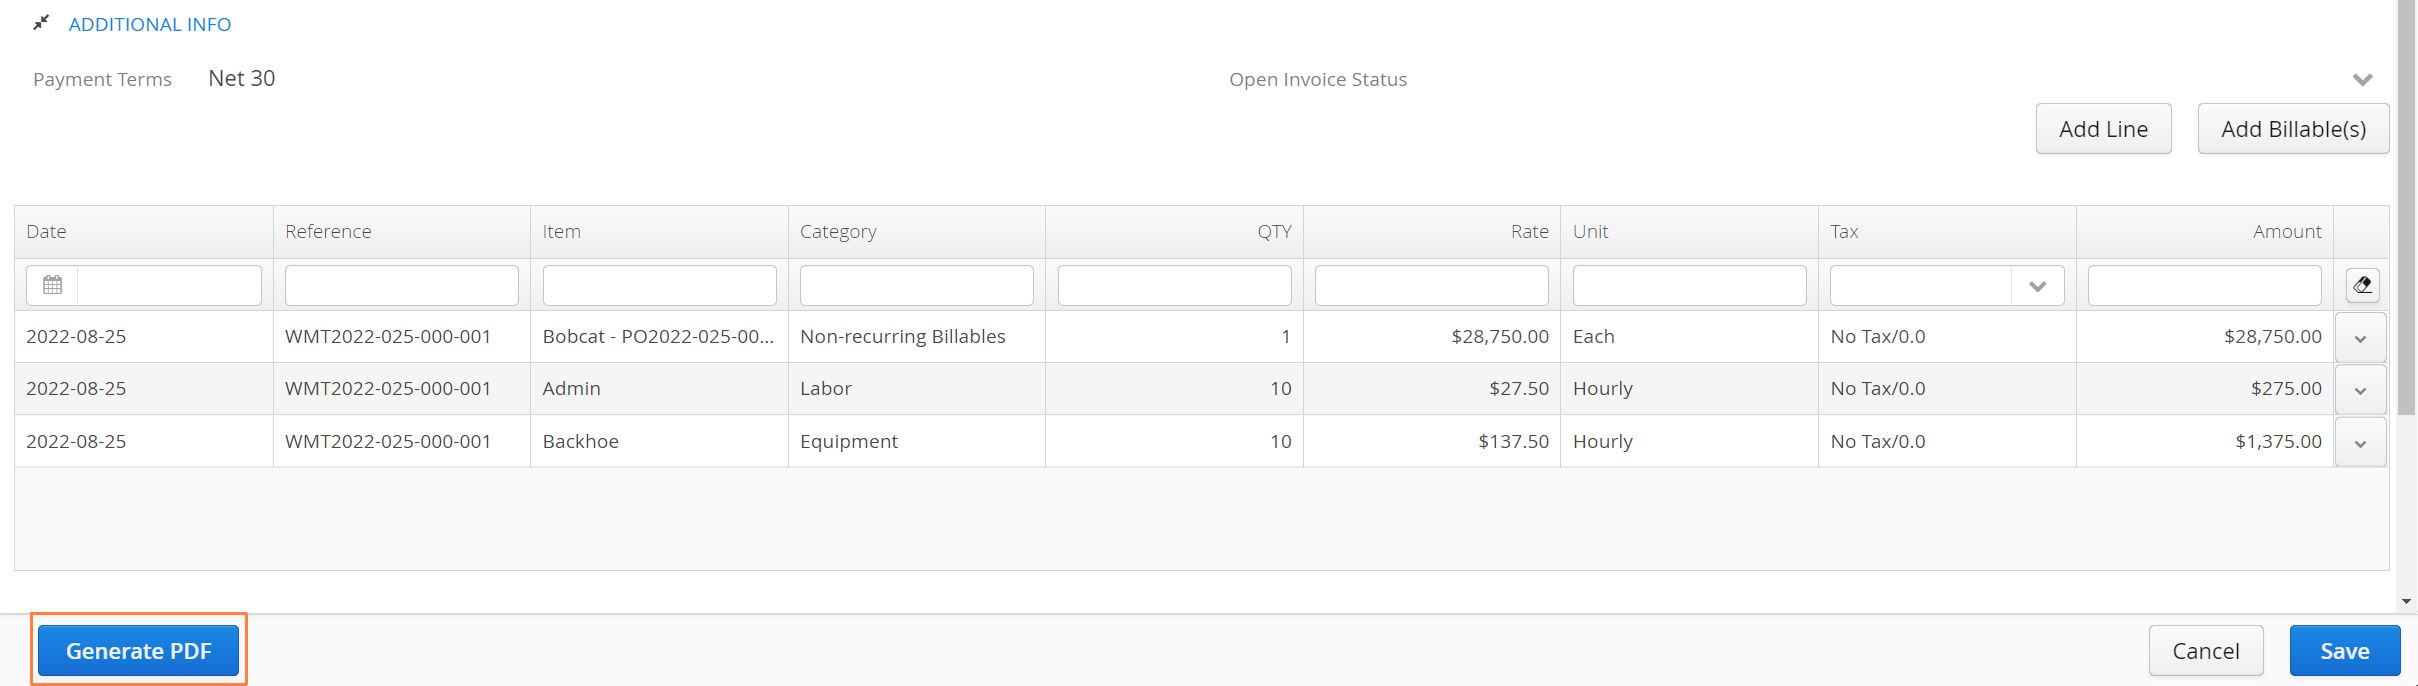
- When a PDF copy of an invoice is being created, items are grouped by selecting the preferred PDF Template.
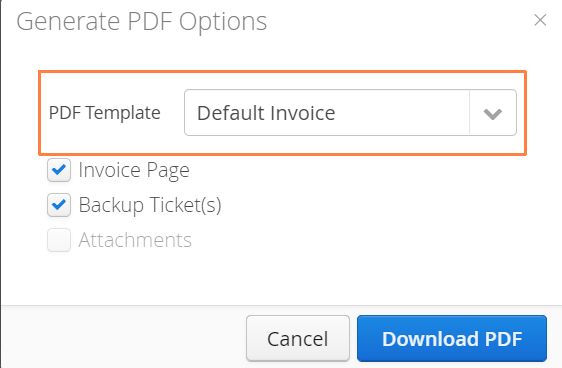
For more information on creating templates see our Invoice PDF Templates guide.
Unlike other forms on our platform, an invoice PDF is not stored in Aimsio after creation. If you require another PDF you’ll have to use the Generate PDF action again or download invoices from the Invoice page.
How to Add Tickets to an Existing Invoice
Users can add tickets into a pre-existing invoice by clicking the Add Billable(s) button on the right of the invoice window. Only qualifying Tickets can be added to an existing invoice (e.g. ‘Closed’ Tickets that are associated with the same Job) .
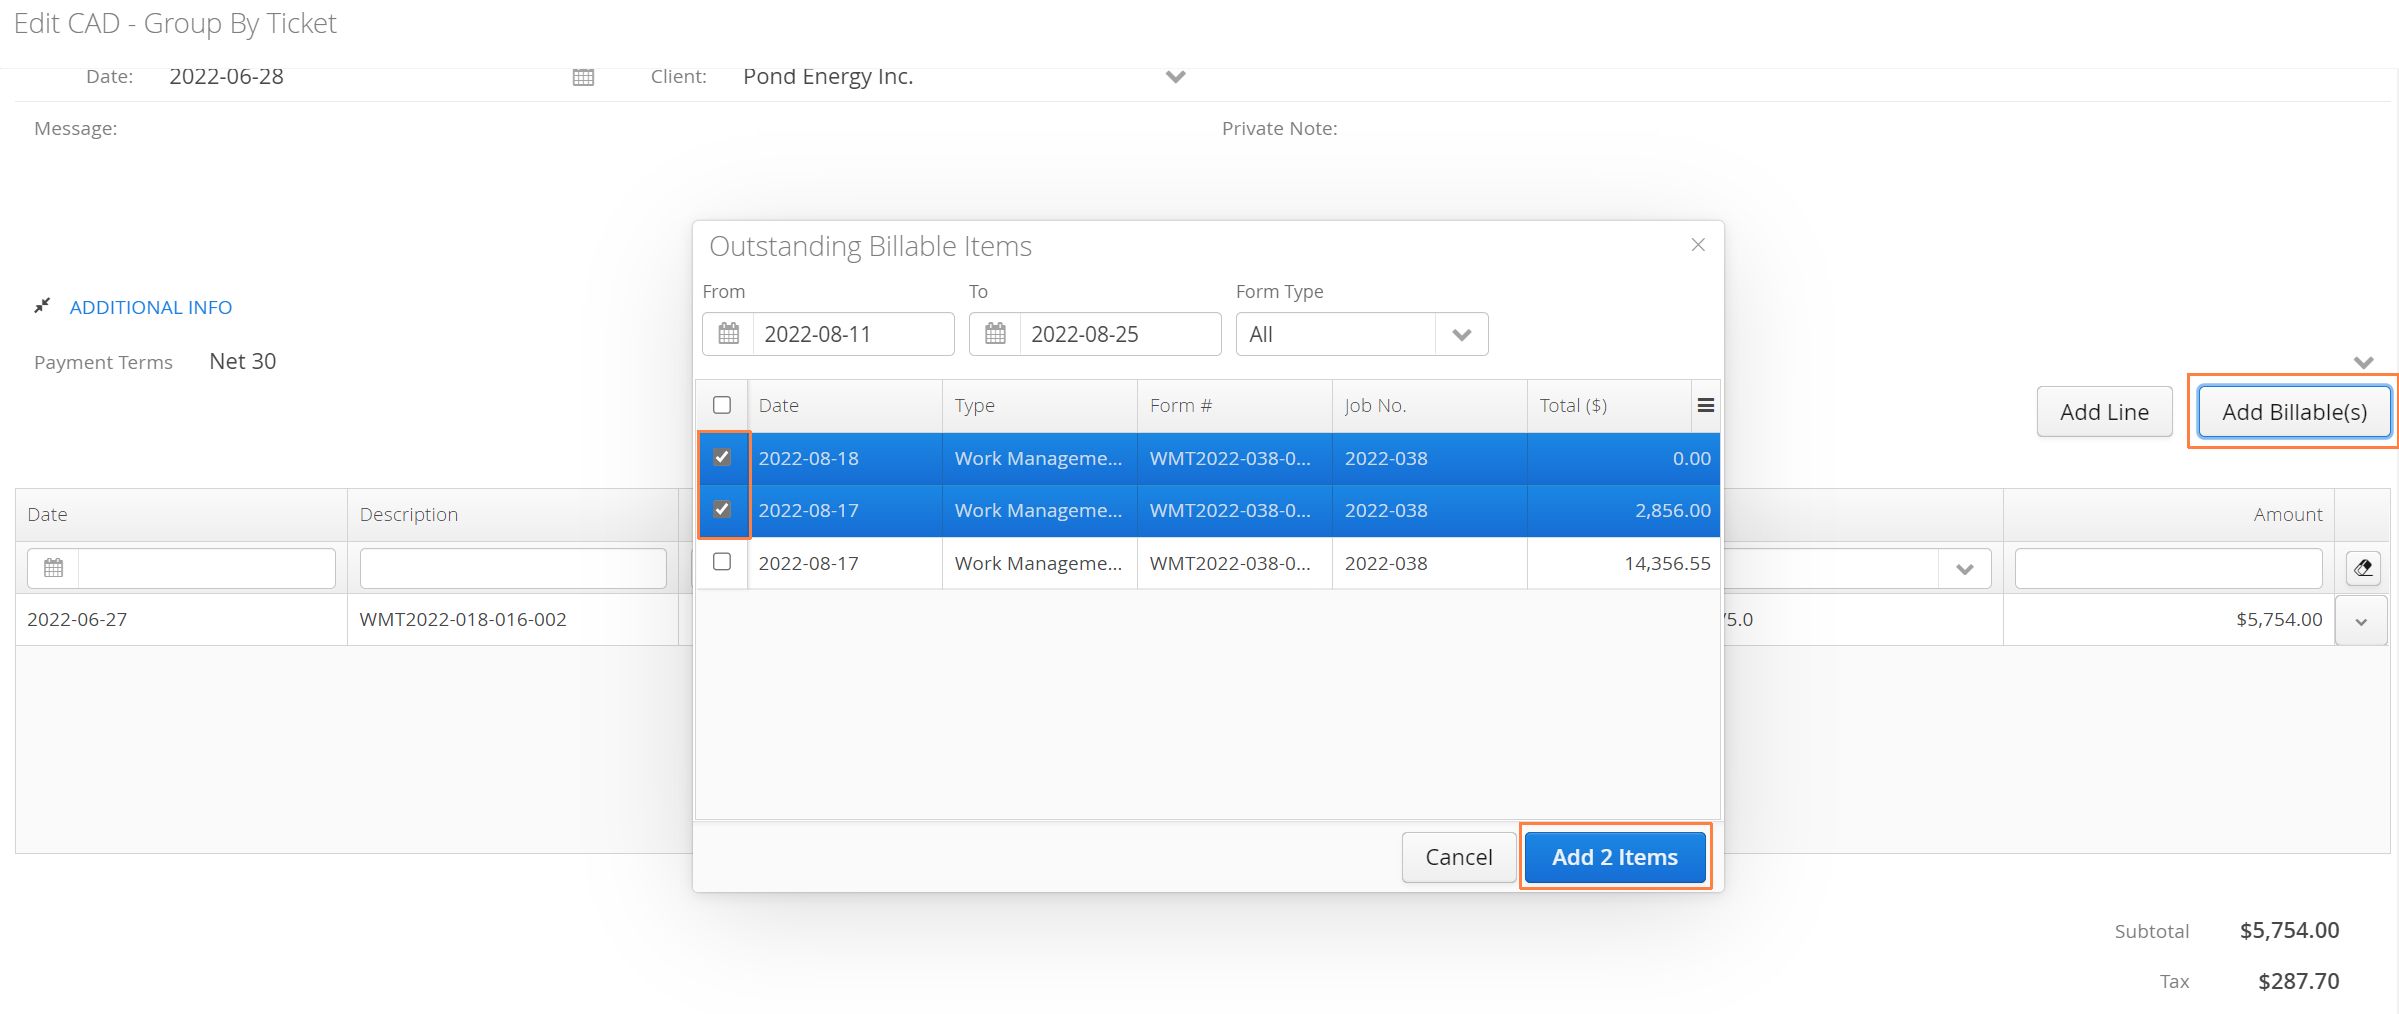
Once a Ticket has been added to an invoice, every line item from that Ticket is added to the invoice. To remove a Ticket from an invoice, every line item on the invoice that is associated with the Ticket number.
After all line items are deleted, the Ticket will be available for inclusion on a separate invoice. If the Ticket belongs to a Master Ticket, the entire Master Ticket must be removed from the invoice.
How to Edit an Invoice
First, locate the invoice that requires editing from the Invoice page. Use the action button to the left of the invoice and select Edit.

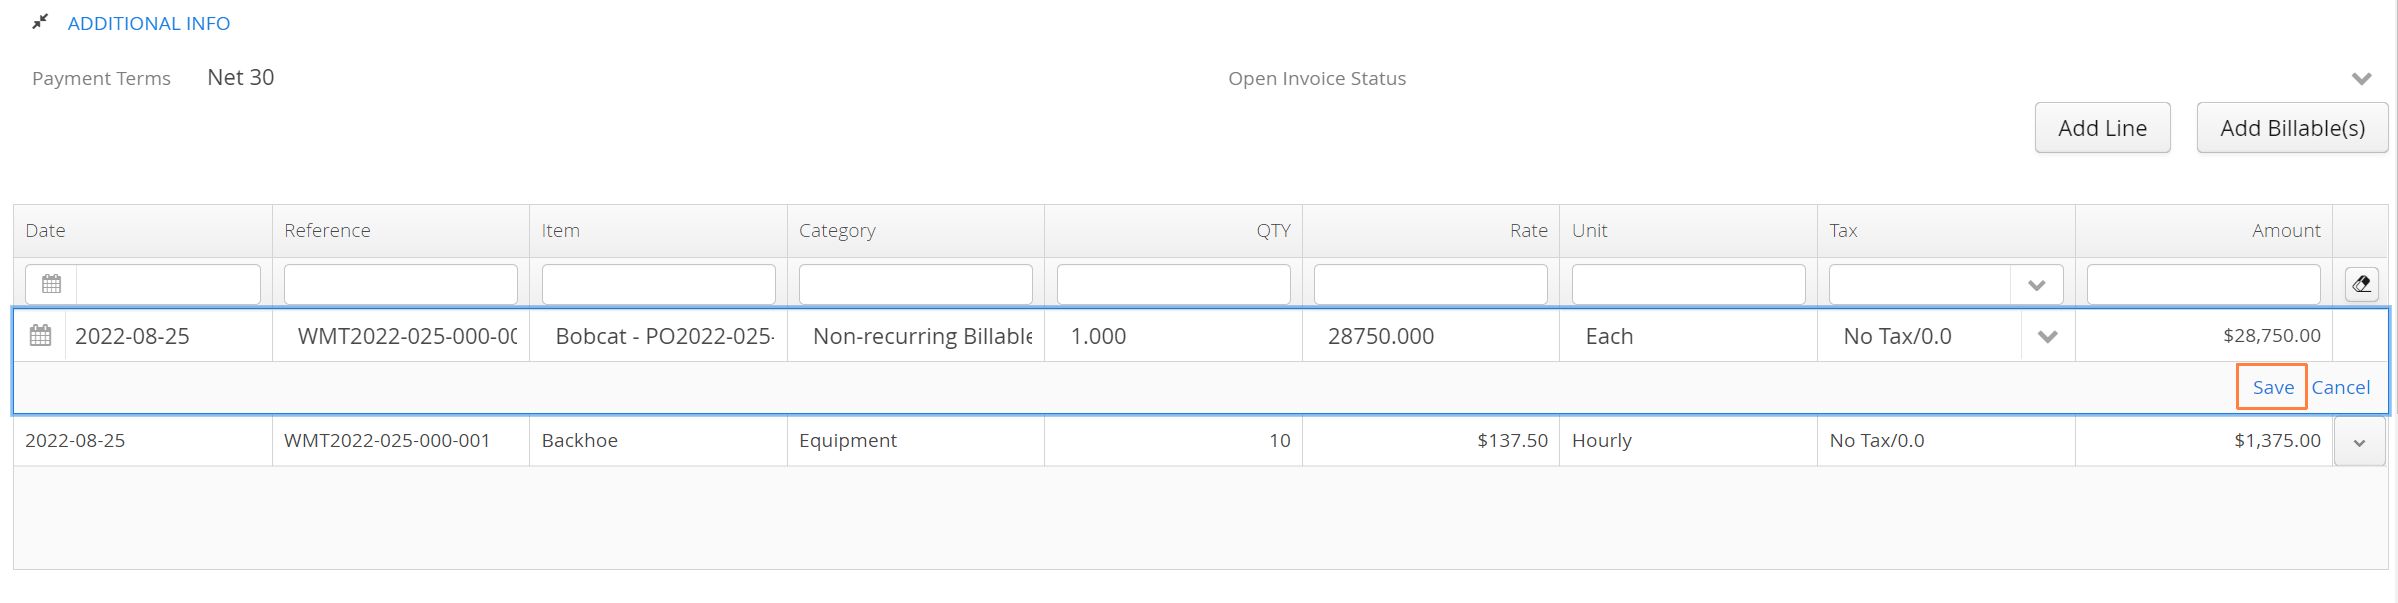
- To edit the invoice, double-click on any line item to bring up the editor. After the changes are made, click Save on the bottom right corner of the line item.
How to Edit Invoiced Tickets
Once an invoice is created, Tickets associated with that invoice are locked. This is to prevent discrepancies in reporting and to ensure field teams are not accidentally making changes that affect AR teams.
If an invoiced ticket needs to be edited, delete the invoice first. This will unlock the Ticket and allow editing to take place. After the ticket has been updated, create a new invoice.
How to Add Attachments to Invoices
Users can attach PDF files to an invoice by clicking on the “Attachments” button located at the bottom left when viewing or editing an invoice. Aimsio will display how many attachments are currently uploaded (when applicable).
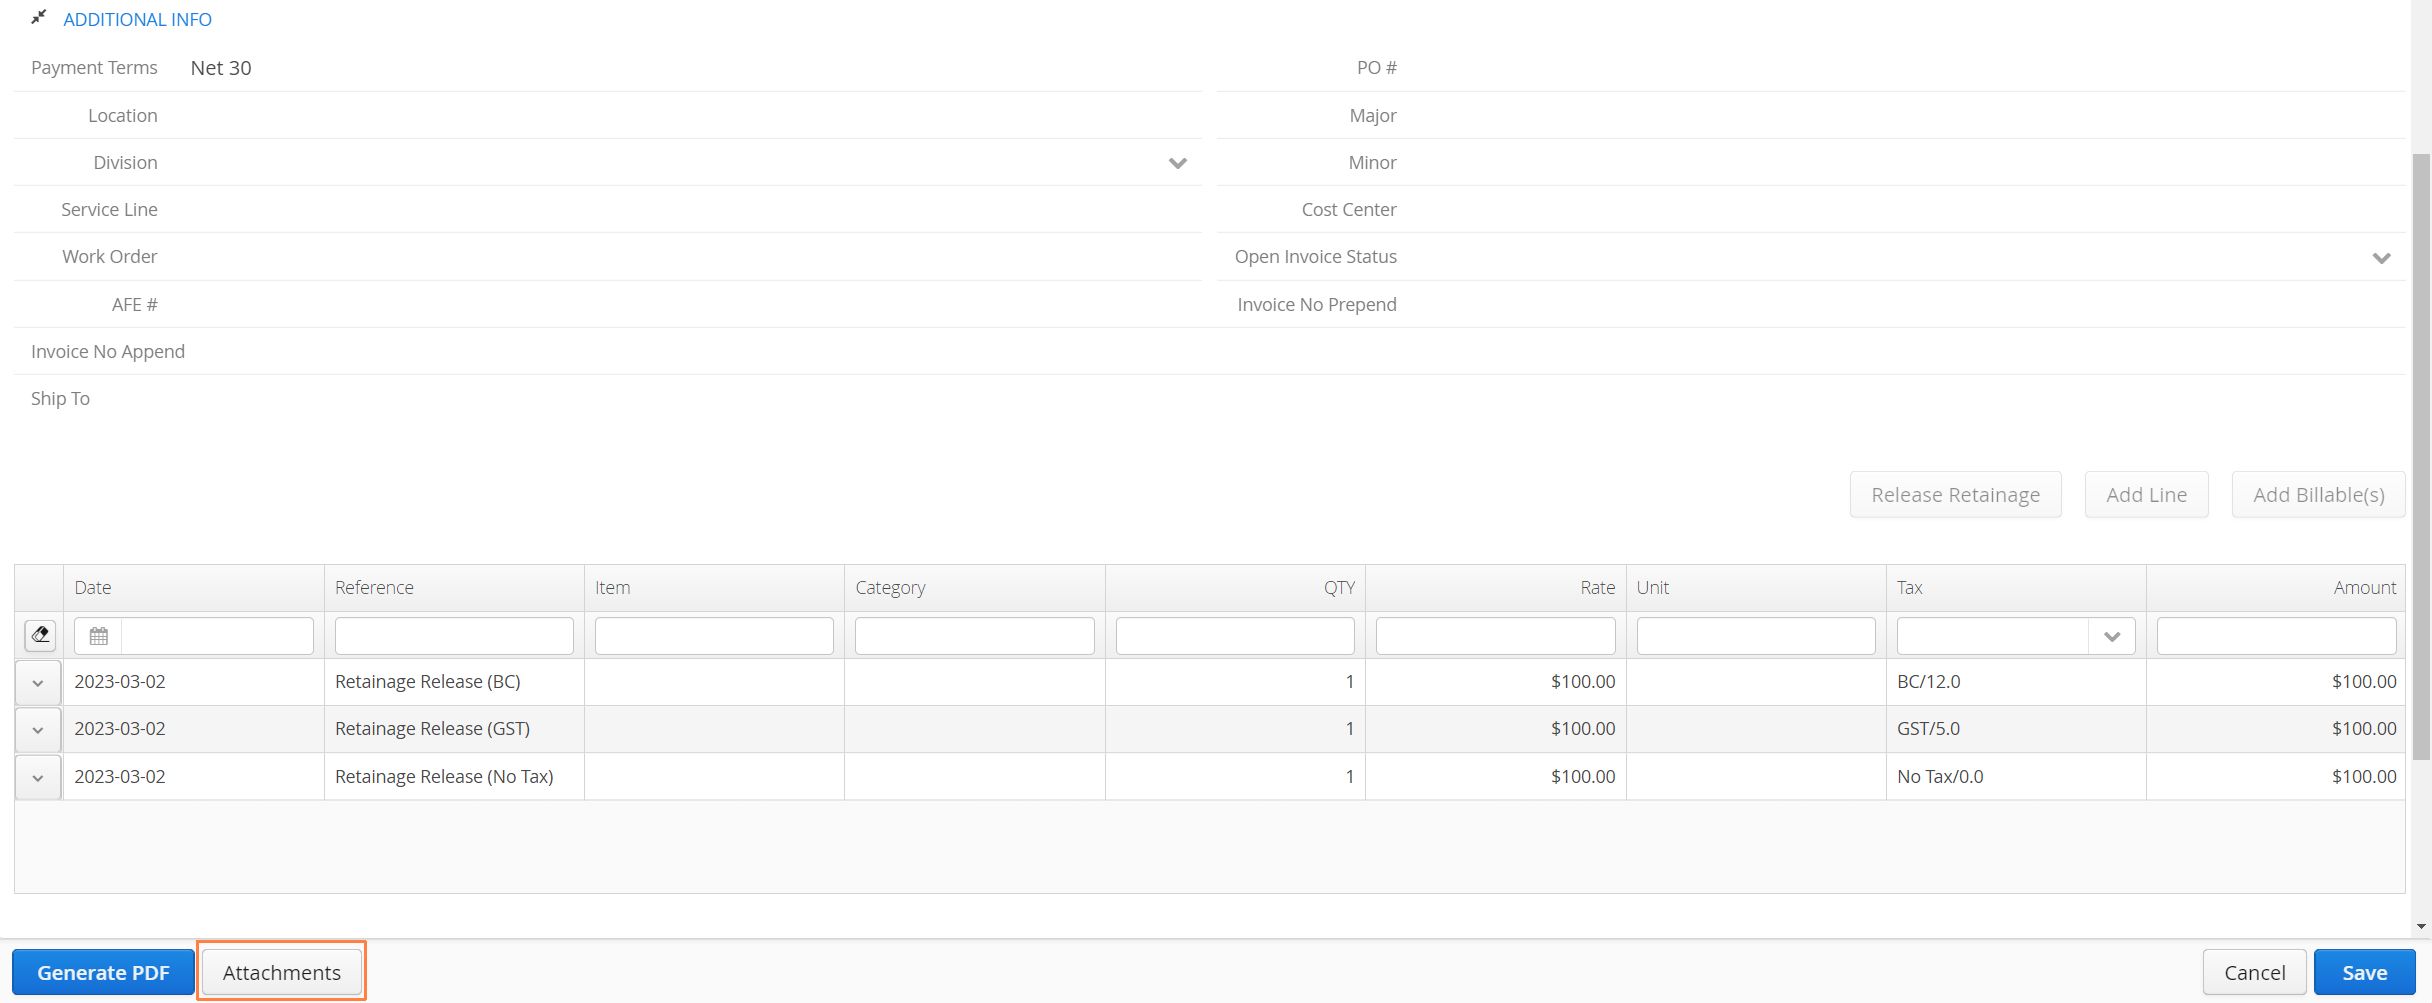
The attachments table will let users upload multiple PDF attachments. Click on the New Attachment button on the left. Note that there is a file size limit of 20MB per attachment, but no limit on the number of attachments.
- Click on the Upload button to select a PDF from your device. Users can reorder attachments by click, holding and dragging the line item up or down. The order of your attachments will dictate the order they appear on subsequent pages on the invoice.
How to Create a Standalone Invoice
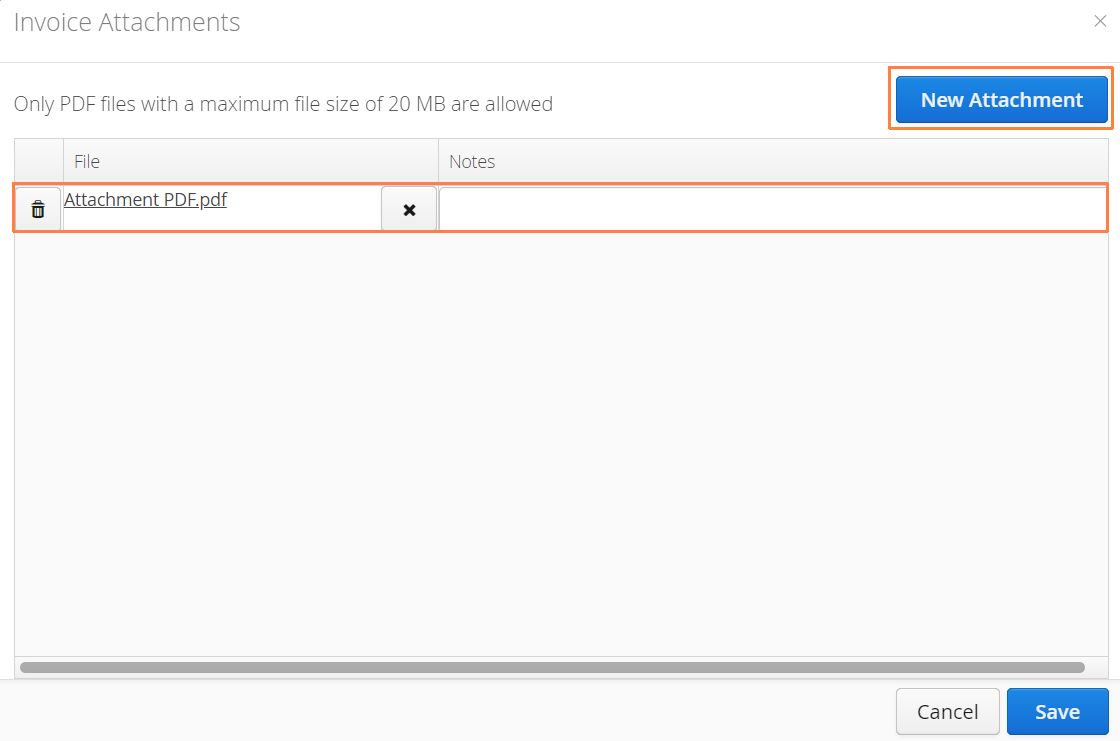
While invoices are typically created from Tickets / LEMs, it’s possible to create a standalone invoice by navigating to the Invoice page and selecting Create Invoice.
- It will be a requirement to associate a Client to the invoice before saving.
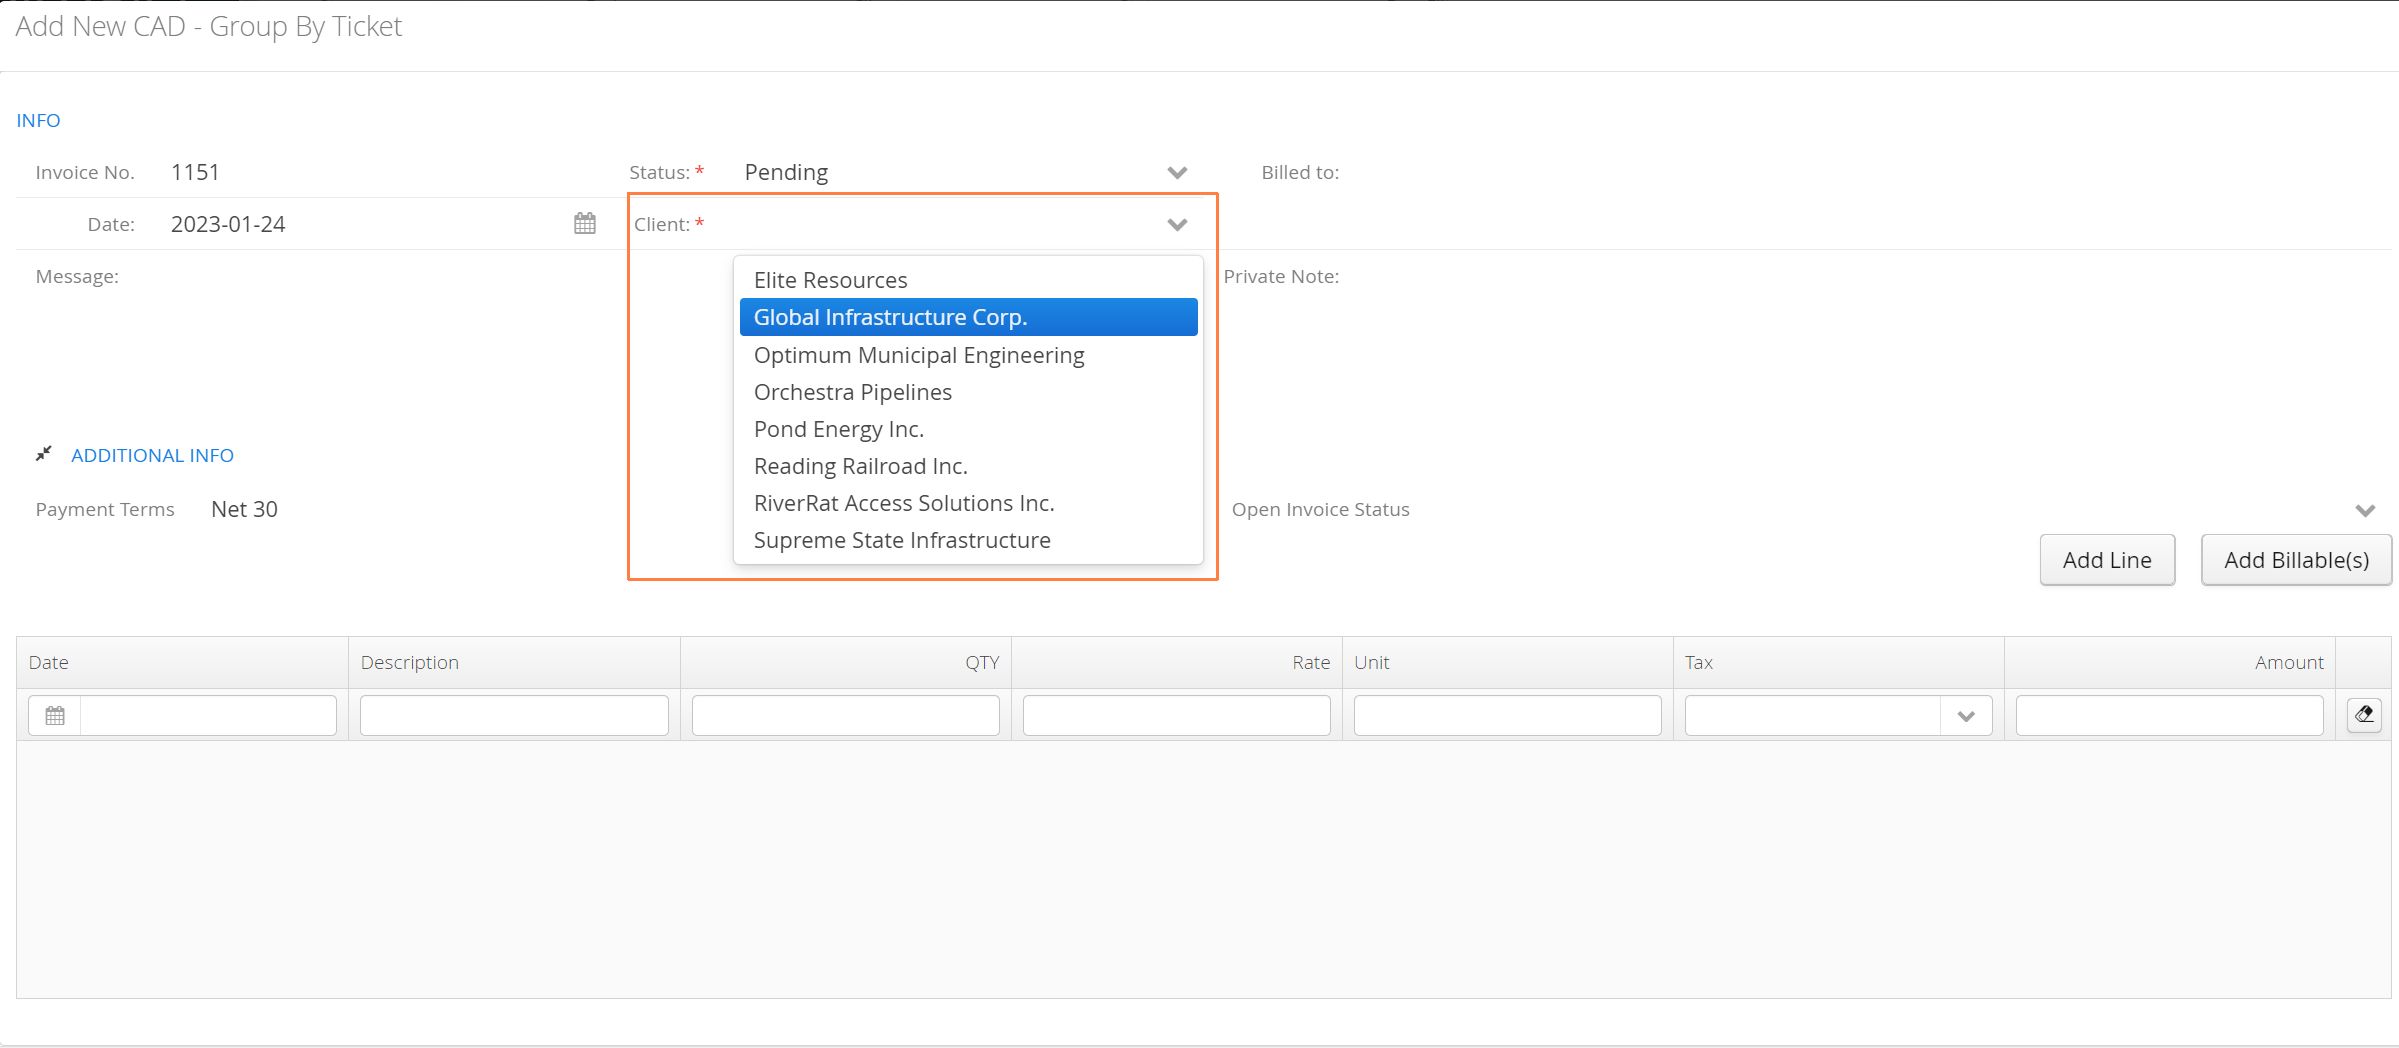
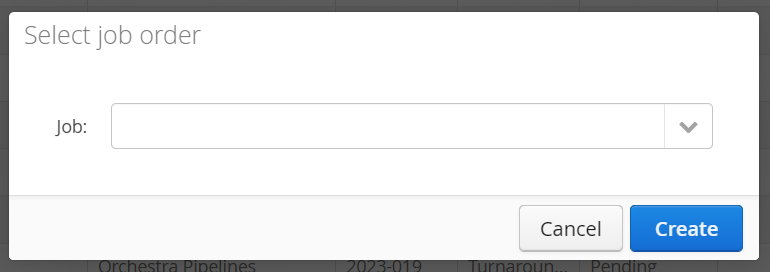
- If your account is only using one invoice type, users will be required to select which Job the invoice is for.
-
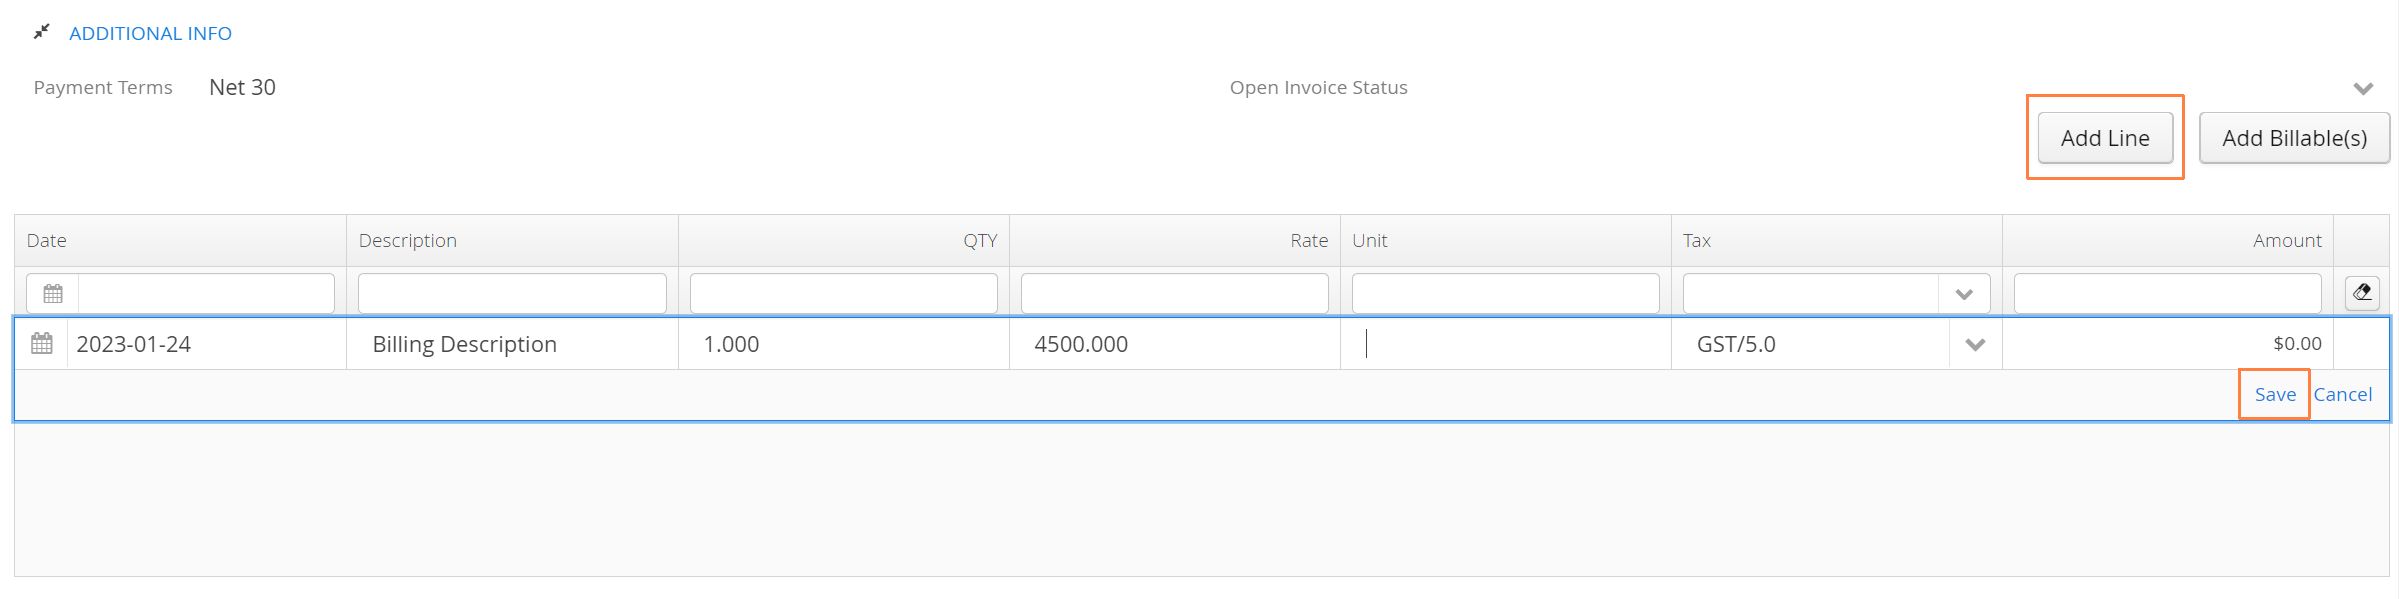
To add a line-item to the invoice select Add Line. Fill out the appropriate details (description, quantity, rate) and click Save on the right-hand side of the line-item.
-
There are no limitations on the number of line-items that can be manually added to an invoice.
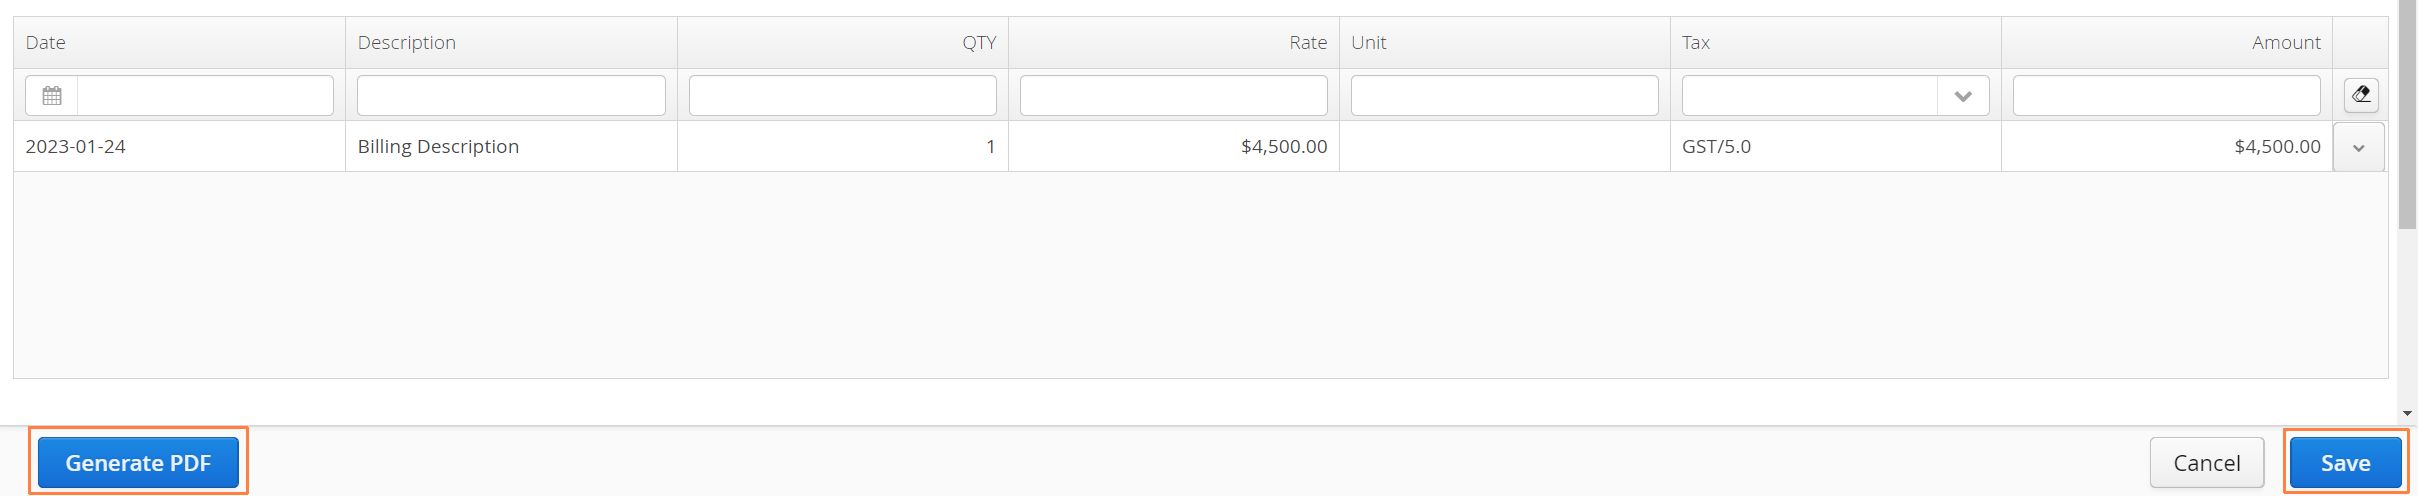
- Generate PDF and Save like you would with any other invoice.
How to Download Multiple Invoice PDFs
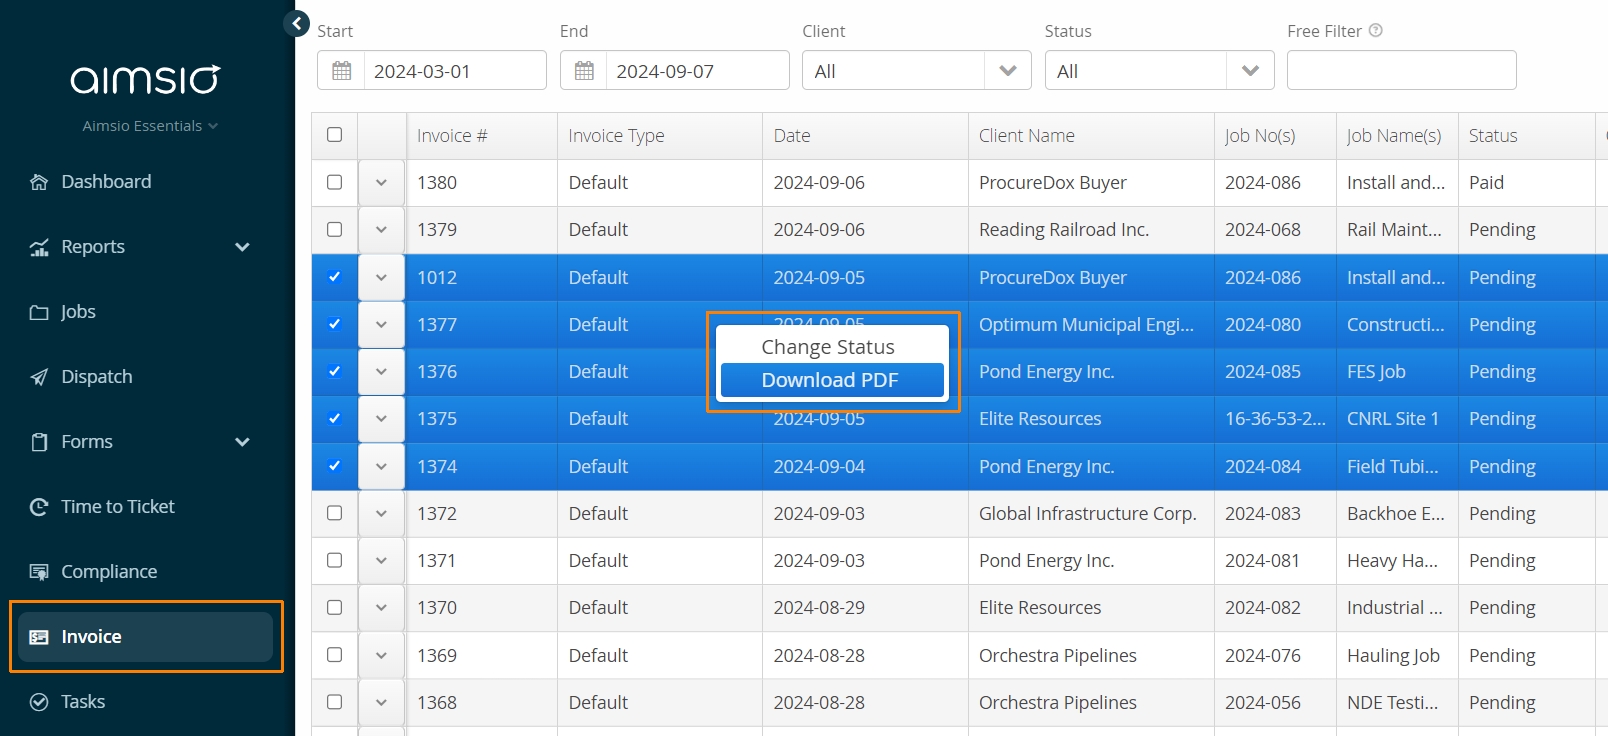
From the Invoices page, users can select multiple invoices at once, right-click and select Download PDF.
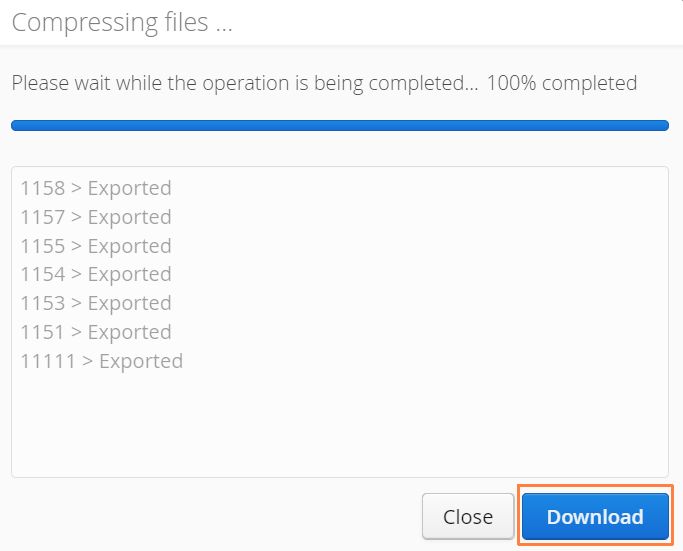
- Aimsio will prepare as .zip file and provide the option to download once complete.
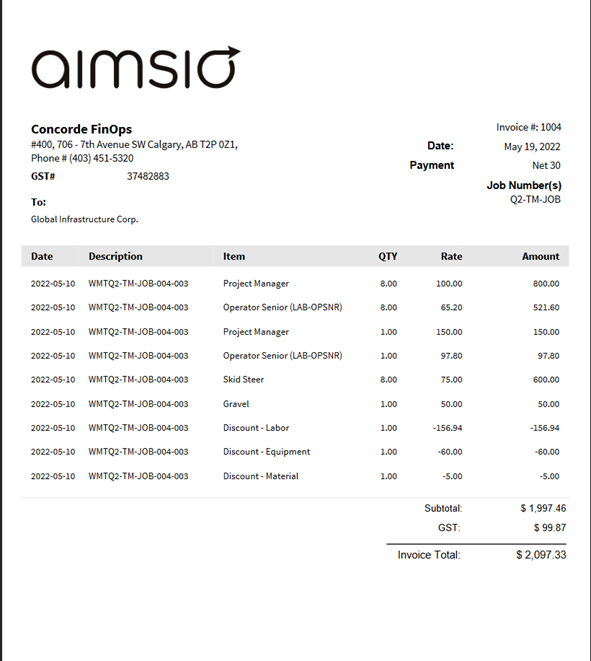
See an example of a PDF invoice below. Aimsio will customize the invoice PDF to match your company logo, as well as any additional information you need to display in the header or footer.
How to View a Deleted Invoice
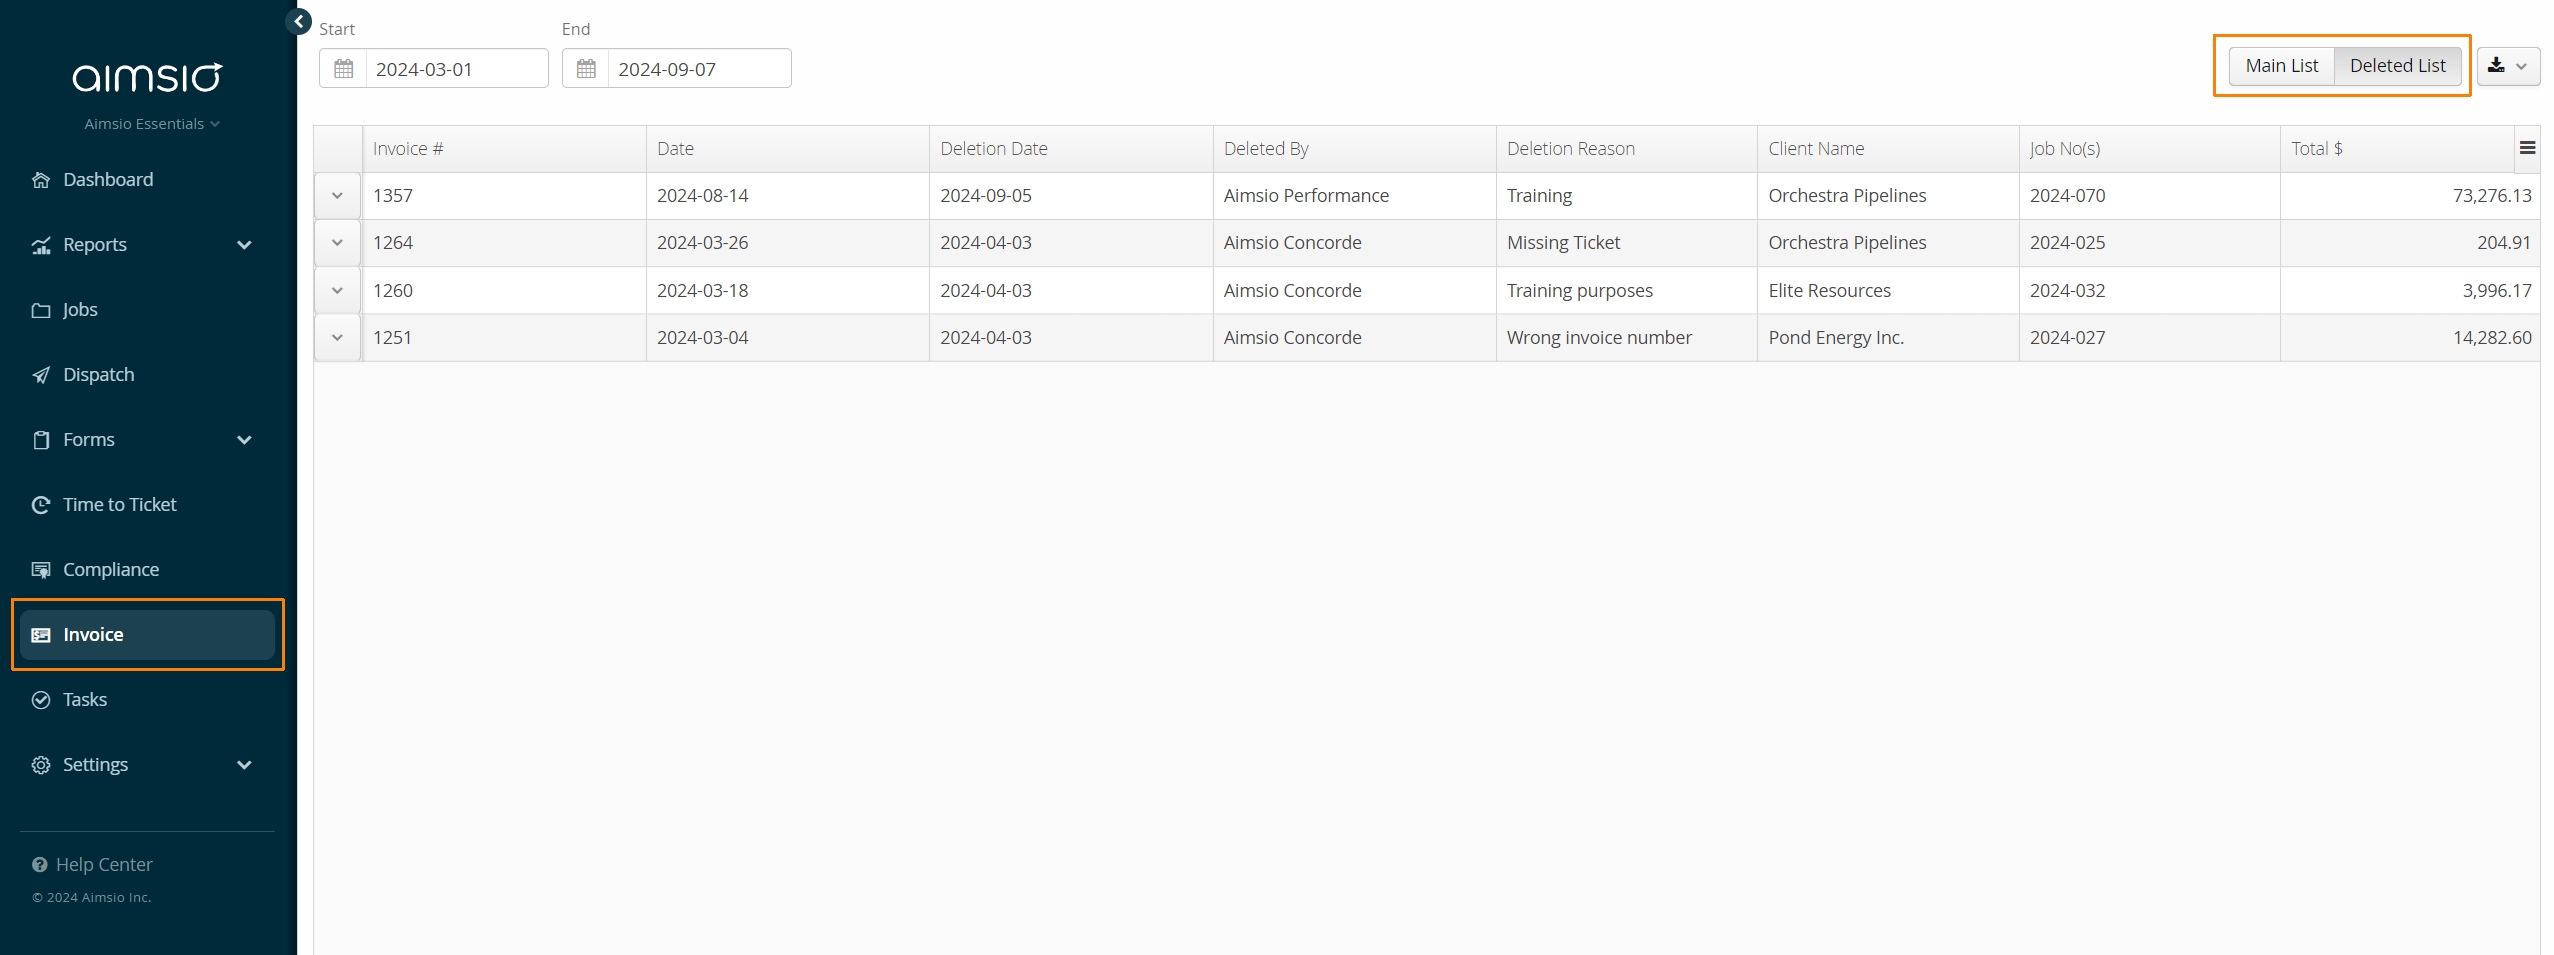
To view a list of deleted invoices, navigate to the Invoice page and locate the Deleted List on the far right.
This feature is only available for invoices that have been deleted after 24.07 (April 2024). Deleted invoices cannot be restored. If an invoice is deleted, the invoice number becomes available for a future invoice.
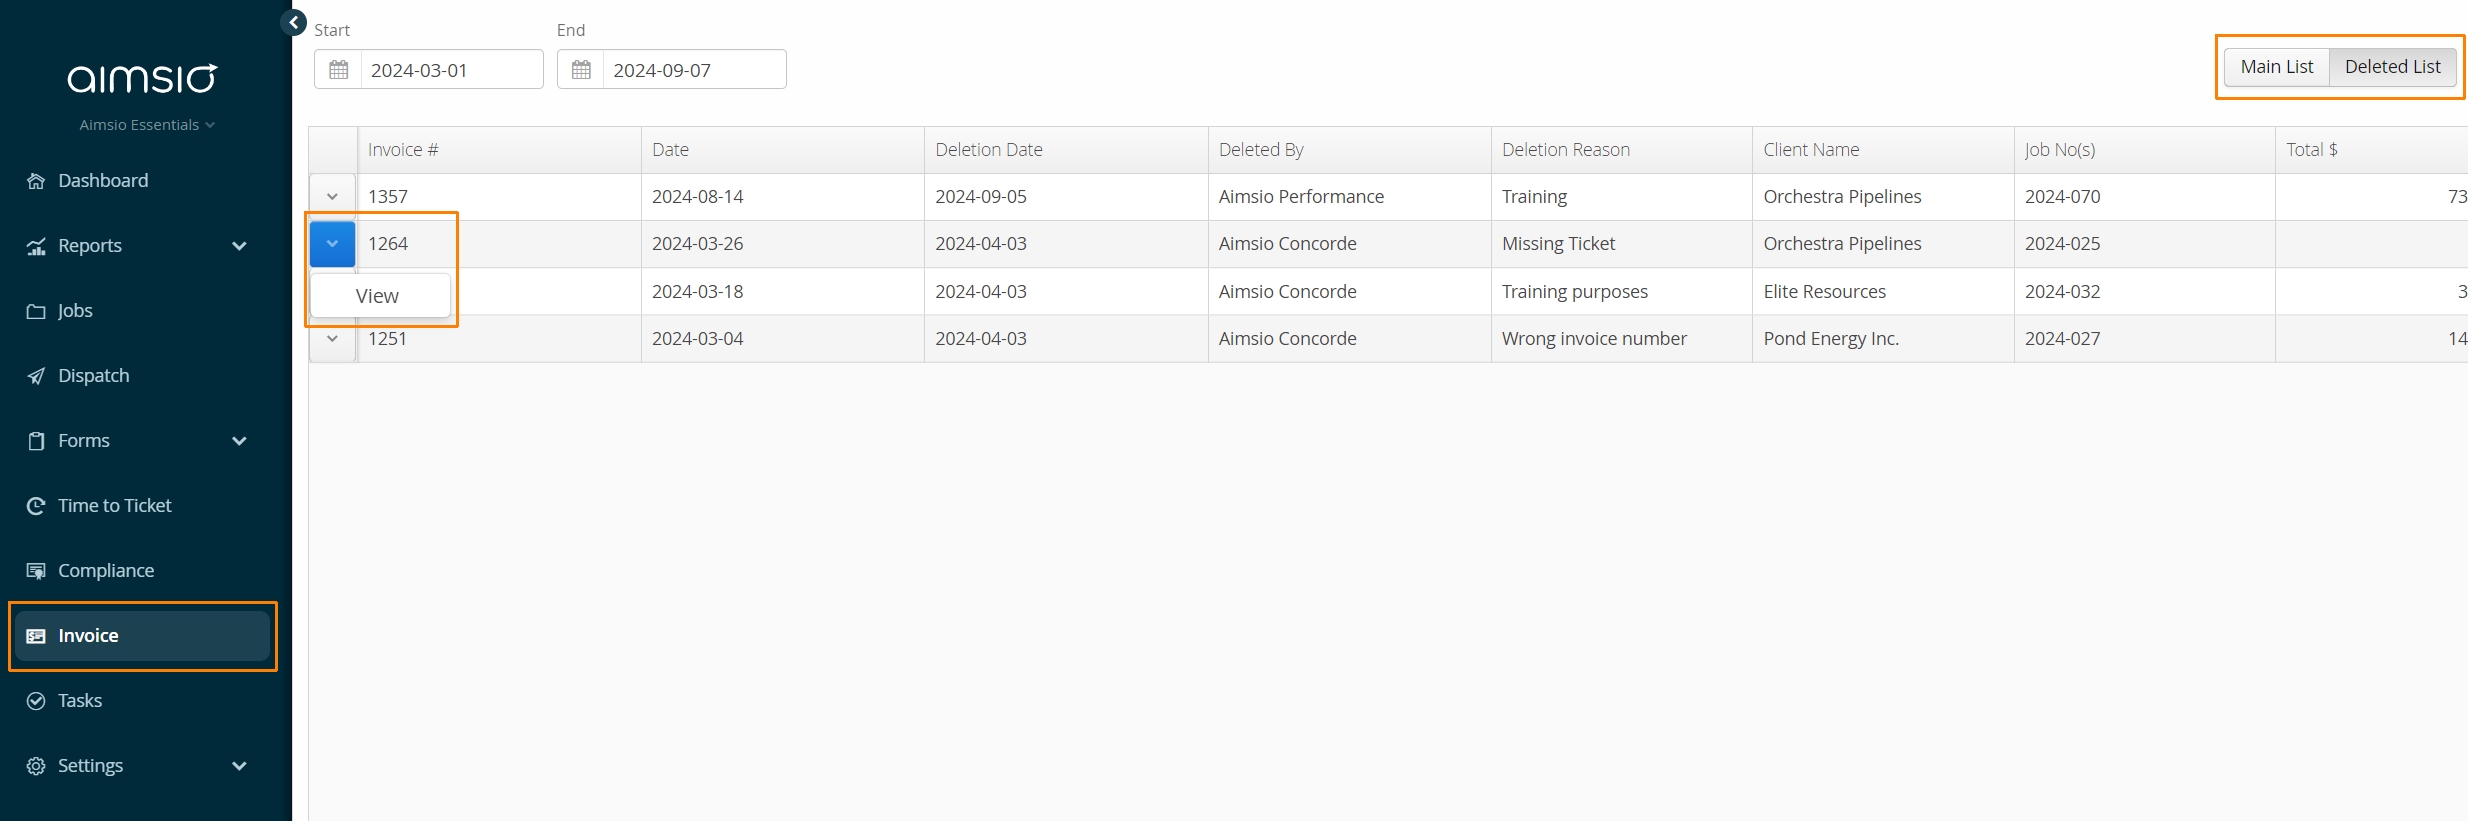
- View the contents of a deleted invoice by using the action button to the left of the invoice and selecting View.
- A report of deleted invoices can also be exported to csv using the export icon on the right.

How to Export Invoices
Aimsio supports exporting a CSV/Excel report of your invoices. It’s also possible to export/download invoices in JSON format. In most cases, invoices would typically be exported from Aimsio and imported into an AP software like Sage or QuickBooks.
Accounts exporting invoices to an external software will most likely be using Aimsio’s Invoice Export located in the Report Center.
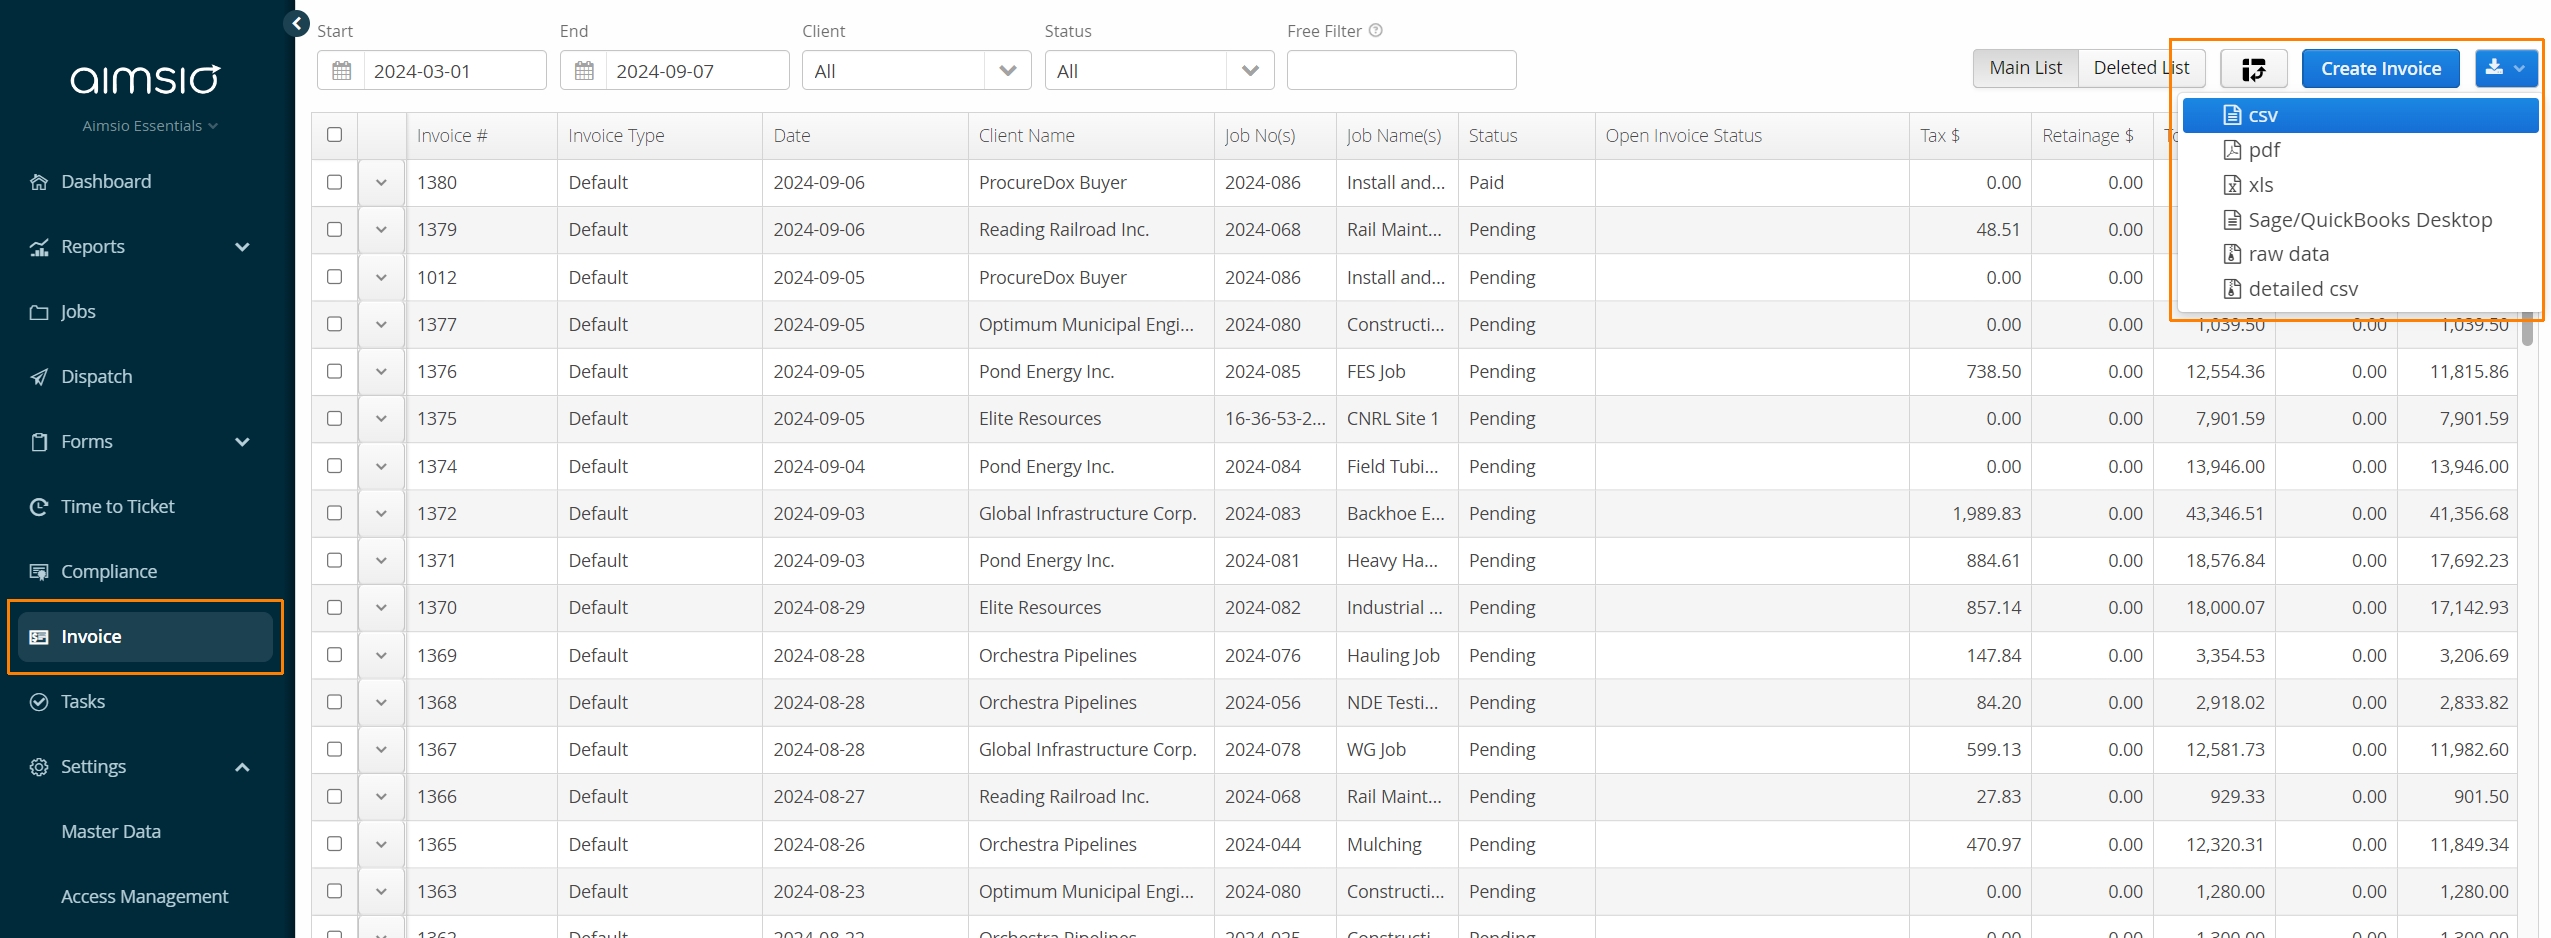
The export button is located at the far right of the Invoice page where you’ll be provided a number of format options, depending on your requirements. For JSON, choose the Raw Data option.
Invoice Statuses
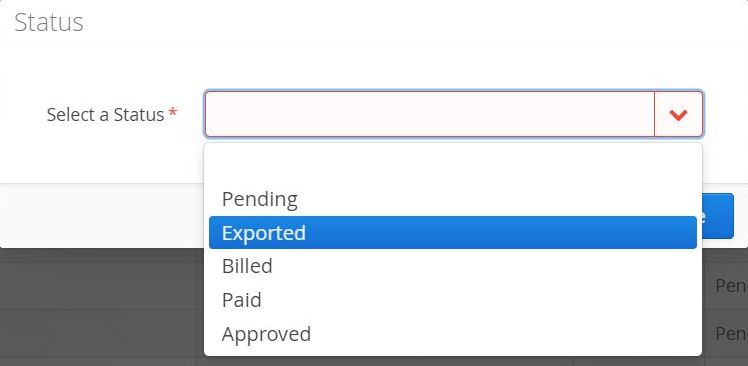
When an invoice is first created, it is given a Status of Pending. To change an invoice status, select all that apply from the Invoices page, right-click and choose Change Status.

- An invoice status of Exported, Billed, Paid and Approved are available.
If your account is using one of our API Integrations, an invoice status of ‘Exported’ is automatically assigned when the invoice has been successfully pushed.
How to Manage Sales Tax Rates on Invoices
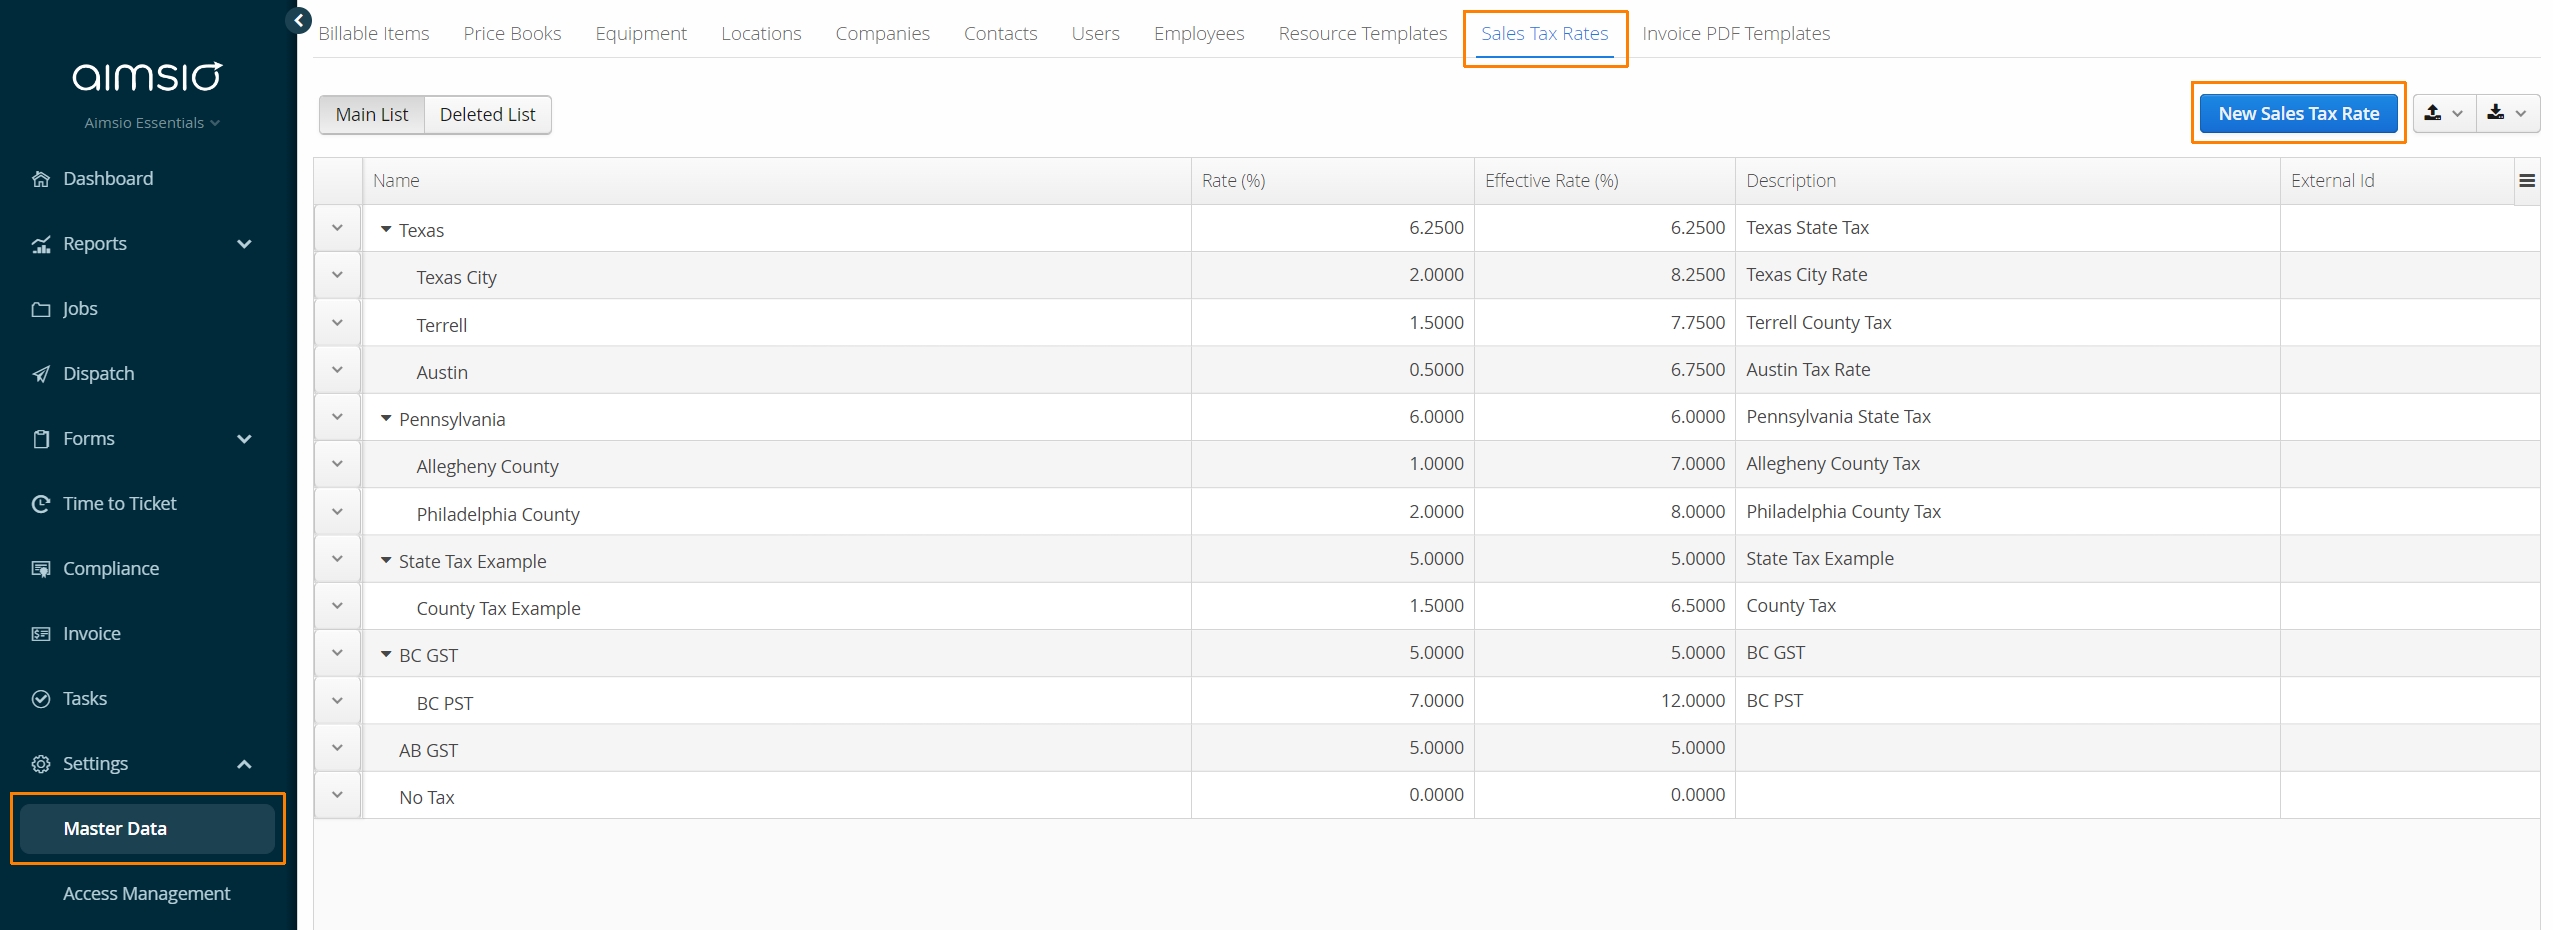
Aimsio supports single or hierarchical Sales Tax Rates for US (State / County) and Canadian (GST, PST, HST) customers.
For more information on managing Sales Tax see our Sales Tax Rates guide.
- Sales tax rates can be set up via the Master Data → Sales Tax Rates tab.
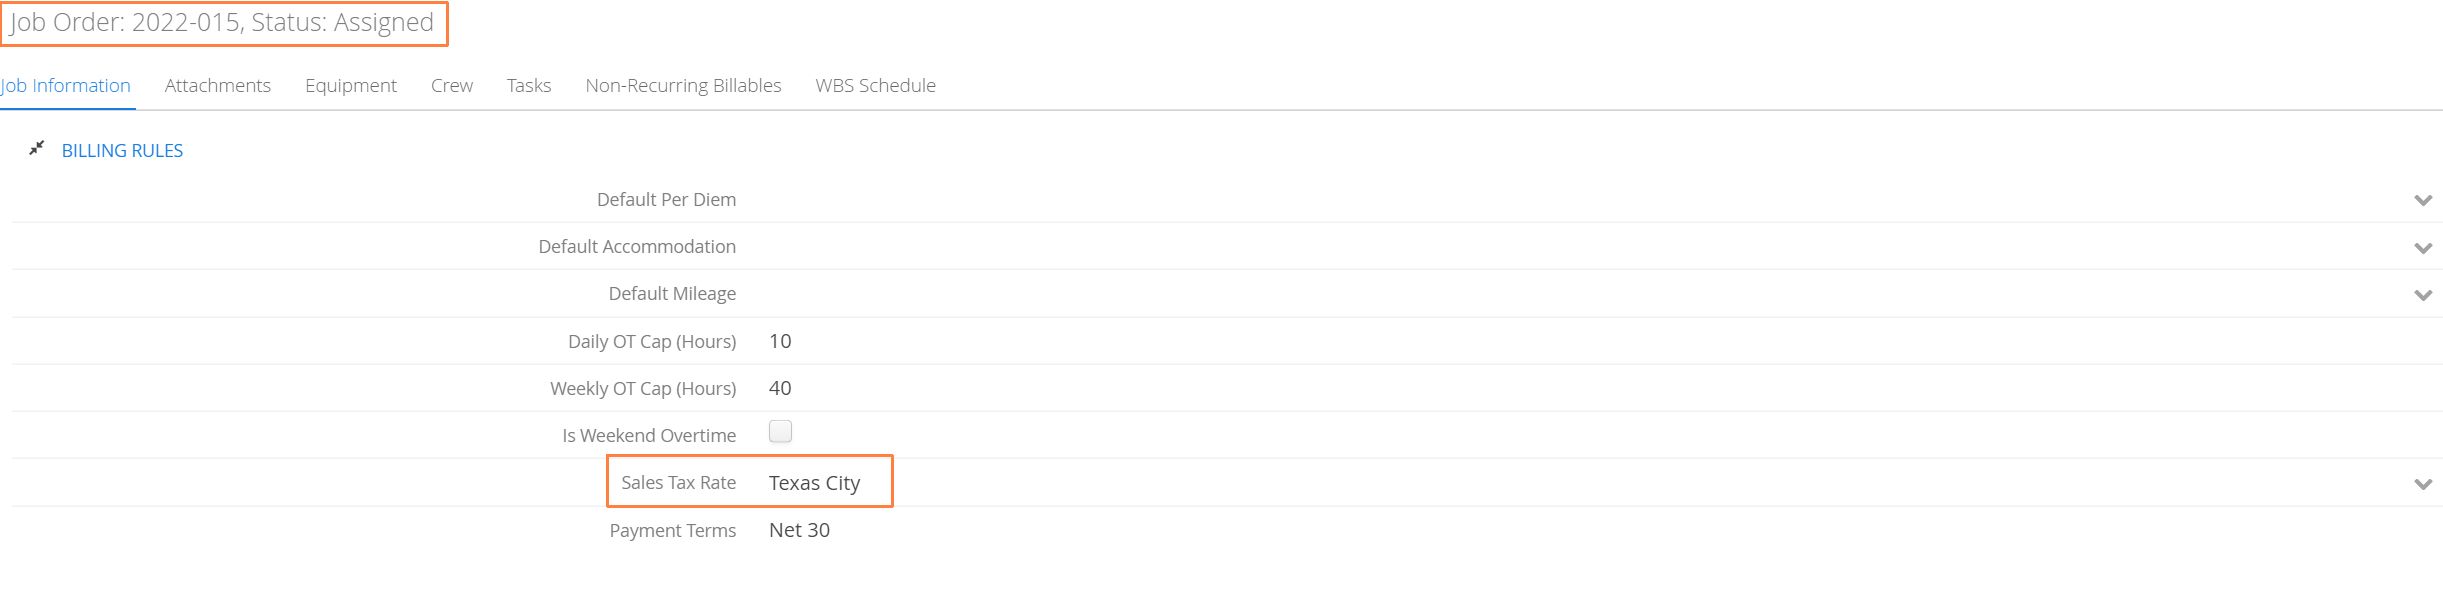
- After setting up sales tax, users can select the tax rate in the Sales Tax Rate field on the Job form.
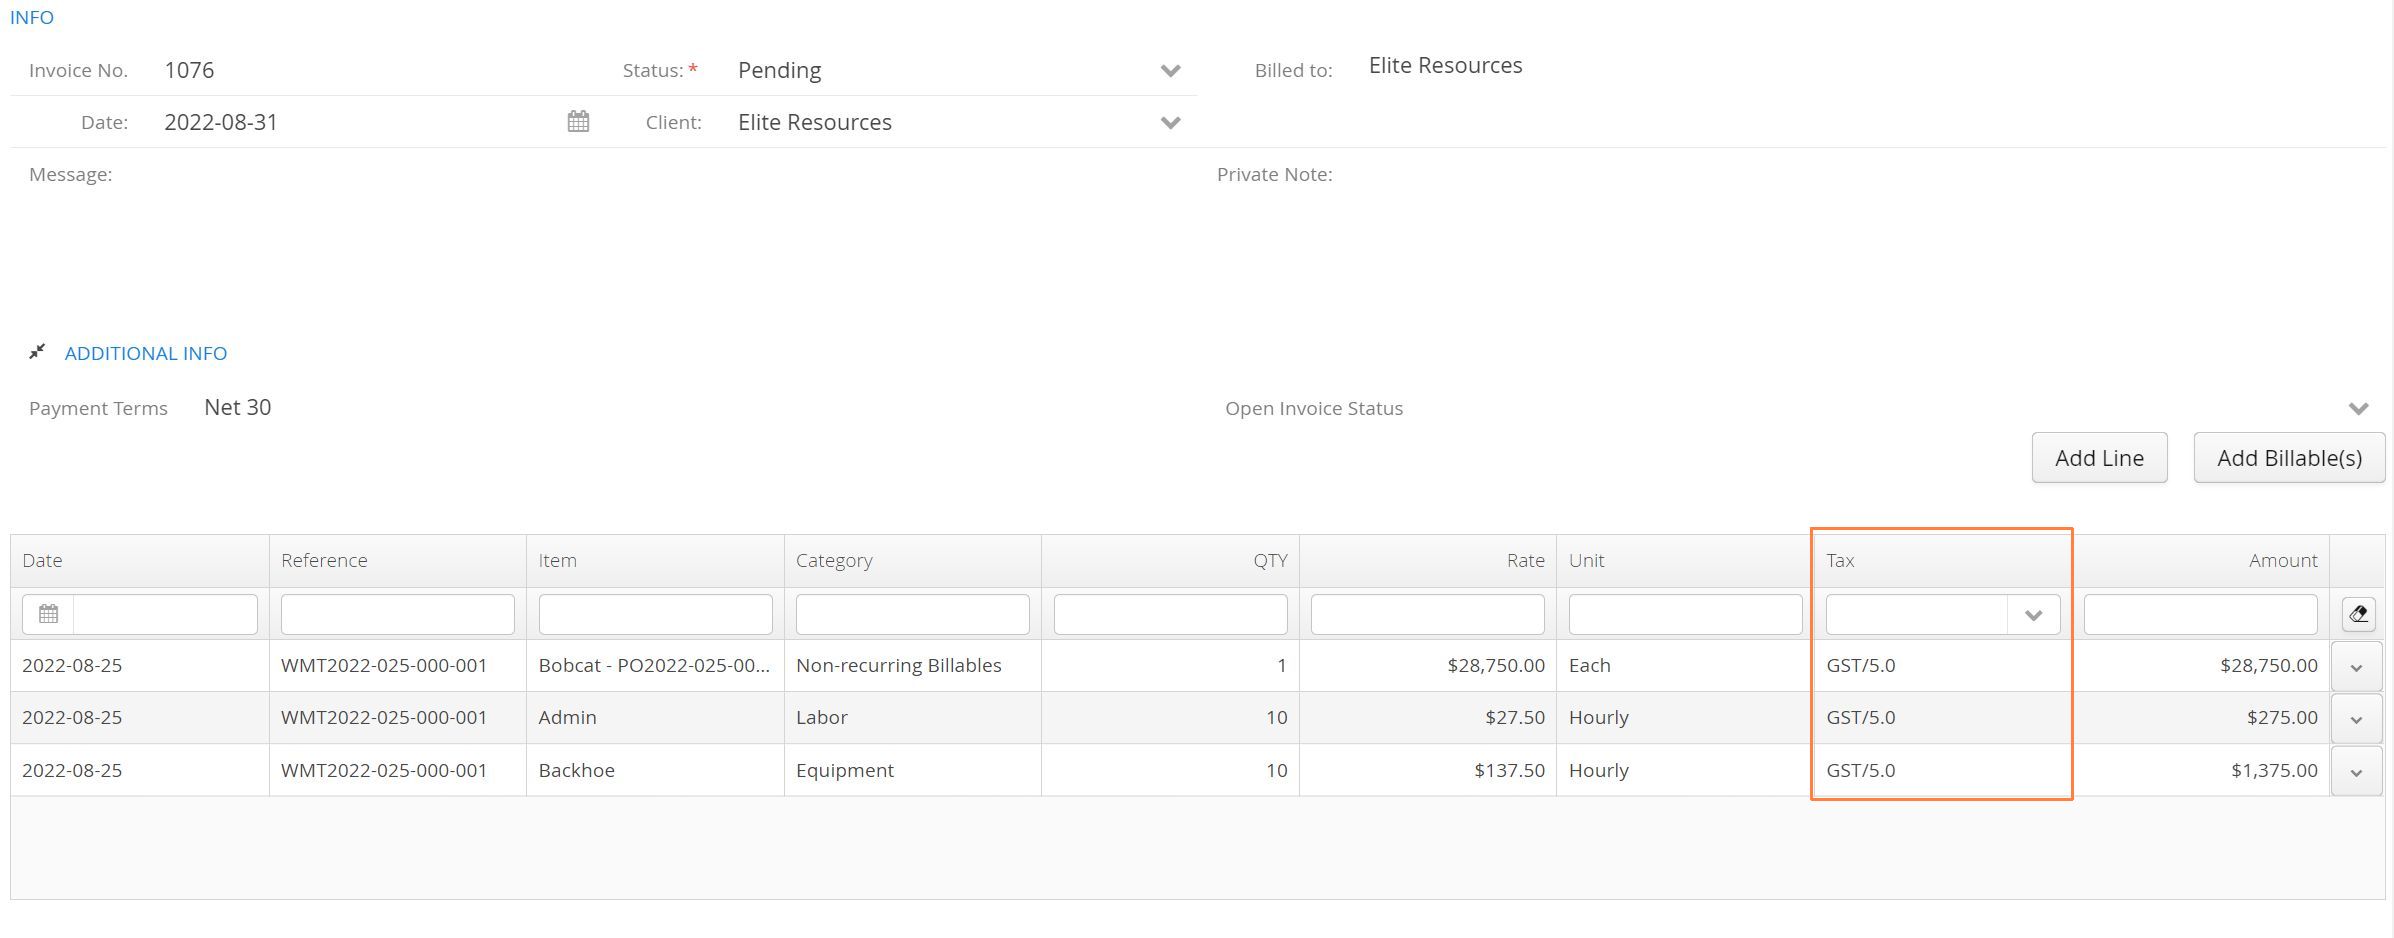
- When creating an invoice, the tax amount will be automatically calculated based on the tax rates selected for the job. Tax rates can be edited or removed per line item by double-clicking the line item on the invoice and adjusting the Tax column.
Can we add Sales Tax to Tickets?
Currently, Aimsio does not support adding sales tax to Tickets.